Finally - everything I know about painting cabinets, condensed into one place. And it all applies to painting furniture too!
Painting your cabinets, especially a whole kitchen full of cabinets, can be a daunting DIY project. As with most things in life, there's no one "right" way to do it, but there sure are lots of wrong ways!
If this is your first time painting cabinets or furniture, and aren't quite sure how to do it well (so you only have to do it once!) then you've come to the right place.
I'll show you what supplies you need based on the type of material you're painting, which method works best for busy families, and answer all the most frequently asked questions I hear from readers.
Here's the outline, if you want to skip to any particular section:
Everything I Know About Painting Cabinets
I'm not sure exactly how it happened, but over the last few years, I've become reluctantly experienced at painting cabinets. (Perhaps because I keep buying ugly houses.) I never set out to become a professional painter, but I've saved so much money over the years that it feels like my second job.
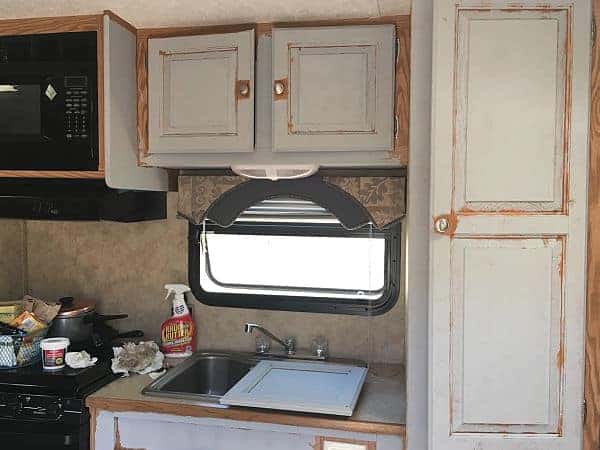
I've painted kitchen cabinets, bathroom cabinets, RV cabinets, file cabinets, not to mention dressers, chairs and tables. They've been wood, laminate, stained, and unfinished, Oak, Maple, brand new, 40 years old, and everything in between.
With each project I've learned a few things, which I've shared in blog posts along the way. I'll be linking to those projects in a minute, so you can see all the details.

This post contains affiliate links. If you make a purchase, I may receive a small commission at no additional cost to you.
But first, why write yet another cabinet painting post?
I decided to write this post, mostly to bring all my experience into one place for easy access, but also because I've noticed something troubling over the years...
The painting products keep changing!
My most popular cabinet painting post uses products that, as of this writing, are becoming very difficult to source and buy.
I can't stand the thought of someone reading my post, getting excited about the product, and then going off to buy it and not finding it so they end up back at square one, unable to start their project.
Or worse, getting halfway through the project and not being able to finish!
So here I'll explain how to find the correct products to paint your cabinets, what methods work best, and answer your most frequently asked questions about the whole project.
Selecting the Right Cabinet Painting Products
This is it, y'all. This is why you're here, right? You want to paint your cabinets, but you don't know what kind of paint, primer, and tools to use.
Maybe you're standing in the paint store this very moment, examining your options. The possibilities seem endless, and if you pick the wrong one, you could end up with a mess on your hands and so many hours wasted on an unsuccessful project.
Don't worry, you've come to the right place, and I'm not going to let that happen.
I am going to give you three best-practice options for cabinet painting products, ranked in order of my favorite to least favorite (but still useful) options, along with why I recommend each one.
Plus I'll share more options for painting laminate cabinets, in case you're dealing with cabinets or furniture that aren't real wood.
Let's dive into the options...
Option 1: DecoArt Satin Enamels
Oh Satin Enamels, how do I love thee? Let me count the ways.
You don't drip or smudge. You don't need sanding or priming. You don't need a top coat. I can basically just slap you on and stand back and admire my handiwork. And nothing seems to stick to or stain your slick surface.
Why, oh why, have you gone away from me? (Update: They're back in stock! But a little pricier than they used to be. Still a great bang for your buck when you factor in time saved.)

Lamentations aside, let's chat about DecoArt Satin Enamels. This is the product I used on my Best Way to Paint Kitchen Cabinets (No Sanding!) project. I loved the easy process and the durable finished product, and I still do.
If you can get your hands on DecoArt products, this is absolutely the best paint for cabinet painting projects.
I used to buy them at craft stores like Hobby Lobby or Michaels. And they were always available on Amazon. But lately, they've been hard to find. DecoArt assures me that their paint is still available directly through their website, but I've heard that some colors are not listed anymore.
That's why I've come up with the next option, a very close second choice.
Pros & Cons of Option 1 (Satin Enamels)
Pros: very easy to use and apply. Strong durable finish. No sanding, very little prep work, no primer and no top coat needed.
Cons: Can be hard to get the products. Limited color selection.
Option 2: Valspar or Behr Cabinet and Furniture Enamel
Valspar (at Lowe's) and Behr (at Home Depot) both make a good cabinet and furniture enamel, similar to the concept of the Satin Enamels in option 1.
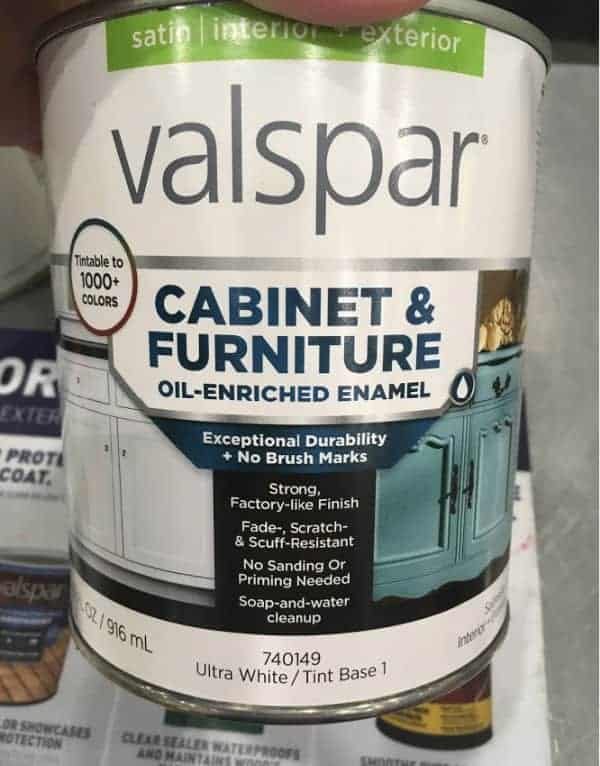
These enamels tend to be a little thinner consistency, which can result in paint drips if you're not careful as you apply the paint. This the only reason they're not yet my #1 choice.
But as long as you apply the paint somewhat lightly, your finish will turn out great. You may need two or three coats of paint, which is true of all the paint options.
The great thing about these cabinet enamels is you can have them mixed in any color you choose. The Valspar paint is also available in both Satin and Semi-gloss finish, which is nice.
To use the Valspar or Behr option, you would follow the same process as the Satin Enamels, which you can find in this cabinet painting post or outlined below. As with the Satin Enamels, these paints require no sanding and very little prep. It's basically the Satin Enamels process, just with a more accessible paint.
Pros & Cons of Option 2 (Cabinet Enamel)
Pros: You can find this paint at either Lowes or Home Depot and get in it in almost any color you want. Just as durable and easy to prep as option 1. No primer or top coat necessary.
Cons: The consistency is a little thinner, so you need to be a little more careful when applying to avoid drips.
Option 3: Alkyd Paint, Primer, and Sanding
"Alkyd" paint is basically an oil paint suspended in a water base. That makes application and clean up easier, but gives you the durability of oil paint. Benjamin Moore and Sherwin Williams both make a great Alkyd product.
This option is perfectly acceptable, and indeed for many years was the "correct" way to paint cabinets. It's the product I used on my first kitchen cabinet painting project, after much research. Years later, it has stood the test of time.
However, it's the most labor intensive method, and requires sanding, which really makes a mess in your kitchen. If you want to go old school and get the satisfaction of knowing you've given your project every possible chance of success, you can't go wrong with sanding, priming, and finishing with Alkyd paint.
I personally believe that, while absolutely correct, this way of painting cabinets causes the most upheaval on your household and family, so it's not the way I'd do it again.
Before you make your choice, read more about the whole process in my original kitchen cabinet painting post here.

Pros & Cons of Option 3 (Alkyd Paint)
Pros: Can be mixed in any color. Easily available at Benjamin Moore and Sherwin Williams. Beautiful and durable finish.
Cons: Takes a long time to dry between coats. Requires sanding and primer.
Products for Laminate Cabinet Painting
This post would not be complete without touching on the subject of laminate cabinets. These are my two recommended options for painting any sort of non-wood cabinet or furniture:
DecoArt Chalk Paint and Satin Enamels
As in Option 1 above, this is my favorite method for painting laminate, and the method I used on my camper's laminate cabinets. But alas, the products can be hard to find. So the next option is my new favorite for laminate.
Zinsser BIN primer and Valspar Cabinet/Furniture Enamel
If you've never used Zinsser BIN primer before, let me introduce you to a game changer. This stuff is THE BEST for covering stains or knot holes and adhering paint to slippery surfaces.
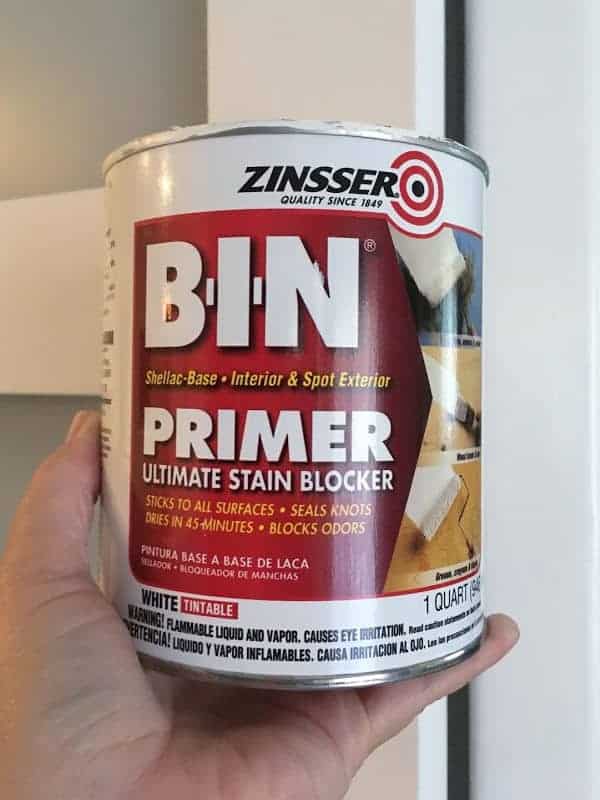
I would use it on everything except that it's overkill for most projects. It's a shellac based product, which makes it the perfect bridge between paint and surface. But it's also stinky, and cleanup is difficult because it's not water based.
So maybe it's over the top for some things, but it does a great job of gluing paint to laminate. I haven't yet written a post about this, but we used it on a cabinet at our latest flip house and it worked even better than chalk paint for adhering the enamel to the laminate.
This would be my #1 choice if it weren't for the fumes and more difficult cleanup. To solve those problems, just use adequate ventilation and plan on disposing of your rollers and brushes afterwards, rather than trying to wash them.
All the Cabinet Painting Supplies other than Paint
Once you've picked your paint and primer, you still need tools to apply them. Here are all the other supplies you'll need. (These are all the same, regardless of which type of paint you choose.)
- Krud Kutter - for cleaning before painting
- Mohair Paint Roller and handle - for rolling paint on larger flat areas
- Soft Paintbrush - I like a 1" brush for details and edges
- Painter's Tape - for taping off edges and for labeling doors
- Caulk - for filling seams between and around the edges of cabinets. This squeeze tube doesn't require a caulk gun and can be easier to control, especially for beginners.
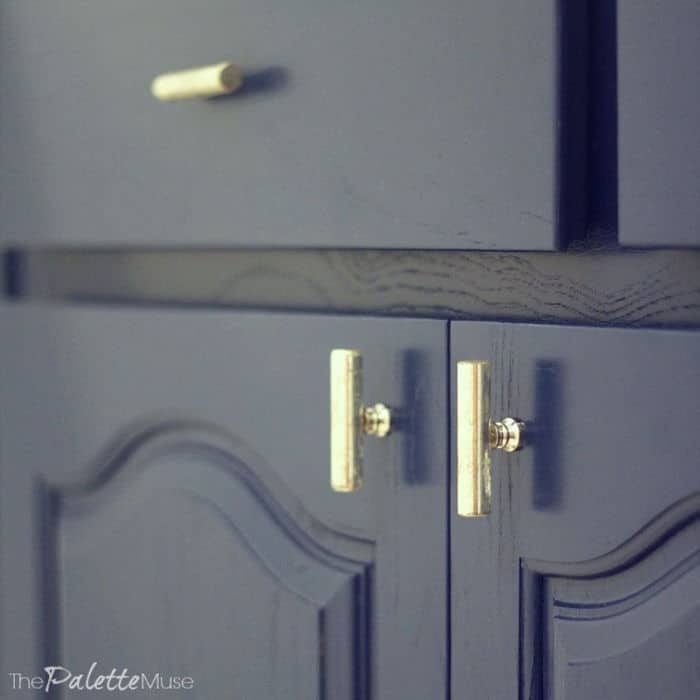
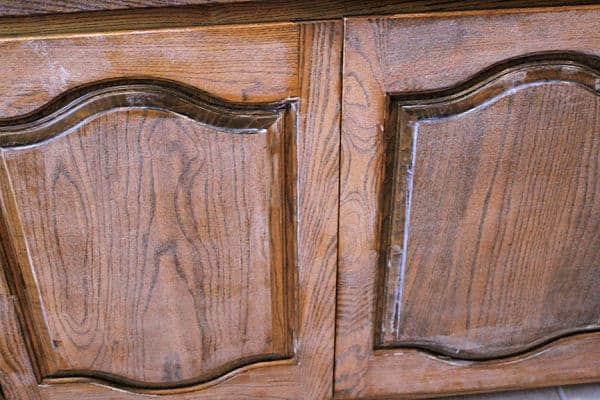
A Note About Wood Grain
I love the subtle hint of Oak wood grain that barely shows through my paint job. It makes me feel good about having solid wood cabinets and adds a richness to the color. But that's just my opinion. If you want to get rid of yours, I recommend this method for covering wood grain.
The Best Method for Painting Cabinets
Finding the right painting products is only half the battle. Now you need to know what to do with them. Here's the method I use on ALLLL my cabinet painting projects to save time, space, and sanity.
The secret? Unless you are painting the insides of your cabinets (which I don't recommend) you don't need to move anything out of your kitchen! No sanding means no dust, which means all your dishes and food can stay in place.
Even if you complete your project a little at a time over several weekends (because this is real life), you can still cook every night. Not that you'd want to, but you could.
This means you can carry on with your life, even as your cabinet painting project rages on.
Here's how:
1. Prep - The Most Important Step
Even with the right products, the key to a good finish is in the preparation. None of my recommendations include sanding (yay!), but all of them include cleaning.
While I know you're itching to get started, painting over dust and grease is a recipe for peeling paint and frustration.
Do yourself a favor and clean every inch of your cabinet surfaces or furniture with Krud Kutter first. Simply spray on lightly and wipe off with a clean damp cloth or paper towel, being sure to get in all the crevices of the cabinet doors and drawer fronts.
This is especially important in kitchens near the stove and sink.
2. Paint Door Fronts
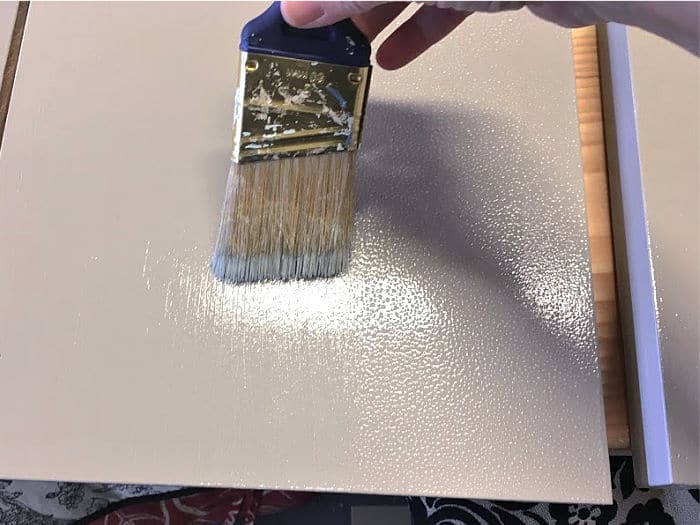
Once your cabinets are clean, you can paint the front of the cabinet doors. Use a roller for large areas, and a brush for smaller detailed spots like raised door frames.
Pro Tip: if your roller leaves spongey marks, you can lightly feather a dry soft brush over the wet paint to smooth them down. Follow a straight up and down pattern, along with the wood grain.
3. Label & Remove Doors
While the first coat of paint on the front of your cabinet doors are drying, label the inside of the doors and cabinets, using the raffle ticket method.
Raffle ticket labels: Make two pieces of tape with the same number on each. Stick one to the inside of the cabinet and one to the inside of the door. When it's time to reattach your doors, simply match up the numbers!

When your doors have dried to the touch, use a screwdriver to remove them, along with their hinges. Then remove any pulls or other hardware. Label and keep the hardware if you plan on reattaching it.
4. Paint Cabinet Boxes
Now that the doors and hinges are out of the way, you can paint your cabinet frames. Use the same process as you did to paint the doors.
5. Paint Sides and Backs of Doors
While your frames are drying, you can paint the edges and backs of your cabinet doors. I like to spread a sheet on my kitchen table and do a door or two at a time.
Just be sure you have a place to dry them each without leaning them against each other or the new paint will stick.
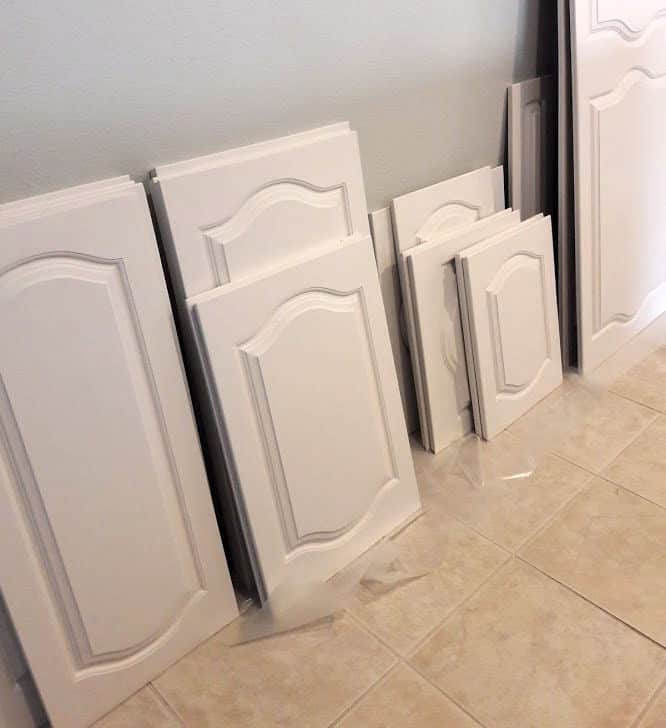
Drying trick: Once the paint is dry to the touch, I use wax paper strips on the floor and tucked between doors, to keep them from sticking as they cure.
6. Replace Doors
After your doors and frames are good and dry (most paints will need a few days to really cure hard), you can replace them. You may want to use bumpers on the doors to keep them from sticking to the frames, especially during the first few weeks.
7. Update Hardware
This step is optional, but new hardware is so much fun! Now is the time to update your drawer pulls and knobs. Check out this post to make attaching new cabinet hardware easier.
What about Laminate?
The process for painting laminate cabinets and furniture is exactly the same, just with the appropriate products, listed in the first part of this post.
Frequently Asked Questions about Painted Cabinets
You can see all the comments and questions on my original cabinet painting articles by following the links at the end of this post, but I've tried to distill them into the main questions here.
Can I use latex paint?
Well yes, you can use anything you want. But latex paint, as in regular wall paint, will not give you as smooth or durable a finish as enamel paint.
I'll admit that, in a pinch, I've painted cabinets and furniture with latex paint that I had on hand. Generally I've had good experience with Valspar Signature in Satin, but I wouldn't trust a whole kitchen remodel to it.
I've been much happier with the cabinets and furniture I've painted with the Satin Enamels and the Valspar Cabinet Enamel, specifically when it comes to a smooth finish without brush strokes.
Can I spray my cabinets?
Yes, you sure can! I just bought a sprayer and am not the person to ask about how to spray anything (yet), but I know many people swear by it. The difference is in the prep.
With a sprayer, you'll need to remove all your doors and hardware first, and be sure to cover everything else to prevent overspray.
Some sprayers require you to thin the paint, but I know the HomeRight Finish Max (that I bought) is supposed to be great for chalk paint and I'd assume it would be for enamel paint as well.
Do I need a primer?
This is the big question - what does primer actually do?
Primer is good for 3 things: sealing natural wood so the paint goes on evenly, covering stains so they don't show through the paint, and creating a surface the paint will adhere to.
In other words primer has two jobs basically: to get the surface ready, and to help the paint stick.
- If your surface is wood that's in good shape with any kind of previous finish on it, you don't need primer.
- If your surface is wood that is old and dry, or new and completely unfinished, you need primer.
- If your surface is laminate, or certain kinds of older wood with tannin stains showing through, you need primer.
- If you have any doubt and don't ever want to second guess whether you did things right, you need primer.
By primer, I mean either actual primer or chalk paint, as detailed in the product options above.
No sanding? Really?
Really! Unless you choose option 3 above, with the sanding, priming and Alkyd paint, you don't need to sand.
You might want to lightly sand if you can see or feel imperfections in the wood you're painting, but if your wood is in good shape, then get ready to throw on the paint!
One note about sanding: if you are sanding paint that may be older than 1978, be sure to test first for lead. It's quick and easy with this home lead test kit. If your paint contains lead, you'll need to contact an abatement team to remove it for you. Or you can decide not to sand, and use either of the first two methods above to paint over it safely.
Do I need a top coat?
No. None of these options need a top coat. In fact, they are all special paint formulated for their durable finish.
I don't recommend a top coat at all, but if you just can't stand it, you can use Polycrylic. It won't yellow over time like polyurethane will.
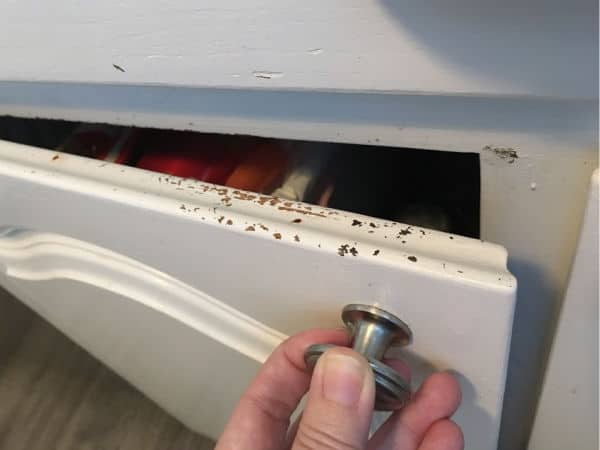
What if my cabinets are not in good shape? Will painting over them fix that?
If your cabinets are peeling, chipping, or flaking, that's a whole 'nother problem, and no magic combination of primer and paint is going to fix that.
(With the possible exception of Peel-Stop, which I haven't tried but I've heard it's formulated for just this problem. If you try it, let me know how it goes. I believe it's best for applications that don't require a smooth detailed finish, since I think you'd still see the edges of the peeling paint as texture under the new paint.)
Before you start even cleaning your cabinets to paint them, you'll need to scrape off any peeling paint and patch with wood-filler. Then you'll need to sand them to a smooth finish and apply a primer over the wood filler.
Will the paint chip over time?
OK, this is the tough one, and I'm going to be completely honest with you. The answer is yes, a little. And anyone who tells you differently is selling something.
Any paint job on anything has the potential to chip over time with heavy wear and tear. Every product, method, and painting professional aims at reducing this problem to almost zero, but I'd be lying if I guaranteed your paint job would never chip.
I usually find that the cabinet housing the trash under the sink, and the drawer holding the silverware are the first to show signs of love. So I keep a little jar of the paint I used on the project to touch up every year or so.
That's the simple truth, and the reason we don't paint our countertops, usually. Things that get a lot of beatings will eventually show their age. Hence the need for home maintenance.
Just like you clean your gutters, or empty your dryer vent, you'll occasionally need to attend to your paint job. But these methods will cut down on the need for that job significantly, if you do them right.
The best way you can avoid chipping paint is to thoroughly clean your cabinets before even touching them with paint. Spend a little time on prep, and you'll spend less time later on touch ups!
Suggested Reading
So that, my friends and patient readers, is everything I've learned about painting cabinets and furniture, in a nutshell. (Imagine the non-condensed version!)
If you still need more details, or if you just don't feel ready to get started yet and want to procrastinate by doing more research, here are the posts that inspired this one. Check them out for even more details.
- What NOT to do when Painting Cabinets
- The Best Way to Paint Kitchen Cabinets
- Painted Kitchen Cabinets - How They're Holding Up
- The Original Kitchen Cabinets Post
- Painted Bathroom Cabinets
- How to Paint Laminate Cabinets
- Installing Cabinet Hardware
- Replacing Cabinet Hinges
- And finally, there's this, my comprehensive guide to cabinet painting, all in one printable ebook, with 2 exclusive worksheets:
And leave me a comment below if you're stuck on something and need help. I know painting cabinets or furniture is a daunting prospect, but you can totally do this!


Tiya says
I used deco art satin enamel following these and others suggestions and it was a complete mess. Gloppy, uneven and so thick/drying before i could try to get rid of the glops. The parts that went on okay showed brush marks even with a fancy brush. I then had a tabletop i couldn't use unless i sanded everything down and started over. It is still in garage a year later. I really want to try chalk paint over my laminate cabinets that have fake wood grain ridges but am wary of trying satin enamel again. Will chalk paint fill in enough of the ridges to use it by itself with a wax over it and still hold up? I also don't want brush marks, grain ridges or uneven color/washed look in final result. Thanks for any help!
Meredith says
Hi Tiya, I'm sorry to hear you had a bad experience last time. As for the chalk paint, it will fill in some of the cracks on its own. However, I would not recommend a wax coating as I've heard from several people that it doesn't hold up well over time in heavy use areas like cabinets. I would recommend a chalk paint base coat, covered with an enamel such as the Valspar cabinet enamel as a top coat. I think you'll like the Valspar product better; it's thinner and should do better with the brush marks.
You will need to do some light sanding on the chalk paint between coats to get a smooth finish. And if the ridges are very deep, you might be better off filling them first with a wood filler and sanding it down. I would try one door first, start to finish, and see if you like the process enough to do in on all your cabinets. You can help even out the brushstrokes by working in smaller sections, and you can even out the color/finish by using a similar color chalk paint to your top coat enamel.
Good luck and let us know how it goes!
Laina Carlson says
This article is great! I have a question about white washing kitchen cabinets. I love the look but do you recommend I use a primer? Anything else I should do to achieve this look?
Meredith says
Hi Laina, actually whitewashing is a whole different process than painting. If you are going to whitewash your cabinets, you would not want to prime first since that would cover up the wood grain too much and leave streaky primer under the wash. You might want to check into other articles about whitewashing specifically, since that's not really my area of expertise. Good luck!
Corina Peterson says
I’m about to tackle painting our wood cabinets. They were stained mahogany and a few coats of poly in them. They are rough and bumpy. We would like to go white. Maybe antiquing on it. I love the idea of chalk paint. After cleaning thoroughly what would you recommend?
Thank you
Cori
Meredith says
Hi Cori, do you mean the poly finish is rough? Or the actual wood of the cabinets? I would recommend sanding first to cut down the roughness, or it may show through your new paint. But if you really don't want to sand (and I wouldn't blame you) then try a coat of chalk paint on one of them to see if it's thick enough to cover the texture. (Just be sure to cover the chalk paint with a coat or two of enamel so the finish is durable.) Let us know what happens!
Brittany says
Hey, there! I’m fixing to tackle painting our rv cabinets, which of course aren’t real wood. I can’t find that one particular chalk paint in stock that you recommended, so will any chalk paint work? I’ve used rust oleum in the past and had great luck with their chalk paint. Thanks!
Meredith says
Hi Brittany! Yes, you can use any chalk paint you like. I have used Rustoleum too and love them as well. Happy painting!
Carolyn says
Hi Meredith! Thank you for this we are going to try to tackle some cabinet basements to make the area more appealing and have managed to track down the deco art paint. I'm wondering if there is a rule of thumb on how much paint we need?
Looks like they come in 8 ounce pots.
Also the floor down there is a God awful yellow from the 1970s so we were thinking of just going with the white. Any thoughts on that?
Meredith says
Hi Carolyn, you can't go wrong with white! I believe DecoArt says a jar will cover about 20 square feet, so you can figure out based on the area of your cabinets how many you'll need. And don't forget to allow for second coats!
Leanne says
I have painted 1st coat of paint after a primer but realised 2 coats of primer and one coat of colour have done on with a roller so have a texture. If I don’t sand and paint brush on another coat of colour will the texture disappear?
Meredith says
No, if the texture is somewhat raised (I'm imagining bumps from your roller?) it will not disappear with more coats of paint. You will need to sand down the texture first, to get a smooth coat of paint on top. Do you mind me asking what kind of roller and what kind of primer you used? It might help others to know.
Katelyn says
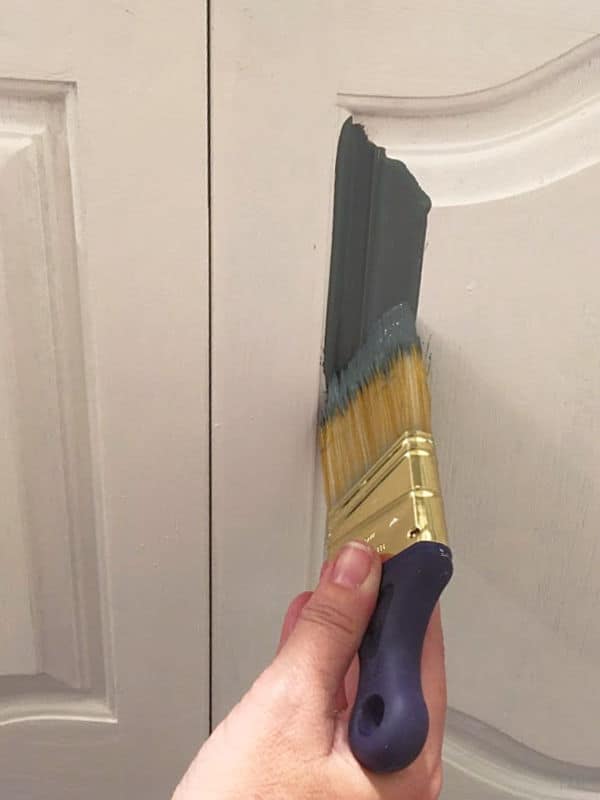
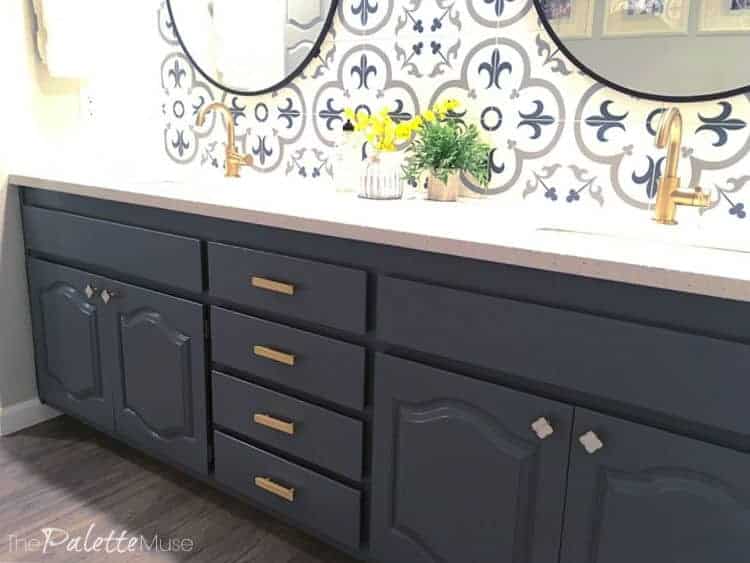
Do you know what color is used with the gold hardware... looks like a dark blue-gray? Thanks!!
Meredith says
Hi Katelyn, that is Valspar "Crucible" and it's a dark gray with slight blue undertones. I love it!
Gerard says
I've been reading lots of websites about painting cabinets and this, by far, has been the best. It doesn't include just the "how", but also the "why" and properly weights the options. Thank you for this information!
Meredith says
Thank you, that's exactly what I was going for. I'm so glad you found it helpful!
Jessica Gasser says
I am in the process of painting my kitchen using Annie Sloan chalk paint. It has been a process and am not happy with the results. My cabinets were orange oak. I painted the lowers green and loved it without a topcoat. I followed some suggestions and used a polycrylic topcoat but am not loving the texture and brush strokes. Next I painted the uppers white and when I added the polycrylic it turned yellow. So, again after receiving suggestions, I put a shellac on but am so afraid to add polycrylic again. My question is, what are you thoughts on painting over the painted cabinets with your option two Valspar enamel?
Meredith says
Wow Jessica, I'm sorry to hear that. First, I'm curious to know what kind of polycrylic you used because that's the first time I've heard of it turning yellow. Second, you could try lightly sanding and recoating the bottom cabinets to try to get rid of the texture. But what you're really asking is whether you can paint over the whole thing with the Valspar enamel, and the answer is "yes, but." The enamel should adhere to poly or shellac, but if you have texture issues, those won't go away by adding more layers of paint. If the actual physical texture is bothering you then you'll need to sand it down to a smooth base first, then apply your enamel with a mohair roller and soft brush. (You do not need to completely sand off all the paint, just till you get a nice smooth surface.) I hope that helps, and let me know if you have other questions!
random says
what about painting thermofoil doors? any special treatment or things to do different?
Meredith says
I would treat thermofoil the same way you would laminate. That is, chalk paint or Zinsser BIN primer, followed by cabinet enamel paint.
Amber Temple says
Can you use the Valspar paint in a paint sprayer or would it be too thick even after we thin it out? I’ve heard that if the paints too thick it won’t come out of the sprayer!
Meredith says
Hi Amber, I haven't used the Valspar enamel in a sprayer, but I think it would work very well. It's consistency isn't too thick, so it seems like it would be a good fit for a sprayer. You might ask them at the store how to thin it, in case you try it and feel that it needs to be thinner.
Krissy Devine says
I’m getting ready to tackle painting my kitchen cabinets. Your article was great!
My question is I cannot find the Deco satin enamel, can I use the deco exterior/interior instead, ( it’s the outdoor living) ?
Meredith says
Hi Krissy, I haven't tried the DecoArt outdoor on cabinets, but I used it on my front door and loved it. It's supposed to stand up well to the elements, so I would think it's ready to take on your kitchen. I also really like the Valspar cabinet enamel too, if you're considering other options.
Ally says
Thank you very much for this post! It is so helpful! Can't wait to get started. I plan to use your Valspar or behr method but am wondering if you have any suggestions for different rollers that will still give the right texture? I am vegan and noticed that the mohair rollers are made of goat fur. Thanks so much!
Meredith says
Hi Ally, that's a great question! I think you can get soft mohair-like synthetic rollers at most home improvement stores. Look for rollers labeled for smooth texture. Just be sure you get something with a soft fur-like texture, rather than foam. (Foam rollers can leave a bubbly texture.) Let me know if you find one you like so I can share it with other readers!
Pamela says
Great article! Is it possible to just use the chalk paint and polycrylic?
Meredith says
Hi Pamela, in my experience the enamel paint gives a smoother and more durable finish than the polycrylic. You could definitely try it, but I've found that the enamel works better and the polycrylic sometimes needs touching up if it's in a high traffic area. If the issue is you like your chalk paint color best, you could have the Behr or Valspar enamel color matched to your chalk paint.
Kiley says
Hi! This has been so helpful. I am hoping to paint kitchen and bathroom cabinets that are real wood in good condition but stained a very dark brown that’s basically black. I want them to be white. I started one and sanded then used primer and the texture from the roller was terrible and I gave up. I’m going to try again. Should I go right into the valspar paint after cleaning the cabinets? I hate sanding and want to avoid. They are craftsman style cabinets and I’m wondering if I could just use a paintbrush to avoid the roller marks? Or if you have a recommendation for a roller that won’t do that? Thanks!
Meredith says
Hi Kiley, yes you can go right to the Valspar enamel once the cabinets are cleaned. You'll love not having to sand! And the paint is better at self-leveling than primer, so it will give you a smoother finish automatically. You could try a mohair roller for a smoother texture, or it's also fine to use a paint brush, but that just takes a little longer. Also, another thing to consider if you're seeing roller marks but not texture issues, is you might just need another coat of paint. The marks will be visible until you have the correct number of coats on the paint, but the actual physical texture should be smooth.
Laurie says
You rock. Thank you so much. I’ve started as you suggested and it’s working well. Very happy I found this site. Thank you so much
Meredith says
Thanks Laurie, so glad you found this helpful!
Janel Cayou says
My cabinets are painted black right now. We want to paint them white. Is this do-able? Can I just use white deco paint like you suggested? Or are we better off replacing the cabinets?
Meredith says
Yes, you can paint white over black! You'll probably need more coats to get a nice, even color. Or you could add a step of priming with Zinsser BIN primer, which will cover the black a little more before your paint goes on. Maybe try one door first, before deciding whether to replace them all!
Nancy Centanni says
Hi! I’m not sure if my cabinets are wood or laminate. But I do have 2 areas where it’s actually lifting where a seam would be, so therefore I’m thinking not solid wood. So what can I do to get that lift area back in place?
Then around my stove area I have a lot of grease spots and I have cleaned and cleaned but they always come back. Can I lightly sand all the cabinets to try to get the grease off then use the grease cleaner you recommend?
So if they aren’t wood, you would recommend me priming them first, then doing the enamel on top?
Also I have visible hinges that are filthy and need to be soaked & cleaned. Probably the original kitchen cabinets from the 1960’s. So can I remove these and clean and then replace when ready to rehang cabinets back up. What would you suggest I use for cleaning the hinges possibly?
I know it’s a lot of questions, but this is a big job and I only wanna do it once and correct.
Thank you
Meredith says
Hi Nancy, all good questions! 1. You'll need to repair any peeling spots first. You can try carpenter's glue or epoxy, but you'll need a way to apply a lot of force while it's drying, like a clamp. 2. Have you tried the degreaser yet on the greasy spots? You don't want to sand those because you could grind the grease right into the wood. Try to get all the grease off first. 3. Yes, I recommend priming everything first, then covering with enamel paint. (You can do this even if they are wood, then you're covered either way.) 4. I haven't cleaned hinges before but I've seen tutorials from other bloggers about how to do it, so try searching for that. I know it's possible!
Martha Valle says
I read this just in time. I'm planning on painting my kitchen cabinets in the next few days. Thanksfor your tips its been very informative.
Meredith says
I'm so glad this was helpful, good luck on your project!
Michelle says
I’m sold on the decoart enamel paint. But I’m buying from the company and can’t find any information on how many 8 oz containers I need. Do you know basically how much overage 1 8oz container covers?
Meredith says
Hi Michelle, one jar covers about 20 square feet.
Gordon L Trynor says
I have painted cabinets already. Can I still fill the wood grain?
Meredith says
I'm sorry, I don't think that will work very well. The wood filler needs to adhere to wood and be sanded smooth. I'm pretty sure that can't happen on top of paint.
Brittany says
Can I paint over already painted and heavily distressed cabinets without sanding?
Meredith says
If the previous finish is smooth and in good shape you sure can! If the distressing has made the texture bumpy though you'll want to sand it smooth first.
Elegant Painters Vancouver WA says
Great advice and very honest and practical. If I could redo my house I think I would have chosen the same. Can’t wait to see the result! I know those cabinets will look awesome. Love seeing the progress!
Meredith says
Thanks! Paint makes a huge difference!
Karen says
I'm currently painting my kitchen cabinets using Valspar. Can says to wait 8-24 hrs between coats, but sounds like you just waited until they were dry to the touch. I hesitate to go against manufacturer instructions, but waiting that long in between coats really drags out this project. Thoughts?
Meredith says
Hi Karen, I do recommend following manufacturer instructions. Otherwise, your finish may not dry uniformly. For me, it took several hours to paint all of one area, so by the time I was done with a section, it was easy to go back at start on the next coat. Also, I live in the desert, so I knew I could get away with the minimum drying time. That will be different for everyone, depending on their climate. In the end, it's worth it to do it right, even if it takes a little longer.
David says
Excellent article! I would like to add that spray painting cabinets are a real option, and yes, with cans of spraypaint. I have done all my 3 bathrooms in this way and while it is most definitely the most labor intensive it is also by far the most proffessional finish. I cant look at brush strokes or roller marks on my cabinets.
I have used 2 coats of Rustoleum Painters Touch 2X primer and then 2 coats of primer and paint. Everyone who sees the cabinets asks if we replaced the. But again, a ton of prep work.
Meredith says
Wow, that sounds like a lot of work, but I'm glad to hear you've found success that way. Thanks for sharing!
Linda says
Thank you so much for sharing your experience. I painted a bedroom set many years ago and months later it was a disaster. I used a a great primer but I did not sand. The finish on the furniture was originally shiny. The guy at the store said use this primer and no sanding nessary.😬 Years later I finally decided to repaint the furniture. I decided on Valspar furniture paint. Great choice. First I stripped the paint off the flat surfaces. Sanded them and used a Valspar primer. 2 coats of primer. Light sanding between each coat. Then I put 3 coats of paint. Light sanding between each coat. I wasn't taking any chances so I add two layers of Polycryic to all surfaces of the furniture. It looks fantastic!!!! The Valspar paint was applied with a very good quality paint brush. There were no brush marks. Very nice finish. Your article inspired me to finally repaint this furniture. Thank you!!!!
Meredith says
Thanks for sharing your experience Linda, I'm so glad you're happy with the results!
Linda KY says
I have read so much on painting camper cabinets, starting couple months ago.
So many articles on Beyond cabinet paint. So that was what I used, no priming and you can’t sand camper cabinets. I did go with another choice first, used the primer... looked good, then beaded up on cabinet. So it’s like it didn’t stick at all, used the valspar cabinet enamel, did same thing. Yes I cleaned cabinets first, so bought 2 quarts Beyond cabinet paint. Oh my I had to put 3-4 coats on to make it look good. A blue haze came through the paint? Yes the paint is chipping also, we even put a sealer on them.
Ran out of 2 quarts of paint so had to stop, I just received it while camping last week. So yes my bottom cabinets needs another coat.
You know at 47.00 a quart, I’ve spent many dollars on this project and still not satisfied.
Have you used “Beyond” paint before?
Thankyou Linda
Meredith says
Hi Linda, I have not used Beyond paint before, and I'm sorry to hear about your experience! I don't know if this will help, but you could check out my other article about painting laminate cabinets: https://thepalettemuse.com/how-to-paint-laminate-cabinets-without-sanding/
Diane says
After I use the Bin primer do I use satin paint over the primer on laminate cabinets?
Meredith says
Yes, exactly!
Pj says
What is the best way to get rid of oak wood grain before paint
Lewis says
@Pj, I'll second that request.
Meredith says
I have not tried this myself, but I do trust this blogger who has. Check out her tutorial: https://www.cravingsomecreativity.com/painting-furniture-removing-wood-grain-texture-to-get-a-smooth-finish/
Lewis says
Hi,
I have those yellow oak kitchen cabinets which have been sprayed over with an HVLP sprayer with a kind of dark stain finish which I now realize is just a paint job as it has chipped and flaked in high use areas to show the original oak finish again. How would you suggest I prepare the cabinets for painting with a cabinet enamel option? Also, any thoughts on how to get rid of the natural wood grain finish so that I end up with a smooth finished surface and not wood grain that's been painted over?
Thanks.
Meredith says
Hi Lewis, I've gotten this question so often that I've edited this post to include the answer. Here's what I recommend: https://www.cravingsomecreativity.com/painting-furniture-removing-wood-grain-texture-to-get-a-smooth-finish/
Joyce says
We are moving into a home that has the old oak cabinets. I'd like to paint them white and make it as permanent as possible. This article seems almost too good to be true. After reading one comment with someone unhappy with the deco art paint now I'm not sure what finish would be best to do over the oak. Your experience is valuable and I'd like your input on how to begin. I'm not a novice and I'm pretty good at furniture refinishing. I really have no 'oak' experience. I'd like to get rid of the grain. Thanks in advance for any pointers you provide.
Meredith says
Hi Joyce, I've had this question a few times, so I've updated the post to include the answer. You can also find it in the comment above.
Natacha says
Can I paint over already painted cabinets? If so, what paint is best and do I have to sand?
Meredith says
If the existing paint is in good condition, you can use any of these products and methods. But if it's peeling or lifting, you'll need to remove those layers of paint first.
Luz Vidal says
Hello, I been doing so much research about painting white kitchen cabinets and this article is the one I trust the most.
I was able to find some of the DecoArt Satin Enamels paint in white, but my question is I am painting over dark brown. Do I need to sand the cabinets? And do I need to put some type of protector after I paint them?
Thank you so much.
Meredith says
Hi Luz, great question! You shouldn't need to sand first, but you might need an extra coat or two of the paint to really cover up the brown. Or you could prime first with a white primer like Zinsser Bin primer. You will not need a top coat or protector on top of the satin enamels.
Ciera says
I have wooden cabinets that were painted with an oil based lead paint and want to seal the paint onto the cabinets. Is there a good method of doing this?
Meredith says
Hi Ciera, yes I would recommend covering your paint with the Zinsser Bin primer before painting. I'm sure you know this already, but do NOT sand lead based paint. Simply cover it with a good primer, and you'll be ready to paint over it.
Dom says
Hello! Thank you for this extremely useful post. I have a question, wondering whether the non-sanding options are a possibility for me. I moved into my rental about 10 years ago, and the rather old wood cabinets were painted already (possibly more than once) and did not have hardware. If only I'd known that fast-forward 10 years, much longer than I thought I'd stay, the lack of hardware means that the portions of the doors I use to grab-and-open are getting filthy: combination of dirt and paint having gotten eroded with time. I want to repaint them and then add hardware, but I'm worried about what I think is already multiple layers of paint (probably the same latex paint that was used on the walls). When I tried to apply latex paint to the side of a bathroom cabinet years ago, the results were not great: giant patches of dried paint coming off. Do you think this situation might require something more involved than the two non-sanding options you describe in this post? I will appreciate any guidance!
Meredith says
Hi Dom, that's a really good question. Do you think the kitchen cabinet paint is the same as the bathroom? Either way, I would not recommend regular latex paint for painting cabinets, for the reason that you're already seeing with peeling paint. The very safest option would be the sanding option, since you don't know what kind of paint is there already. (Speaking of safety, if you're going to sand, be sure your existing paint isn't lead-based first. If it's older than 1978 test it first.) If you want to try the non-sanding options (which I still would because I hate sanding that much), I would go with a primer coat of Zinsser Bin to cover the existing paint, and then the cabinet enamel for the color. Also, be really sure you clean well first with the Krud Kutter. The main reason paint doesn't stick is if there is already residue on the surface. I hope that helps, and let me know how it goes!
Dom says
@Meredith, Thanks so much for responding and for this info! I am looking at all of the options and was also starting to think that a primer would be needed before I saw your response here. I can't bring myself to do all that sanding when the problem area is really just 5 or 10% of the surface of the cabinet door (where it gets grabbed!), although I would of course repaint the whole thing. It will be a few weeks before I can get to this but I'll let you know how it goes. (Also, good question RE: is it the same paint in the kitchen as what I saw in the bathroom. Possibly not! It's actually quite possible the kitchen cabinets did not use the latex paint. I doubt I can figure it out myself though.)
Marie Belding says
Yes can you come to my house I have a mess.
Gail Miller says
Thanks for the very informative post.
What is your opinion regarding satin vs semigloss enamel for old oak Roman arches doors? There are some blemishes due to age. Ive sanded & primed but undecided about the sheen.
Thank you in advance.
Meredith says
Hi Gail, I like lower sheen (satin) for making details and blemishes less noticeable. Higher sheen reflects more light, which can highlight imperfections.
Craig says
Never paint fronts first. Lay your door face down while doing the backs. Let dry thoroughly. Flip over and do fronts lastly, to avoid blemishes on the face. Myself I spray! Clean very well with denatured alcohol, spray latex Stix undercoat, then spray smooth finish coat like glass 2-11 tip I love Inslx cabinet coat
Olga Haberl says
Hi! I just found your blog. Thank you for sharing your knowledge on this topic.
We bought our home a year ago and the seller used flat white paint for the kitchen cabinets and hinges. The paint is already coming off. Yikes! I would like to repaint them. They are real wood cabinets. Your thoughts would be appreciated on what to do first. Thank you for taking the time to respond.
Meredith says
Hi Olga, if the old paint is peeling or flaking you should sand it down to an even finish first. If it's simply being worn off by overuse, you can use the methods in this post to paint over it.
Cami says
This article is so helpful! I have knotty cherry cabinets that I’m wanting to paint. Should i cover/fill all the knots first?
Meredith says
Hi Cami! Are the knots 3 dimensional? I would fill them if they create holes or dips in the surface of the wood. The paint will cover any color differences (with enough coats) but will not fill in holes.
Tosha says
This is SUCH a good post! So glad I found it before painting the secondhand dresser that I just found for a deal! Thanks for all the good info!!
Meredith says
I'm so glad to help!
janeen radman says
Awesome article!
Morgan says
Hi
My cabinets have been previously stained with a heavy coat of an espresso color. They don’t look great at all. Can I paint over them using chalk paint and cabinet paint ir do they have to be completely stripped?
Meredith says
Yes you can paint right over them! If the previous finish is in good shape (not peeling or cracking) then this is the perfect way to get rid of those dark cabinets. No sanding or stripping needed! (You might need another coat or two, though, if you're going from very dark to very light.)
Robin says
Hey Meredith. So wish I had found this info before I painted my island cabinets.
I used Valspar Signature satin. Love the color but can see the brush strokes. Any recommendations to smooth it out?
Here’s my next question - my kitchen cabinets are painted white and are about 15 years old. Some areas are really showing wear and tear and need touching up. I don’t know the color so concerned about matching.
Also I previously tried touching up a few years ago and that paint is now very sticky and looks horrible. It’s almost rubbery. I’m assuming after reading your blog that the incorrect paint was used. Recommendations on how to get it right this time around? Thanks
Meredith says
Hi Robin, thanks for reaching out! When you mention brush strokes, do you mean they are slightly raised and you can see the texture of them? If so, then the only way to fix that is sand them down and repaint. (Try a softer brush next time, or use self-leveling paint like the cabinet enamel mentioned in this post.) If it's just that the color is a little uneven, that probably means you need another coat.
As for the sticky paint, I think you're right. Probably whatever paint you used to touch up didn't adhere properly to the previous paint. (This can happen if you use latex paint over oil-based paint.) The only way to fix that is also to sand and repaint.
I'm so sorry I don't have a better answer for you! Sanding is a big pain, but sometimes it's the only way to get back to a smooth, usable surface. Best of luck on your project!
KLC says
Hi!
I’m following your tips and advice for painting my kitchen cabinets. They’re 11 years old and made of alder. I was tired of looking at an “orangy” color. I deep cleaned them, used the recommended primer, and currently painting the faces warm white from the Satin Enamels collection. Ok, so my question! Do you think I could get away with just the primer on the cabinet faces and trim but skip it on the cabinet door backs? Or do you think the color will look different?
Meredith says
Good question! I haven't painted alder before so I don't know how much its color comes through. Personally, I would go for it, but maybe try one without the primer and see how it goes before committing to one or the other method. (Honestly I didn't prime the backs of my cabinet doors and they turned out fine, especially considering you don't see them as much.) Let me know how it goes!
Stephanie says
Great information that I needed. We live in our home that’s 5 yrs old. We picked the regular cabinets from builders anything special about these ? Husband said there wood cabinets. I’m doing white or a country white if
Option 1: DecoArt Satin Enamels Carries that or should I stick with Valspar?
Meredith says
I don't think DecoArt carries a country white, so you might be better off with Valspar. And you should be fine painting over your builder grade cabinets, that's what this process is perfect for! Just make sure you clean them well first, you'd be surprised how much gunk can build up in five years!
monique kramer says
What a great informative article!!
I have kitchen cabinets that the previous owner painted with Annie Sloan chalk paint (and I think no top coat) I would like to repaint the cabinets with a different color. Can I leave the existing chalk paint (it's wearing off only slightly at some edges) and repaint with your recommended paint like DecoArt Satin Enamel? Or do I need to completely sand off the existing chalk paint first? Thanks!
Meredith says
Hi Monique, as long as there is nothing on top of the chalk paint, you should be able to paint right over it. Chalk paint makes a great primer/base coat. But if there was any wax (usually the top coat to AS chalk paint), you'll have to sand that off first so the paint can adhere to the chalk paint.
Lavaughn says
I've painted my kitchen cabinets in April of this year. I use the vaspar cabinet and furniture paint like you suggested. My color was coastal jetty. They turned out great. I know you suggested no need for top coat but I'm getting ready to use the polycritic since the cabinets are in the kitchen. Thank you for your suggestions.btw, I did need to sand and use primer due to my cabinets was little worn.
Meredith says
Hi Lavaughn, thanks for sharing, that sounds like a pretty color! Sounds like you took the time to do it right, and I hope you enjoy your cabinets for a long time!
Carmen Maleschuk says
Hi there,
I have lived in my house for over 4 yrs and I’m ready to redo the kitchen cabinets that the other homeowners did. They used the Cabinet refinishing from Rust oleum. Do I need to do any prep work ahead of time before I use enamel paint? Thanks
Carm
Meredith says
Hi! You should be able to use the enamel paint right over the old paint, as long as it's clean and in good condition. If you're worried about it adhering, you might want to try a test spot first.
Trina says
Hi! We will be painting our kitchen cabinets this winter. The lady at Lowes told me that if using that valspar enamel cabinet paint that I have to sand or strip the stain first. If I am reading your directions correct, I don’t have to? Our cabinets are in really good shape. They are stained and have polyurethane over that.
Meredith says
Hi Trina, in my experience it's not necessary to sand and strip first, as long as your cabinets are in good shape. That's the whole idea behind this product, and the biggest reason that I love it. My cabinets (in both kitchen and bath) were stained and I didn't do anything except give them a good cleaning first. I don't know whether they had poly on them, but I assume they must have had some kind of sealant from back in the day. It's probably worth doing a test swatch first, just to make sure you like how the paint is adhering. Also, if your stain is dark and you're painting them a light color, you may need an extra coat or two.