Have you been thinking of painting your kitchen cabinets, but can't stomach the thought of all the mess, upheaval, and general mayhem that goes along with such a big project? Then I have good news for you!
Now there's an easier way to paint kitchen cabinets, without destroying the heart of your home in the process.
(THANK YOU to DecoArt and D. Lawless Hardware for providing supplies for this project!)
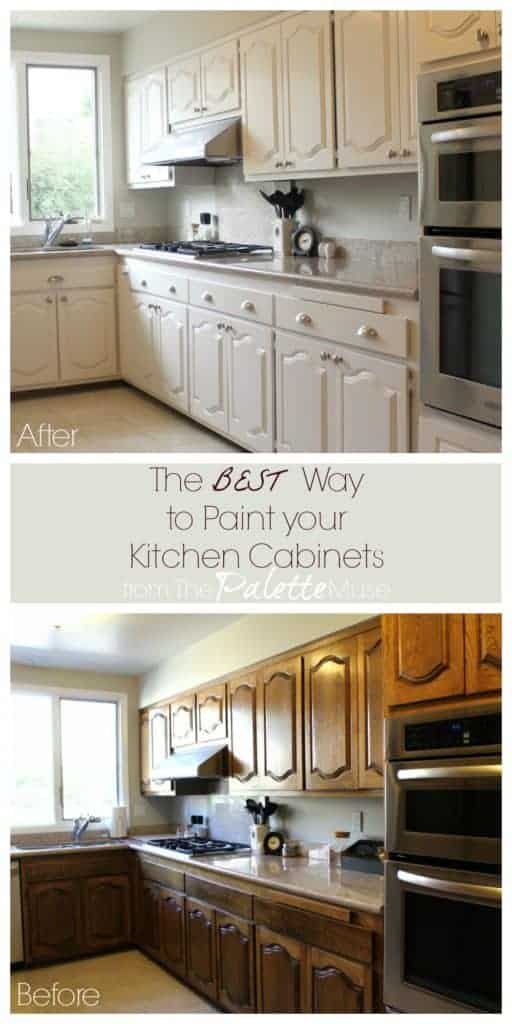
The Absolute Best Way to Paint Kitchen Cabinets
You may remember I already wrote a post on the "right" way to paint your kitchen cabinets, otherwise known as the world's longest kitchen cabinet painting tutorial. After I published my original post, the question I heard most often was "Is there an easier way?"
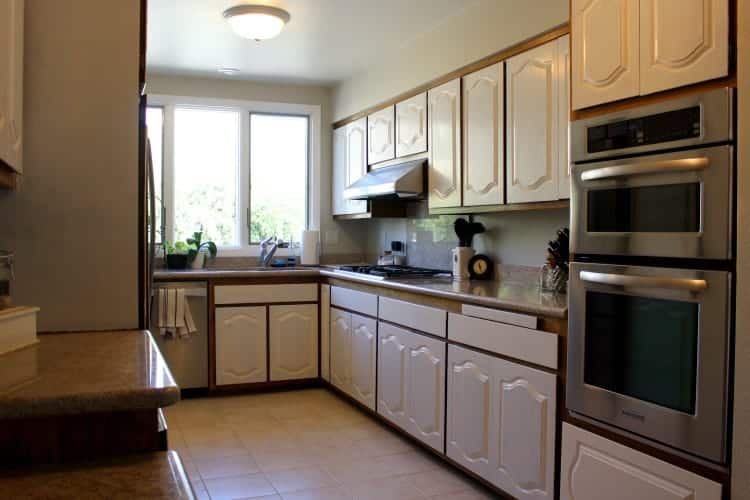
Well, because I love you guys, I set out to answer that question. I had to buy a new house with ugly dark outdated oak kitchen cabinets, just to satisfy your curiosity. It was a sacrifice, but one I was willing to make. Just for you, my dear readers.
So now, after trying out a new product and a completely different process, I have the new and improved "best" way to redo your kitchen cabinets.
What makes it the best, you ask? It's faster, easier, and with WAY less mess. My previous process still works well, but if you're wanting a quicker turnaround, this will be the process for you.
Update: After living with my cabinets for several years, I've found that this new easier way holds up just as well as the previous method. So there's no reason to feel like you're taking a shortcut. I can definitely say this is my favorite way to paint cabinets now!

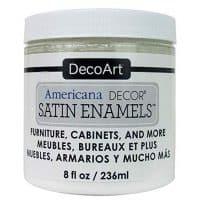
DecoArt Satin Enamel Cabinet Paint
In the past, if you wanted to paint cabinets or furniture, you had to strip, sand and generally kill yourself getting a good surface ready to paint on. Now, with DecoArt's Satin Enamel paints, you don't need to do any of that. Simply clean the surfaces, prime if needed (we'll talk about that in a minute), and paint.

Kitchen Cabinet Painting Hack
That sounds great, but here's the really great part... since you're not sanding, you don't need to remove all your items from your cabinets. That, my friends, is the key to making this project easier.
You don't have to change anything about the way your kitchen functions until you're almost done with the whole process. No more pulling everything out of your kitchen, then hunting through piles on your living room floor for that pan that you need to make dinner.
Everything stays in place, and you can cook dinner every night, after working on the cabinets during the day. (Oh wait, that doesn't sound good at all. Let's just say you could cook dinner, but don't tell your husband that, and make him take you out for dinner.)
New Cabinets in 7 Steps!
Here's the actual step-by-step process.
- Clean cabinet doors
- Prime cabinet door fronts and edges, if needed
- Paint cabinet door fronts
- Remove cabinet doors
- Clean, prime, and paint frames
- Paint edges of cabinet doors
- Reattach doors
That's it! Sounds easy, right? Well, that would be a pretty short blog post, so here's how to do it in full detail. (Be sure to read all the tips at the end!)
Clean Cabinet Doors
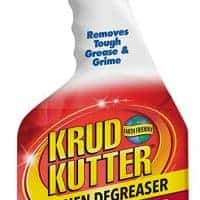
All you need for this step is a good degreaser, such as Krud Kutter, and a clean rag. If you can't find Krud Kutter in your cleaning aisle, look at the hardware store. It's a heavy duty, but non-toxic cleaner that will remove any grease buildup that can get in the way of your paint.
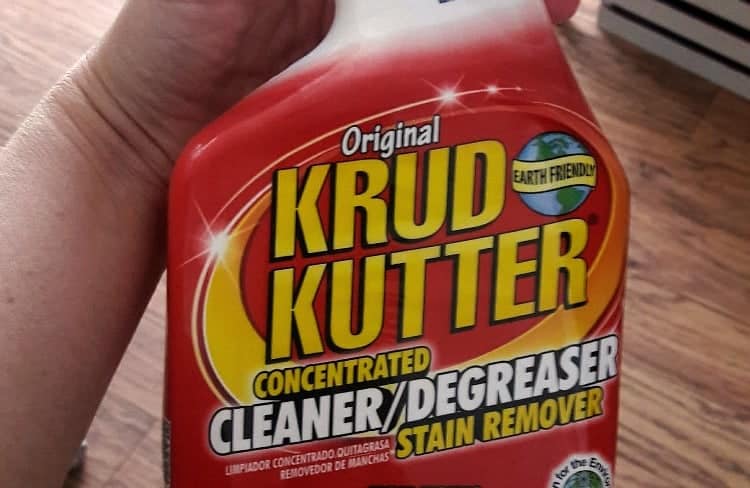
Simply spray on and wipe off with a very slightly damp clean rag or paper towel. Tougher spots may need a little elbow grease. Be sure to clean every paintable surface well so your paint will stick.
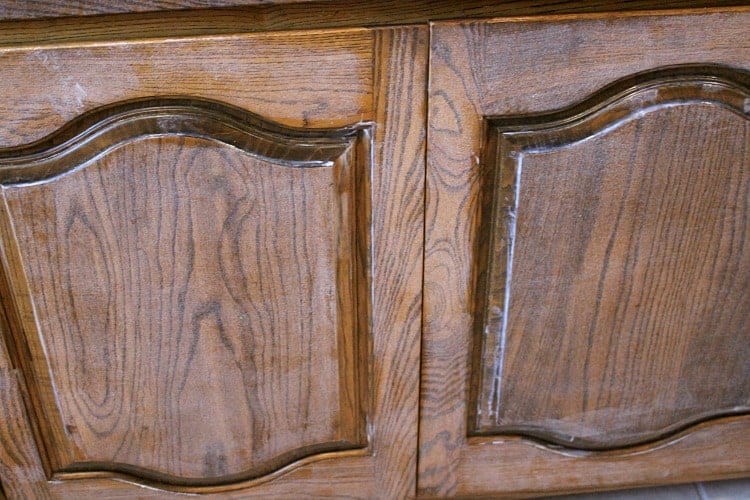
Prime Cabinet Doors - if needed
Not all cabinets will need to be primed before painting, if you're using DecoArt's Satin Enamels. Satin Enamels are formulated to adhere well to wood, and I've seen this to be true in multiple cabinet and furniture painting projects.
If your wood is old, has stains or dark knots, or seems dried out (like here in the NM Desert), it can be a good idea to prime first. Primer helps with adhesion and stain blocking, so it helps your paint stick better, look better, and go farther.
This Zinsser BIN Advanced Primer is what I recommend for painting over wood, whether it's cabinets, molding, or doors. It does the best job of stain-blocking out of any primer I've ever used.
Plus it dries in 45 minutes, so you can get on with your project quickly!
Full disclosure - when I painted these cabinets, I used DecoArt's Stainblocker, but it's not available for purchase anymore. I've use the BIN primer in several other wood projects and I know it will do the same job.
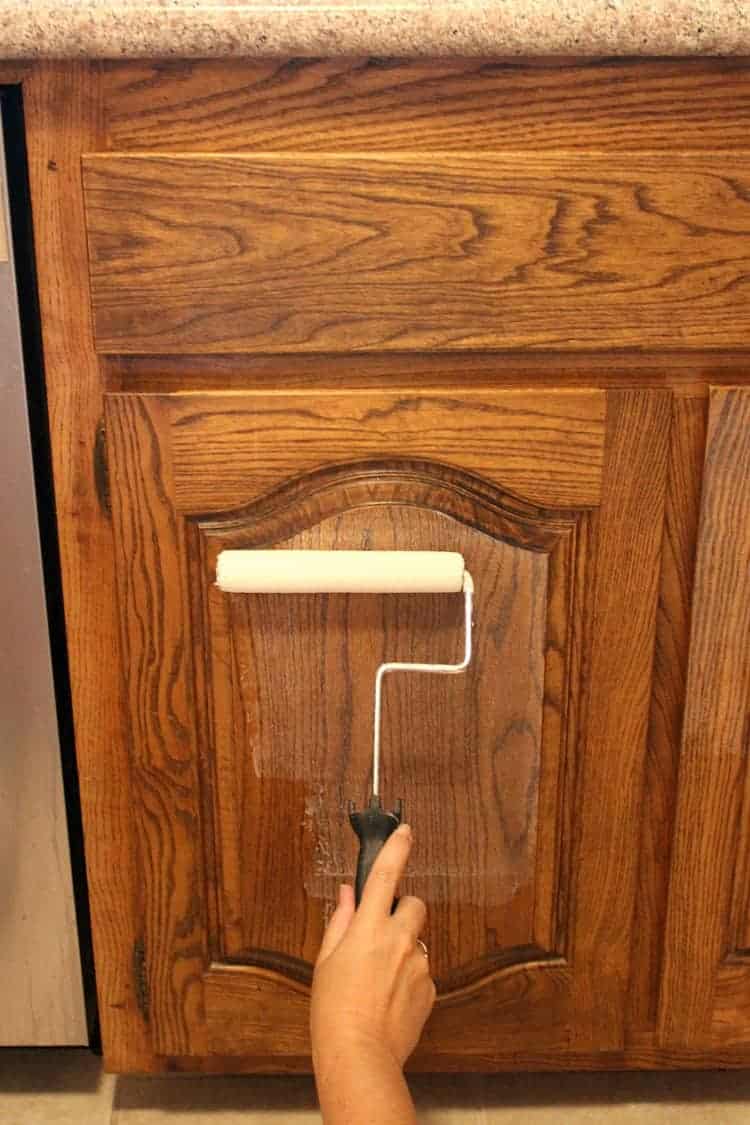
Paint Cabinet Door Fronts
I can hear you now, asking "Meredith, didn't you forget a step? Who would paint their doors while they're still hanging?" Well, I would. And you should too. It saves TONS of space, not to mention time spent moving doors around onto work surfaces.
Now, if you were using traditional latex or oil paint, I would not recommend painting vertically, due to the risk of drips. But this Satin Enamel paint holds it shape better while it's wet, which means it goes on smooth, and has the perfect drying time.
Drying time sounds like a weird thing to rave about, but it really makes all the difference in this type of project.
You need a paint that dries slowly enough that it has time to even itself out and get rid of brush strokes (we call this self-leveling), but not so slowly that it runs and drips and can't be touched for days.
Seriously, I can't say enough about how important this one property is to making this project so easy. Of course, you need to be careful to apply the paint evenly, and look out for all those corners where paint can build up and lead to drips.
The other great thing about this paint is you can re-coat as soon as it's dry, so conceivably you could do all your coats (2 to 3) in one day, if you were so motivated. I was not.
It took me a few days, but at least I didn't have to worry about my kitchen being torn up in the meantime.

One last tip about painting doors... If your doors have inlays, like mine did, paint those first with a brush before painting the large flat areas with a mohair roller or large brush.
This will allow you to be careful in all the nooks and crannies, and still achieve a good clean paint job without having to stop in the middle and do the detail work.
Removing Cabinet Doors
The absolute first thing you must do before removing your cabinet doors is LABEL them. Trust me, this is the one tip you should not skip over.
I know you think you'll remember where everything goes, but you will not. You will, however, thank me later if you label your doors clearly. I use the raffle ticket method shown below.

Now you're ready to remove the doors. For this part, you may want to find a helper. That is, unless you're unnaturally adept at holding a solid wood slab in one hand and operating a power drill in the other, all while balancing on one knee on the countertop, with the other foot straddling a sink full of dirty dishes.
As it turns out, I was not particularly gifted at this skill. Unfortunately for my knee and my dishes. Hence, no photos of this part of the process.
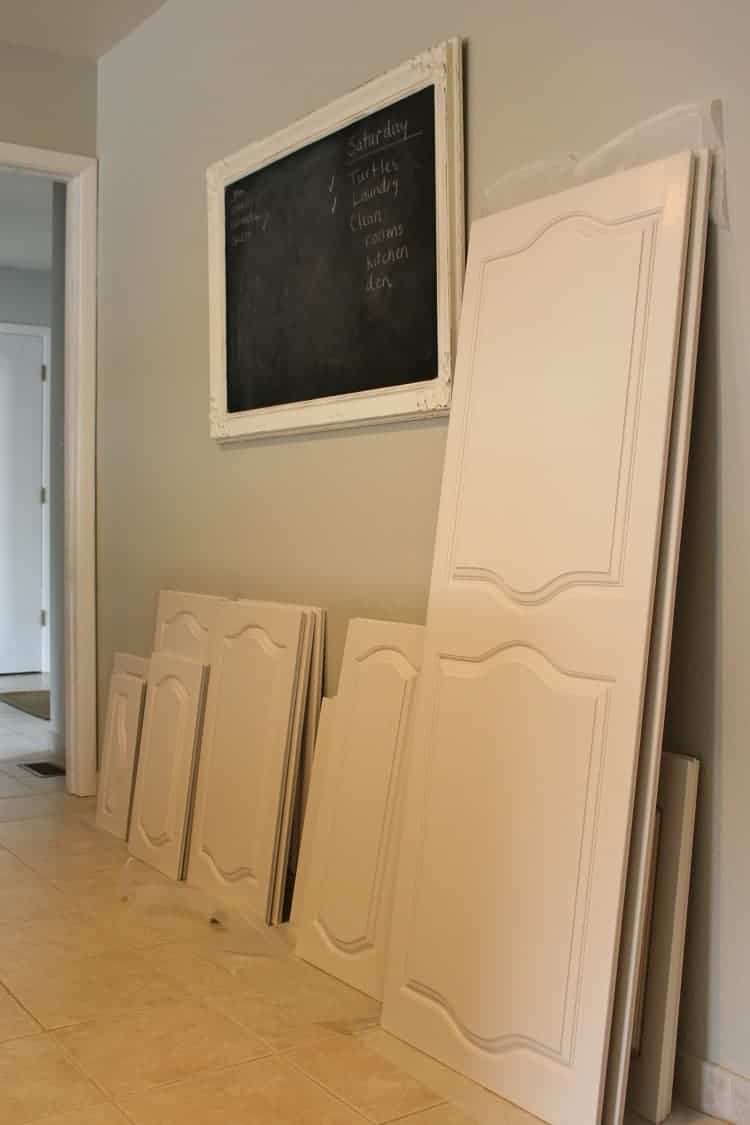
Simply unscrew the hinges and stack the doors along the wall or in your garage. If you're re-using your hinges, label them to go with the doors and save them for later.
I didn't want to re-use my old dingy brass hinges. I also didn't want to call attention to them, so I went hunting for something that would disappear into the white background of the cabinets. Did you know you can buy white hinges?
That's just what I needed, and I found them online at D. Lawless Hardware. If you haven't checked out D. Lawless yet, you should. They have a great selection, at great prices, and are just the nicest folks to work with. You'll see more of their hardware in a minute.
Clean, Prime, and Paint Frames
Once your doors are out of the way, you'll repeat the same cleaning, priming, and painting process as above, just on the frames this time. It sounds like a big job, but it really isn't.
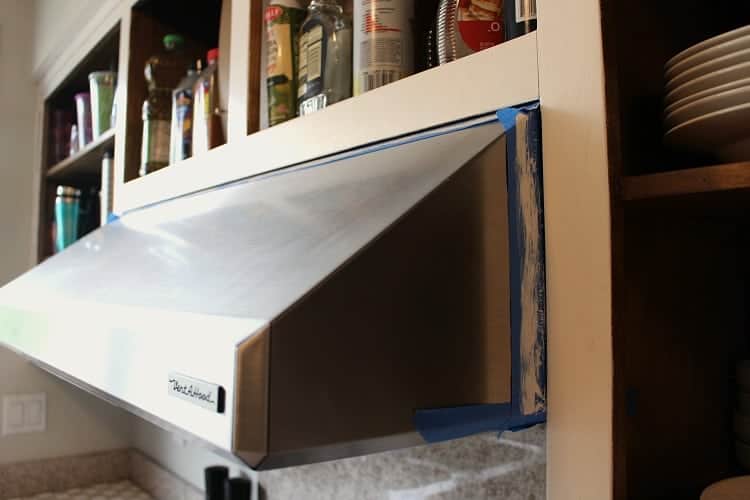
The frames don't take up much space, so they won't take you long to finish. Just make sure you tape off any edges first, to make your life easier.
Paint Edges of Cabinet Doors
While you're working on your frames and waiting through drying times, you can paint around the edges of your cabinet doors.
You want to make sure the paint is good and dry on both the frame and the doors so they don't stick to each other once you attach the doors again, so leave plenty of time for this step.
This is also the time that you'll want to pull out your drawers and paint their edges too.
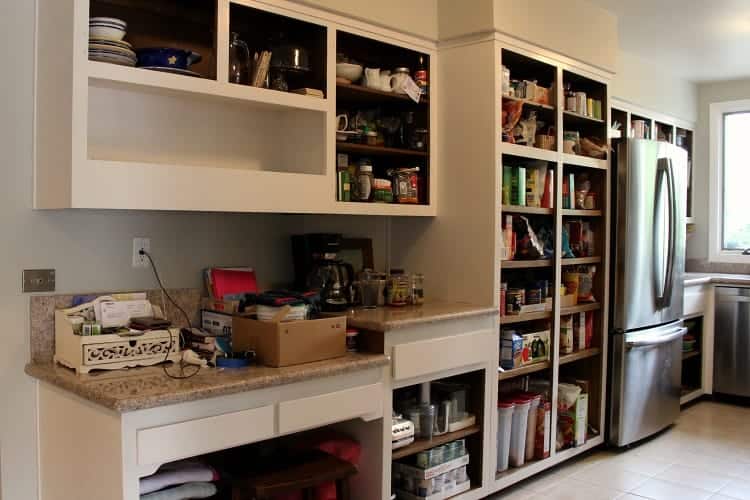
At this point, you remember why you can't have open shelving in your kitchen.
Reattach Doors
Once everything is finished and it's all good and dry, then you can rehang your doors and replace the drawers. (Sounds easy but involves more contortionist moves in mid-air, so enlist a partner if you can!)
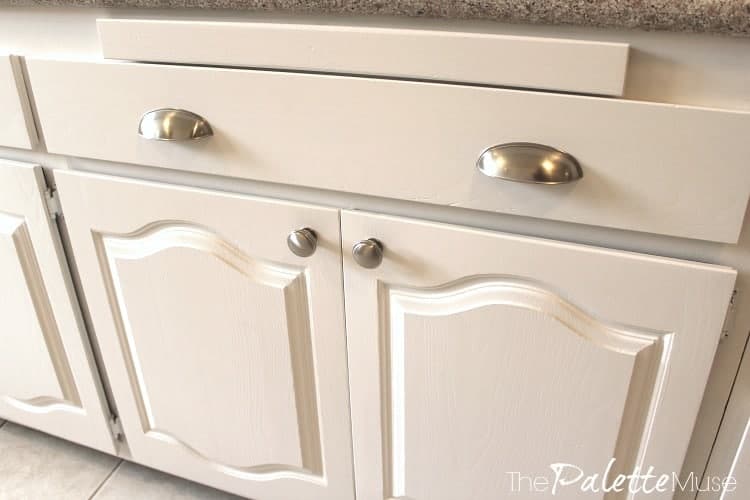
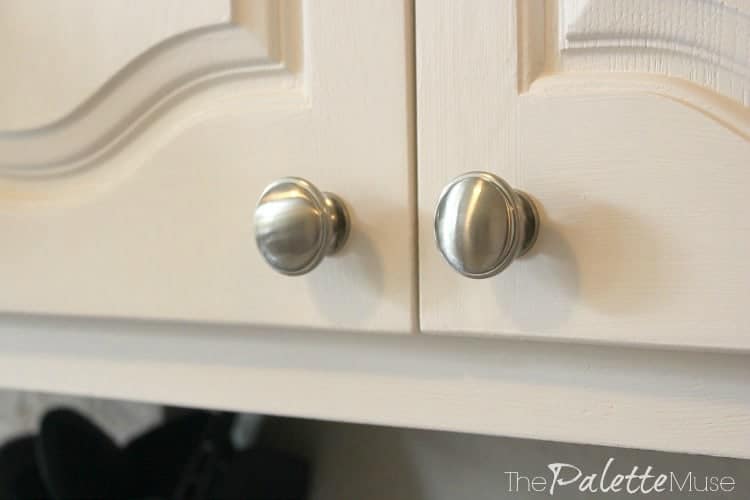
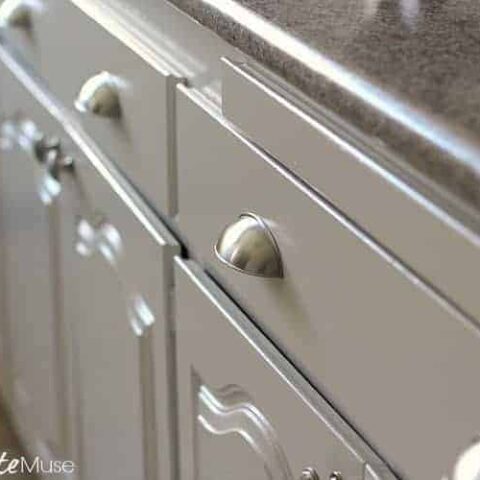
Finally, add some fabulous hardware knobs and pulls, and you've got a brand new kitchen.
You're done! That wasn't so bad, now was it? You didn't have to remove a single dish from your cabinets, and everything got to stay in its place so you could use your kitchen as you worked little by little on it.
You didn't even have to spend a whole Saturday cleaning sawdust out of your cabinets before replacing your mixing bowls.
The family wasn't mad at their mom-induced chaos. Even your husband was impressed that all this magically happened in between meals. OK, well maybe that's stretching it a little, but you get the idea.
Resources
Note: these are affiliate links, which means if you make a purchase, I'll make a small commission at no extra charge to you.
Cabinet Painting Tips
This process absolutely works best with DecoArt Satin Enamel paint. (You can find it on their website, Amazon, or just about any craft/hobby store. I like Hobby Lobby because they always have a 40% off coupon.)
The paint's consistency and drying time allows you to work on the doors in place, and there is no sanding required. I do not recommend this method if you want to use regular latex or oil-based paint. See my earlier post if you want to do that.
Color
Don't fret if you can't find the color you want in the Satin Enamel paint. You can mix whatever color you like from the available colors in their line.
For my cabinets I used Bright White, mixed with Natural Sable. (The formula was 10 jars white, and 4 tablespoons sable.)

I wanted a soft warm white that wasn't too pure. Adding a little brown gave me exactly what I was going for.
Be sure to mix enough paint for your WHOLE project. You do not want to be trying to match colors when you run out of paint halfway through!
Brush Strokes
If you use a mohair roller, you shouldn't get any paint bubbles or roller texture. But if you do, simply drag a soft dry brush over the rolled area as soon as you're done with a section.
Move in the direction of the wood grain as you go, and any brush strokes will be almost invisible.
Hinges
If you're buying new hinges, make sure you measure your old ones accurately and check that the new hinges are exactly the same size and shape.
Small differences can add up to make a big problem in the end. If your house is older, you probably have the non-adjustable hinges that go right on top of the frames.
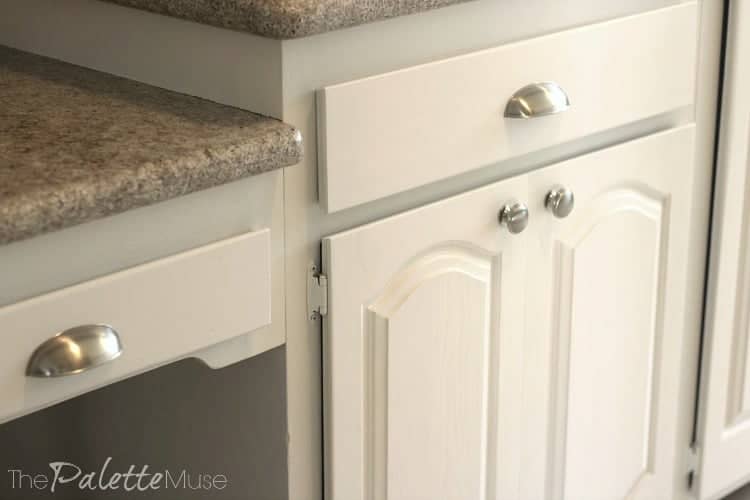
Fortunately it's pretty easy to replace these in a variety of colors. For my kitchen I didn't want the hinges to be visible, but I also didn't want to retool everything to add hidden hinges.
The solution was white hinges. They're not totally hidden, but they also don't call attention to themselves.
What About Laminate Cabinets?
And finally, does this work on laminate cabinets? Yes, with one little modification. If that's you, be sure to check out my newly updated post on how to paint laminate cabinets.
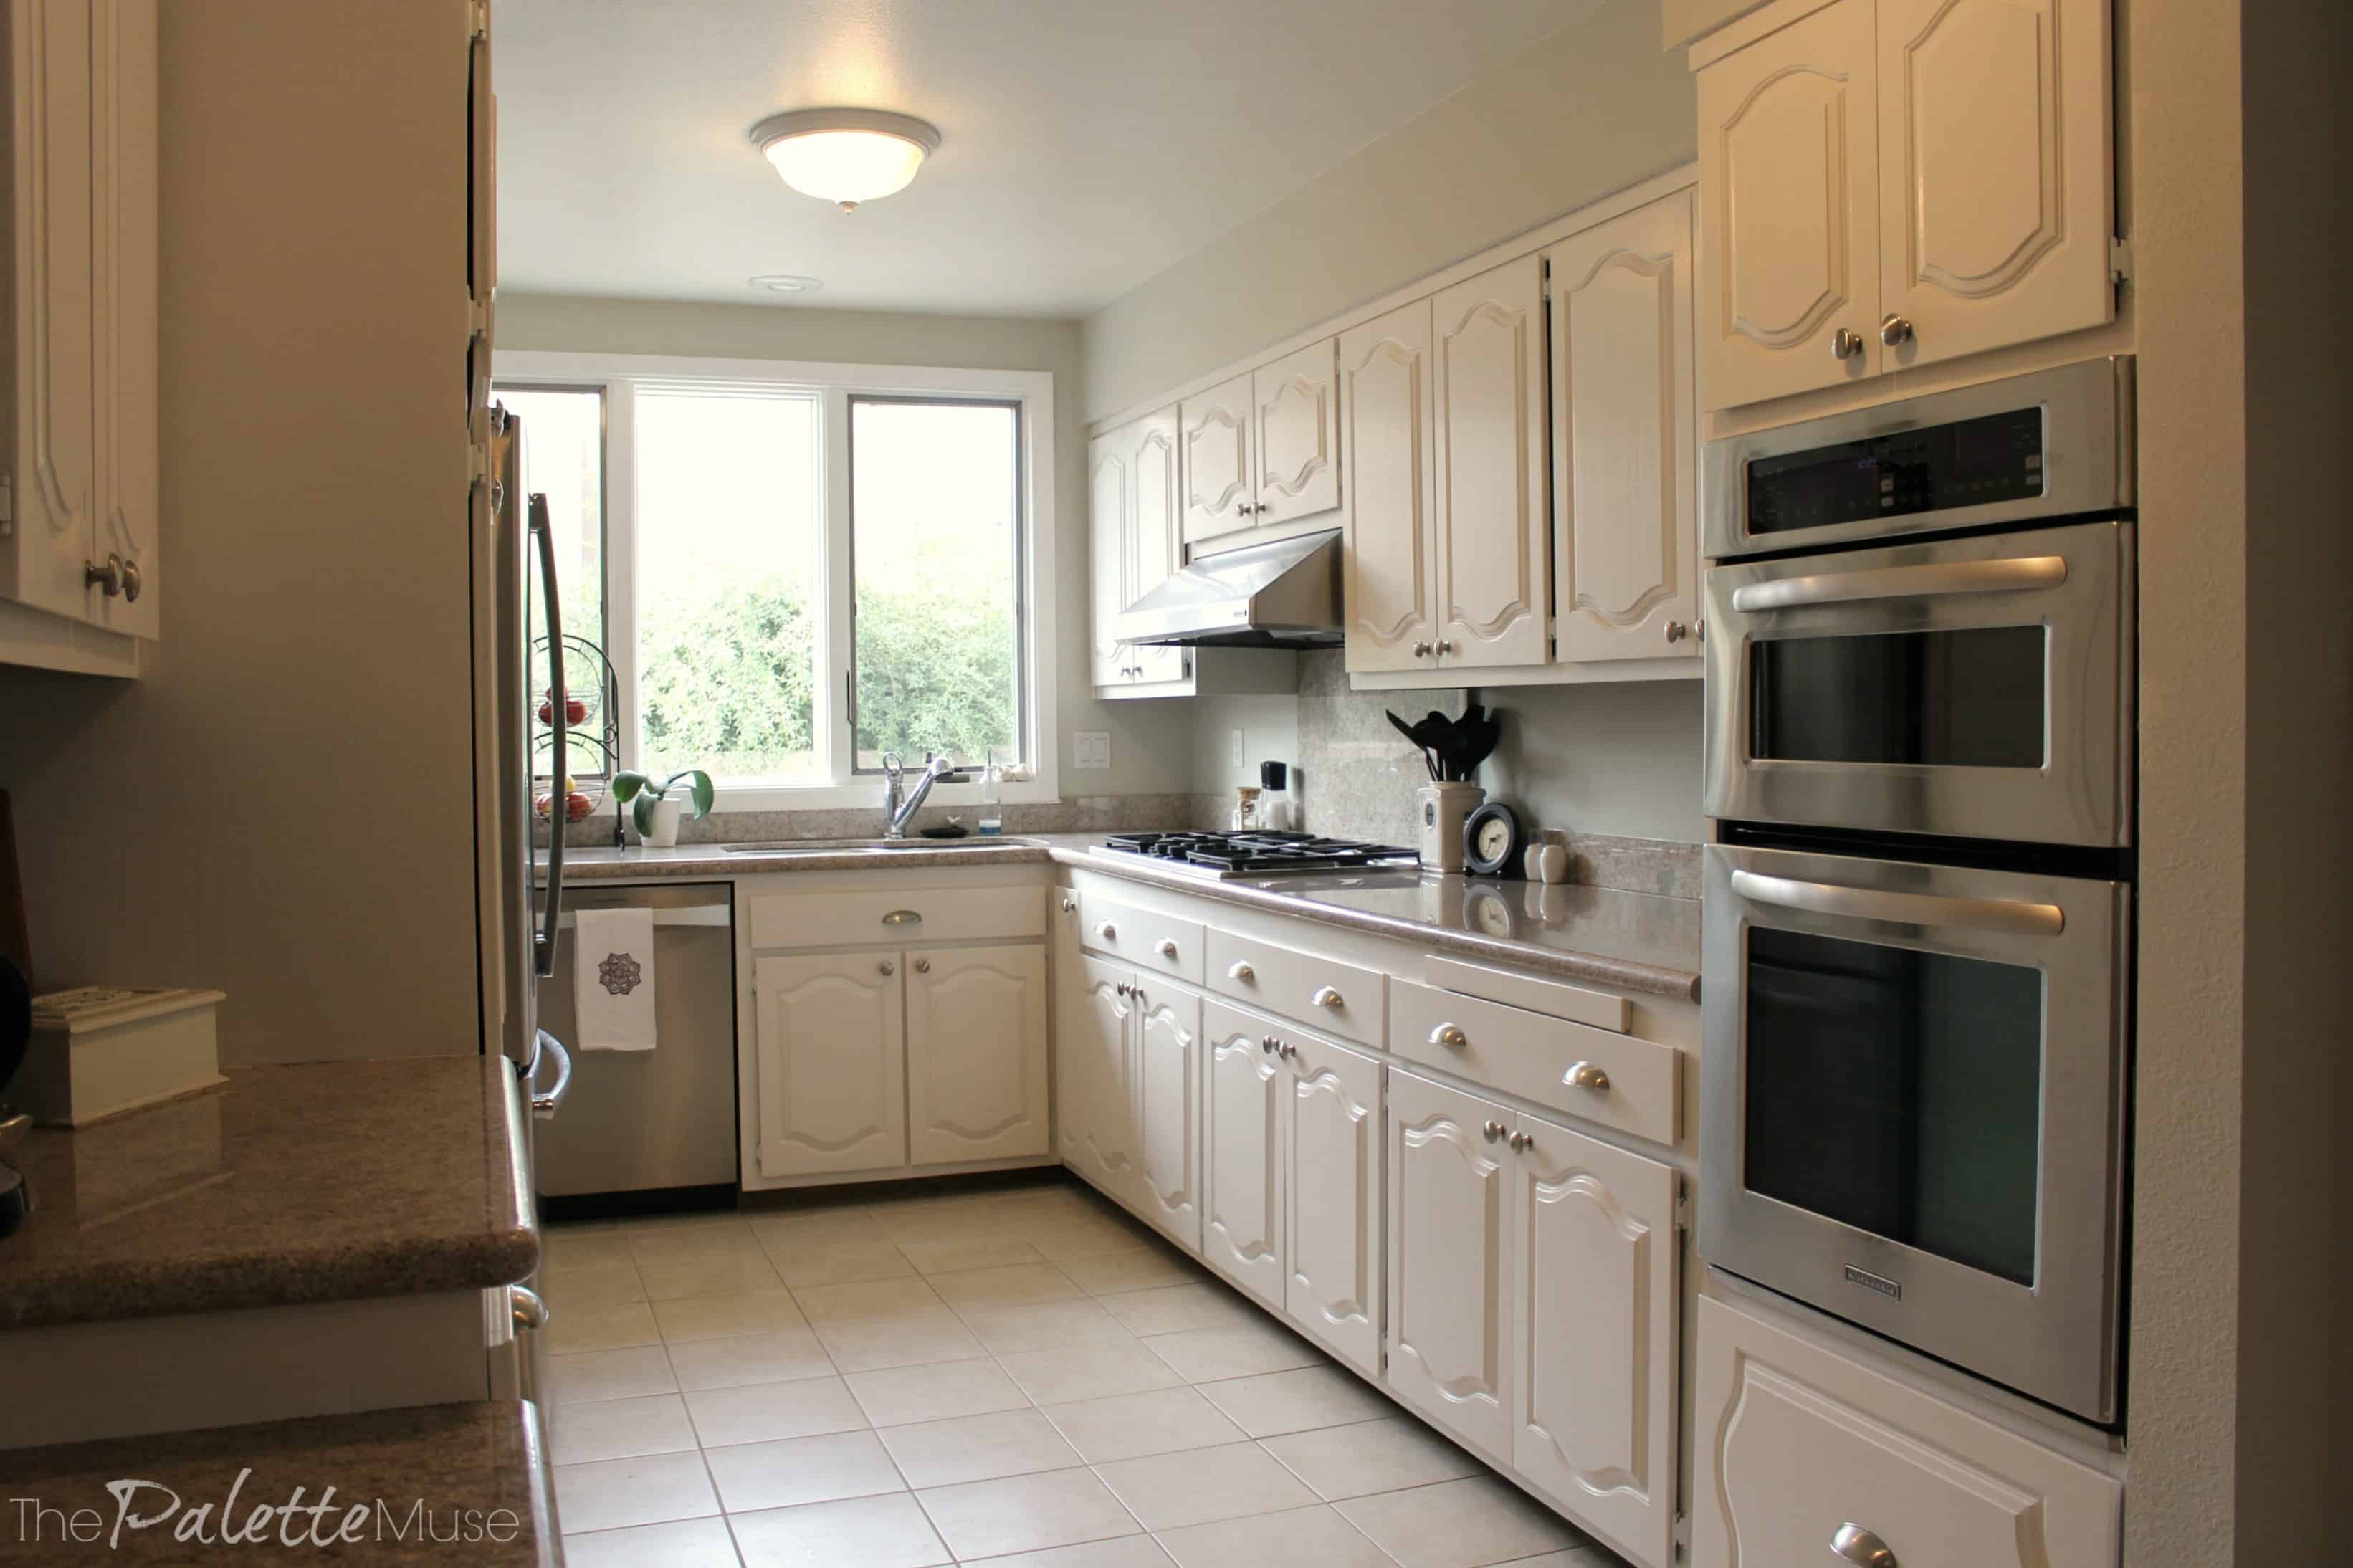
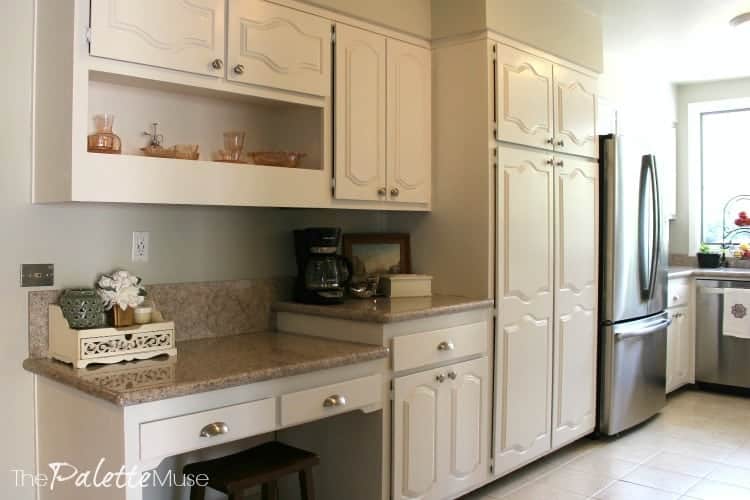
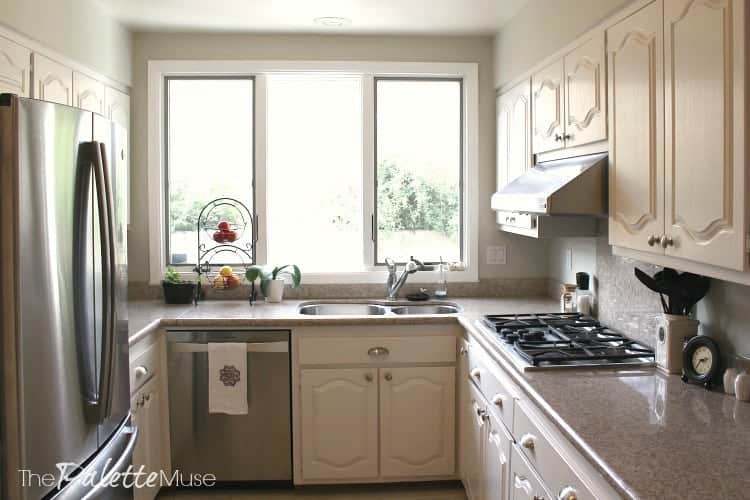
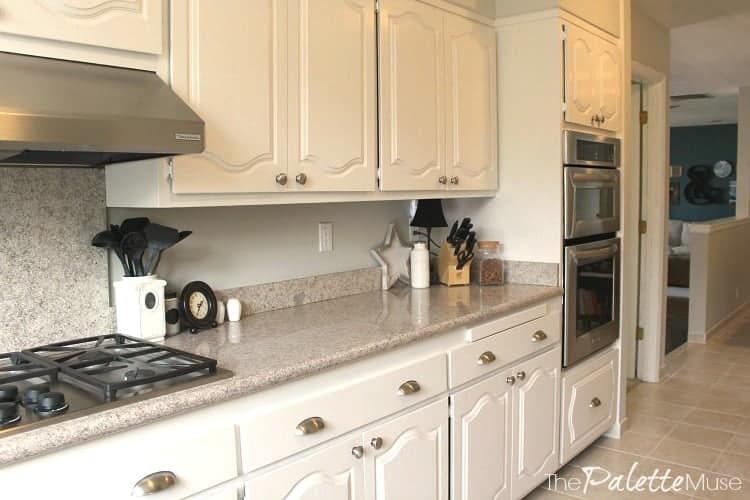
Now it's your turn... what's stopping you? And as always, let me know if you have any questions. I love to help! Well, I'm not actually going to come over and help you paint, but I'm happy to virtually help! In the meantime, here are the "After" photos for inspiration. Feel free to pin and share!
Update: I've had so many wonderful questions about this process and the Decoart and D. Lawless products, that I've written a follow-up post. Before you get started, be sure to check out the Frequently Asked Questions and How They're Holding Up post for all the details. And finally, I've also written a post on what not to do when painting cabinets about the most common mistakes and how to avoid them. Hopefully that one will save you some trouble along the way!
And finally, as if this wasn't enough information to digest, I've written a comprehensive cabinet painting ebook that answers most of the questions you'll find below and in the other FAQs post.
The biggest question is how to get the DecoArt products, which is becoming more of a problem lately. I answer that and what products I'm recommending instead in the book. If you're having trouble sourcing the right kind of paint for your cabinets, give it a read!
The Best Way to Paint Kitchen Cabinets
Painting kitchen cabinets can be overwhelming, but here's how to make it easier. You don't have to empty out your whole kitchen because no sanding is required!
Instructions
- Clean cabinet doors with Krud Kutter or hot soapy water.
- If needed, prime cabinet door fronts with Zinsser BIN Advanced Primer, using roller and paintbrush. Don't worry about the edges of the doors yet.
- Paint cabinet door fronts with Satin Enamel, using roller and paintbrush.
- Label cabinet doors and remove them from the frames of the cabinets.
- Repeat steps 1-3 for the cabinet frames.
- Paint the edges and insides of the cabinet doors.
- Reattach doors.
Notes
It may seem counter-intuitive to leave the doors on the cabinets when painting them, but it gives you a perfect work space, and this paint will not drip or run so you don't need them to be horizontal while painting. They can dry in place, all while leaving your kitchen workable during the project.
Recommended Products
As an Amazon Associate and member of other affiliate programs, I earn from qualifying purchases.


Alison Kennedy Todd says
Happy to report that DecoArt Americana Decor Satin Enamels are available again! After doing my lowers pre-covid, I was despairing that I was going to have to find a substitute paint and have 2-tone cabinets, but checked one last time before committing, and lo and behold, my paint was back in stock! Followed the original post method on the lowers, with the 7-day primer, but am looking forward to using the BIN Advanced primer today, and painting the color coats tomorrow. Original cabinets holding up extremely well! Thank you for this no-sand method! It stands the test of time!
Sarah says
Wow, this turned out awesome! I had a update my kitchen cabinets a few months ago, and ever since then, I've had the itch to change up the vanity in my master bathroom. I think I'm going to try out your process on my vanity! Wish me luck!
Sadie says
You had me at "no sanding!" haha We had update our kitchen cabinets and we love how they turned out so much that now we want to DIY paint our old, outdated bathroom vanities too. Your post is so thorough! Thanks for sharing!
Meredith says
Thanks Sadie! No sanding makes the whole process easier!
Jules says
Does the paint hold up? Are you constantly touching up?
Meredith says
Yes it holds up great! I do a few tiny touch ups about once every year or so, on the cabinets that get the most wear, but that's minimal. All paint needs occasional touch ups, but this paint has help up amazingly well!
Donna says
The results are beautiful! Do you have a process for touching up white painted cabinets that are showing some wear over time.
Meredith says
Thanks Donna! I just make sure to keep a little of the original paint. Then when I need to do touch ups, I clean the area with a slightly damp paper towel and use a small brush to dab a bit of paint onto the nicks. Easy peasy!
Cari L says
Can you paint over veneer cabinets this same way?
Meredith says
It's almost the same process for veneer and laminate cabinets. You can find more details about that in this post: https://thepalettemuse.com/how-to-paint-laminate-cabinets-without-sanding/
Gisele says
Your cabinets look great! Any tips about furniture painting?
Meredith says
Thanks Gisele! I would use this same process on furniture as well. It works great!
Lorraine Handford says
Thank you for all of this. I’m am not ready for a large project, but I think this will work just as well for my bathroom cabinets.
Meredith says
Yes, it's perfect for bathroom cabinets!
Marissa says
I car figure out how many jars to buy. My kitchen looks way smaller than your kitchen. I bought 8 bottles. Seven of pure white and one of taupe grey to mix. I saw how small the bottles are and I feel like it will never be enough. Realistically how many do I need for 13 cabinets (not ceiling height) and about 7 drawers and one side cabinet panel?
Meredith says
Hi Marissa, it's hard for me to say, since I don't know the measurements of your cabinets. I know each jar covers about 20 square feet, so you might want to measure before you decide. The paint covers more than I thought it would, so I know how you feel. Also, do you plan on painting the insides of the doors? Because that will take a little more paint too.
Terry Kmiec says
What about the grain from the oak cabinets
Meredith says
Great question! I cover it in this post: https://thepalettemuse.com/painted-kitchen-cabinet-faqs-theyre-holding/
Gigi says
I am right in the middle of this project, actually close to to finishing up. I am getting a little worried about the paint difference. You said you used the stain blocker which is no longer available. I dropped 1 drop of coffee the morning after painting the second coat on the cupboard door and it didn’t wipe off. Now I know it hasn’t had time to cure and I was able to paint over it. What do you all think?? Has anyone had problems with staining? -Just a little paranoid!
Meredith says
Hi Gigi, I see that I'm late in responding to your comment, but how is it holding up now? I haven't had any problem with mine, so I'm curious to hear what you found out.
Mike P. says
Love your method! Thanks for this. We were actually able to find some of the DecoArt Stainblocker that you mention you actually used on this project, not the Zinsser. I just wanted to ask how long you let the DecoArt Stainblocker dry for before applying the satin enamel paint?
Thanks!
Meredith says
Hi Mike, I think the primer is supposed to dry for a couple of days before painting, but we live in a dry climate so I went for it the next day. I'm curious to know what you did and how it worked for you?
Ariel says
I have two questions. I repainted all my cabinets when we first moved into our house about two years ago. (Not same brand of paint) But I’m starting get chipping, did you put any sealant on yours? Also, would I be able to use your brand over the previous?
Meredith says
Hi Ariel, I did not use sealer on mine, which is one of the things I love about this paint. If your previous paint is chipping or peeling, I would recommend sanding those areas first. There are two reasons for this. 1. The different levels of paint underneath will show through as imperfections on the surface. 2. You top paint coat is only as durable as what's underneath it, so if the original paint isn't adhering well, the top coat won't either.
Gena says
Thanks for sharing Meredith! Which white color did you use? Looking to do the same for my kitchen without having to sand!
Meredith says
Hi Gena, I used Bright White, with a tiny bit of Sable mixed in. It gave me a nice warm white. Best of luck on your project!
Carolyn Erickson says
How do you estimate how much paint to buy?
Meredith says
Hi Carolyn, the paint jar should say how much square footage each jar covers. Then you'll need to calculate the square footage of your cabinets, including frames and inside of the doors. Then divide that number by the amount given on the jar. That will be how many jars you'll need for one coat. Always round up and buy a couple of extra for insurance!
R Steel says
Any additional input if the cabinets being refinished are equipped with distressed finish? Would that mean sanding is still necessary? Thanks!
Meredith says
That's a good question. I would say that if the existing finish feels smooth and even to the touch, you should be able to paint right over it. If the distressing caused the paint to feel uneven or bumpy, due to the different layers of paint and sanding, then you should probably sand first. If you can't tell, try painting one small door and see if you can see variations in the finish after a couple of coats. (I know it's a pain, but probably less than sanding your whole kitchen unnecessarily.)
holly says
This was perfect! Exactly what I needed! Thanks!!
Chris says
What if the previous owner painted over the old finish with a different paint. Can I just use the decoart enamel over that paint or should I remove it first?
Patricia Cotta says
Does the Art Deco Paint only come in 8oz jars or does Hobby Lobby carry a larger size
Meredith says
Hi Patricia, I have only been able to find it in the 8 oz. jars. That's the only drawback!
Betty says
Hi Meredith! First, I'm painting cabinets very similar to yours, and seeing your finished product has me so excited. I'm also relieved by thus easier method! 2 questions:
First, I have already (fine) sanded half the cabinets. Do you think it will show a difference if I don't do the rest? Also, have you tried the all-in-one paint at all? Thanks for any suggestions!
Meredith says
Hi Betty, I'm glad you found this helpful! I think if you've already sanded part of the cabinets, you should probably do them all the same. (Sorry!) I'm just afraid that they might turn out looking a little different. Or you could always try painting one door of each to see how it looks. I'm not sure what you mean by all-in-one paint? You could check out this post for more info on other paint products: https://thepalettemuse.com/what-you-need-to-know-before-painting-cabinets/
Mayra says
What other primer can be used?
Meredith says
Do you mean other than the DecoArt brand? Here are some other ways to do it: https://thepalettemuse.com/what-you-need-to-know-before-painting-cabinets/
Tiff says
Would these same steps work for cabinet doors that are already painted?
Meredith says
Yes! These steps will work for painted cabinets, as long as the original paint is in good condition. It the paint is peeling or chipping, you'll probably need to sand first.
RhondasOriginals says
So I should be rescrewing the hinges back into their original holes as opposed to filling with wood putty and then shifting the location of the hinges and making new holes? I was afraid the using the original holes wouldn't keep them sturdy. Thanks.
Meredith says
I haven't had any problem with mine but you bring up an interesting point. I think if you're careful in removing and reinstalling them, you shouldn't have a problem with wonky hinges. If you do, you could always move them later.
Sharon Tafaro says
Hi-
Thank you so much for doing this tutorial! I am so excited to give this a try!
So, I'm pretty sure the cabinets in my old/"new" home have polyurethane on them.
Do you have any idea if the paint will cover over and stick well to polyurethane?
Thanks for your time
Sharon
Meredith says
Hi Sharon, my understanding from the manufacturer is that this product can go over poly, as long as it's in good condition. (Not peeling or chipping) I would say try it on a sample area first, and let us know how it goes!
Frances says
Loved the post.
Kim says
What if your cabinets have been painted previously? Can you still use this process?
Meredith says
Yes, as long as the previous paint is in good shape, with no peeling or chipping!
Taylor Flores says
Hi there!
What other paints do you recommend in place of the art deco, I can not find a large range of colors in it. I would like to use your method, but am afraid of not using the right type of paint.
Thank you!
Taylor
Meredith says
Hi Taylor! Yes, I've heard that from some of my readers, so I wrote this post: https://thepalettemuse.com/what-you-need-to-know-before-painting-cabinets/ to answer that question. You can find my other paint recommendations under the "Products" category in that post. Spoiler: I like Valspar Furniture Cabinet Enamel!
diana says
I love this and really want to try it but we have a TON of cabinets to do. The only size paint I'm finding is 8oz. Were you able to find larger containers of these?
Meredith says
Hi Diana, I had the same issue and I keep looking, but there only seems to be 8 oz jars. I wish DecoArt would make something larger too, at least in the white! I found that even though I had to use several jars, the cost was still worth it.
Sarah says
How much cabinet does each jar of paint cover? I'm trying to figure out how much to buy for my project. Thank you!
Meredith says
Hi Sarah, each jar covers about 20 square feet.
Jennifer says
Do you know if this will work on honey oak cabinets that have a polyurethane coating?
Meredith says
Yes, this should work great for that, as long as the finish is in good shape (no bubbling or peeling). I always recommend doing a test area if you're concerned.
Tessa says
I just read your tutorial- and this sounds super easy - too good to be true???
I wanted to know how the paint job is holding up at this point- still going strong or have you redone them? If you redid them, was it out of need or choice?
Anything you'd do differently? I"m moving into a house in a few weeks and I am thinking about using your tutorial to repaint my honey oak cabinets.
Thanks!
Meredith says
Hi Tessa, great questions! You might want to check out this article for more details: https://thepalettemuse.com/painted-kitchen-cabinet-faqs-theyre-holding/
The paint job held up amazingly well! I did have to do touch up painting occasionally on the highest traffic cabinet door, which was the one under my kitchen sink that held the trash can. But that was super easy. And yes, I did eventually redo the kitchen (just this year), but that was just because I wanted to move the appliances and countertop space. I was so happy with my paint job for about 7 years before that, and would have kept going except the cabinets themselves were falling apart. Good luck on your project!
Jen says
How do you determine how much paint you need?
Juliette Loewen says
If I wanted new hinges, clearly, I would Need to take doors off. Would it be OK to paint over old hinges with a paint stick?
Meredith says
You could paint over the hinges, but personally I haven't been happy with how that turns out. Maybe that's because I'm not very good with the details? I'd say try it before deciding whether to buy new hinges!
Mohamed Hashi says
Meredith, your guide on painting kitchen cabinets is a lifesaver! The detailed steps and practical tips you provide make this daunting task seem much more manageable. It's great to see how innovative products and thoughtful processes can transform kitchen cabinets with less mess and hassle.
Meredith says
Thank you! It's definitely manageable, and so worth the effort!
Meagan says
I have a really dumb question! What about painting the insides of the cabinets?! Thanks!
Meredith says
Hi Meagan, you can totally paint the insides of your cabinets, but I don't think there's any need to, unless you just want them to be all the same color. Just be sure if you paint them, that you let the shelves dry really well for a few days before putting things back on them.
Shelby Charette says
How many containers did you use? I feel like this would take a lot of those tiny containers!
dwell44 says
Painting kitchen cabinets without sanding is a game changer! This method saves time and effort while still achieving a smooth, durable finish, perfect for giving your cabinets a fresh look with minimal hassle.
Wood staining says
Love this color! Almost finished with my kitchen cabinets. Dont know why i waited so long to do it. Used powder tsp and wore gloves. Water turned black from cleaning. Applied one coat tinted primer, two coats paint. Dont let lazy paint guy tell you he cant tint primer. This is so easy and seems like solid paint job.
Danielle says
Do you use a different size brush to do the inlay portion of the cabinet front or just the soft brush?
Meredith says
Hi Danielle, I use the same soft brush to paint along the ridges of the inlay, and the roller to cover the flat part. I find it helps to roll the flat parts first and finish with the ridges, to make it easier to blend.
Emma says
Can you paint over already painted cabinets?
Meredith says
Yes! You can paint already painted cabinets, as long as the finish is in good shape. If they're peeling or bubbling, you'll want to sand them smooth first.