What not to do when painting cabinets: 17 common cabinet painting mistakes that may derail your biggest home DIY project.
It's been a few years since I painted my kitchen cabinets (and my camper's laminate cabinets, and my bathroom's cabinets) and I'm itching to get my hands on a paintbrush again. Next up, my mom's kitchen.
But in the meantime, I've had a few conversations lately that reminded me there are a lot of ways to go wrong in painting your cabinets, so I thought it might be helpful to put together a list of what not to do when you're painting cabinets.
Of course, if you're thinking of painting your cabinets, be sure to read my comprehensive post on everything you need to know about painting cabinets for all the ways to do it right. But if you're like me, you might also need a few cautionary tales to put you on the straight and narrow.
How NOT to Paint Cabinets
Most of what I've learned in life comes from things I did wrong the first time. Let me save you the trouble.
This post contains affiliate links. If you make a purchase, I may receive a small commission at no additional cost to you.
I know that painting kitchen cabinets is an intimidating endeavor, and one you only want to do once. So if you're researching how to do it right, part of the education comes from what people have learned from doing it wrong.
Here is a list of all the things I've learned the hard way, plus several questions I've repeatedly heard in the comments on my other cabinet painting posts. Hopefully these will steer you away from costly and time consuming mistakes.
When Painting Cabinets, DO NOT:
Expect paint to cover defects or wood grain.
I get it. We're all trying to cover those 70's dark oak grainy cabinets. And paint is a wonderful thing! It lightens everything up, gives you a lovely satiny finish, and generally brings your kitchen into this century. All through the miracle of paint.
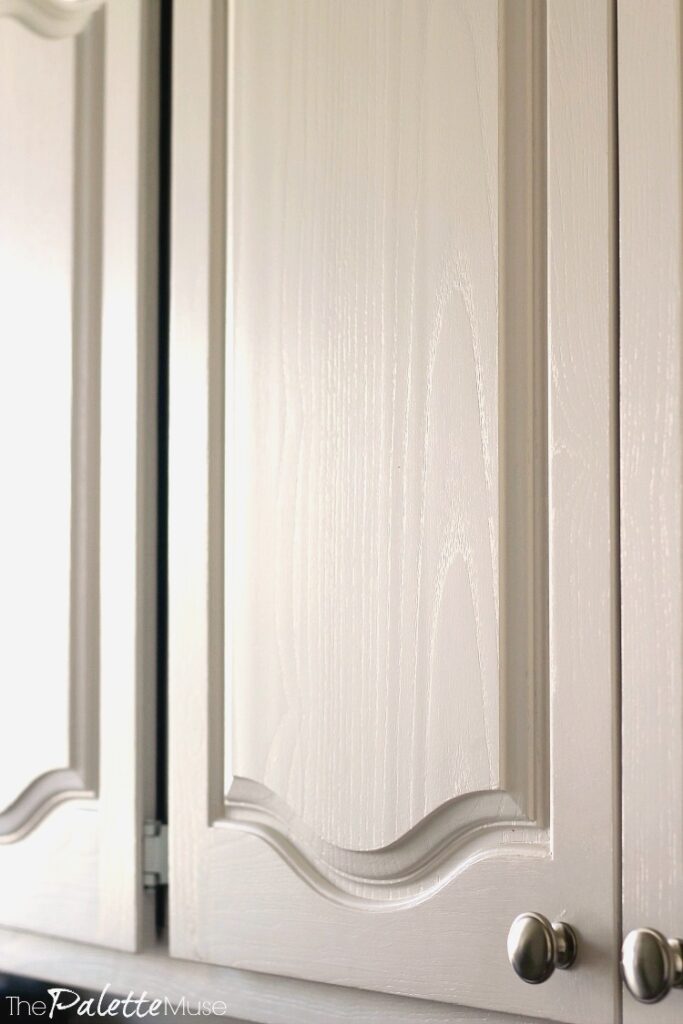
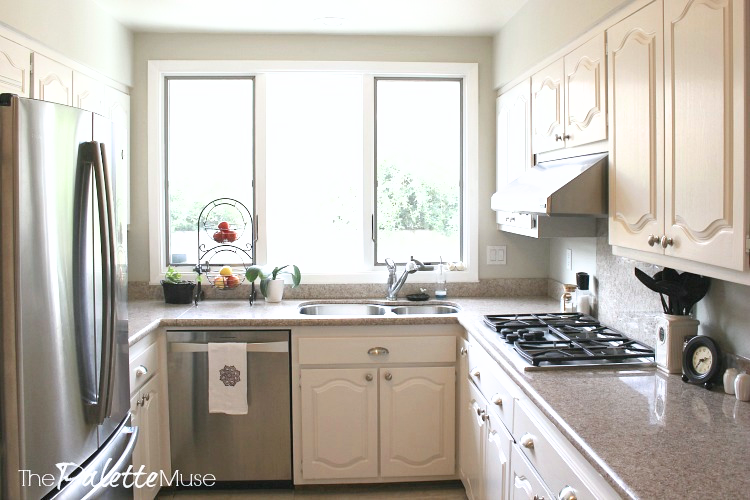
But one thing paint can't do is fill in and smooth out texture and wood grain. Sometimes this is a good thing, like in my kitchen where I wanted to be able to appreciate the solid wood custom cabinetry, while still updating the color. I chose to paint right over the oak, so that the texture of the grain would be subtly visible in certain lighting. I think it's a great compromise when you love your wood, but not the color.
However, if you want a perfectly smooth finish, without visible wood grain, there are products you can apply to the wood before painting, that will fill in the wood grain and give you a smooth finish. Check out my friend Rachel's post about how to cover wood grain before painting.
Paint over a broken surface.
This is hands-down the most common question I get about painting old cabinets, so let's settle this once and for all.
If your paint or laminate/veneer is peeling, chipping or water damaged, you need to fix that first before painting over it.
Similar to the wood grain issue above, paint will not make surface texture issues disappear. Best case, you might be able to make them less noticeable by covering them with paint. But the worst case scenario is the peeling and chipping might continue over time, lifting up the new paint and making the problem even more obvious.
Take the time to repair and fill any damage with wood filler, and sand to a smooth finish, before attempting to paint over it.
Skip the prep.
This is also one of the most important things I can say to help you be happy with your paint job. DO NOT skip cleaning those cabinets!
Even though my cabinet painting method does not involve sanding, you still need to clean the surface well before painting. Trying to get paint to adhere to old grease stains is a losing game every time, and it's one of the main reasons that a perfectly applied paint job will start peeling and separating after drying.
Some people use teaspoon for this job, but I prefer Krud Kutter. It's an excellent degreaser, and is non-toxic and biodegradable. Plus it's easily available at most stores.
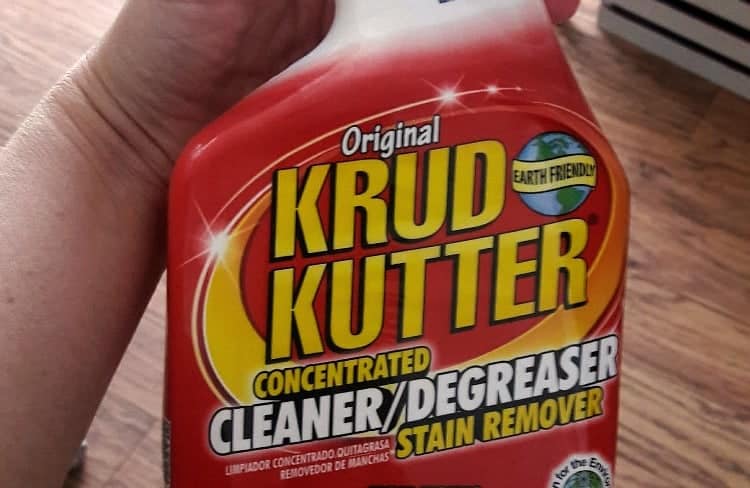
You won't believe what kind of grime comes off your old cabinets with this stuff! (It's always a little horrifying to me when I see what's been living on the surfaces in my kitchen.) Simply spray on and wipe off with a damp cloth. You may need a little elbow grease on cabinets near the stove.
Get in a hurry.
Read the instructions on the back of your paint can and let the paint dry at least as long as it's supposed to between coats. Pay attention to temperature and humidity because that can affect drying time. (I live in the desert, so this one's super easy for me!)
If you don't let the paint dry sufficiently between coats, it can cause smudging, dripping, and failure to dry to a hard, durable finish. And the worst part is, you may not see the effects until you're done with the whole project.
So be patient and take your time between coats. Future you will thank you.
Forget about curing.
Speaking of patience, let's talk about curing. If you thought watching paint dry was boring, wait till you try watching it cure! Curing is a little bit different, and longer, than drying time between coats. This is what allows the paint to develop into a hard enamel-like shell so the finish will remain strong and smooth over time.
The main thing with curing is not to let anything contact the paint for at least a couple of days or more after applying the last coat. I try to wait a week before reattaching hinges, hardware, and cabinet doors.
But a week might be pushing it, depending on the nature of your project. You can protect yourself during the curing period by covering any touch points with wax paper (after the initial dry time of course). The wax paper will keep the paint from sticking to itself or other things that come in contact with it.
If you've ever thought your paint was dry, only to have your cabinet doors stick closed, then you have a curing problem. The only way to prevent it is to follow the manufacturer's instructions completely and don't rush your drying and curing time.
Use the wrong paint.
There are only two paints that I will recommend from personal experience: DecoArt's Satin Enamels and Valspar Cabinet and Furniture. They are listed as Option 1 and 2 in this post. I am sure there are other great products out there (and if you're a paint manufacturer I'd love to hear from you) but these are the ones I keep coming back to after trying other options.
DecoArt Satin Enamels are slightly easier to use for the novice painter, but they can be a little harder to get, with less color options. Valspar Cabinet Enamel is easily available at Lowe's in endless colors, but is a little thinner, so be careful of drips when painting vertically.
If you try to use latex paint on cabinets, it may or may not hold up over time. I've had some good luck with a few furniture pieces that I slapped wall paint on, but I wouldn't take that risk on a whole kitchen.
What about chalk paint? That's a great question. You can use chalk paint on just about anything (hence its appeal) but it's a little finicky to get a smooth finish AND it needs to be covered with some sort of sealer to keep it from chipping easily. You can read more about the right way to use chalk paint in this laminate painting post.
Use the wrong brush or roller.
Getting the right tool for applying your paint is almost as important as picking the right paint. I always use and recommend a mohair roller and a soft synthetic brush. The soft bristle of the brush and texture of the roller allow the paint to go on smoothly, with less bubbles and stroke lines than with foam rollers or stiff brushes.
Also, be sure the brush or roller you're using is clean and in good shape. Sometimes I will wrap my brush or roller in plastic if I'm coming back to the project soon and don't want to wash it and let it dry. That's fine for small chunks of time, but don't use your brush or roller if it gets dried paint in it. That might leave you with streaks in the paint. When in doubt, get a clean, dry brush or roller!
Paint against the grain.
When I was a little girl, one of my chores was to dust the coffee table. My mom drilled into me the idea of dusting with the grain of the wood. Picture Daniel-San and Sensei in the Karate Kid and you'll have an idea of what our Saturday mornings looked like. I definitely rolled my eyes, but it did teach me the importance of going with the grain, which applies to painting as well.
If the wood grain on your cabinets is vertical and you are painting in horizontal or circular strokes, that will be visible in the final product. Try to follow the grain as much as possible, which will help make the grain less visible and your paint finish smoother.
Overwork the paint.
Have you ever been painting a section next to a half-dried section and your wet paint starts dragging in the semi-dry paint? So frustrating! Overworking the paint can leave you with streaks and brush marks.
The way to prevent overworking is to paint on in small sections, and don't pull your wet paintbrush or roller into drying paint. If you work in small sections, the edge of the next section will blend seamlessly into the first section while they're both wet.
When in doubt, wait for the next coat. If you find yourself in the position of working into a section that's already been drying for a while, simply wait till the next coat to address that section. Once the first coat is good and dry, you can go back over it with no problem.
Apply paint too thick.
If you find globby paint or drips developing in your paint, you may be using too much paint at a time. This will make it harder to dry and harder to get a smooth coat of paint on. It's tempting to think that slapping more paint on at each coat will save you future coats of paint, but unfortunately that's not how it works. Several lighter coats of paint is safer, easier, and in the end will save you time.
(If you're wondering, you really can't apply too thin a coat of paint, you just may need more coats.)
Skimp on paint coats.
As long as you're allowing for adequate drying time between coats, you can't overdo it on number of coats. Especially for the beginner painter, I recommend painting more lighter coats. Yes, it feels a bit more tedious, but the finished result will be worth it.
Until you reach the right number of coats of paint (usually 2 or 3) your paint job will look streaky and uneven. Don't panic! This just means you're not there yet. Keep going and you'll be pleased with the result.
Use the wrong sealer.
Let's talk about sealers for a second. I get this questions a lot because people just do not believe you can put paint on cabinets and that's all you need. I suppose in the old days you needed a sealer on top of the paint to keep it from chipping, but today's cabinet paints are made with that technology built in.
If you use the right paint, you do not need a sealer. At all.
In fact you're not helping your project, and might be hurting it if you apply polyurethane over your paint job. Over time poly will tend to yellow in the sun. So your gorgeous white cabinets might end up looking slightly buttery as the poly ages. This won't happen with the cabinet enamel paints.
The one exception to the no-sealer rule is when I paint bookshelves or table tops. If you're painting a horizontal surface that will encounter lots of friction over time due to dishes or books sliding over it, you could seal it with a polyAcrylic. Acrylic won't turn yellow and will add a layer of protection. But it's just not necessary on cabinet faces, doors, frames or drawers.
Use furniture wax as a sealer on kitchen cabinets.
Speaking of sealers, please please please do not use wax to seal your cabinets, even if you are painting with chalk paint. The paint is fine, but the wax is not.
Wax can be used on certain pieces of furniture and decorative items to cover chalk paint, but it doesn't work in the kitchen. It will accumulate grease and grime over time and cause more problems than no sealer at all.
If you are painting over an old piece of furniture or cabinet that's been sealed with wax, you will need to completely sand off the wax layer before attempting a layer of paint. Ain't nobody got time for that!
Sand first.
Yep I said it. Do not sand first.
This is hands down the most controversial claim of this whole post. And indeed my whole stance on cabinet painting.
Here's the deal. If you use cabinet paint that is specially formulated for this process, and you correctly clean your cabinets first, there is no need to sand them before painting.
I have tested this theory multiple times throughout my house, my camper, and my flip houses and I can confidently state that sanding is not necessary.
Now there's nothing wrong with doing it, if you want to go old school. It just makes a mess and takes up a lot of time. But have at it if you just can't stand the thought of skipping this step.
I did this myself in my first kitchen cabinet painting project, and it worked, but it took soooooo long. And you know what? My more recent paint jobs have held up just as well over time as that one did.
If you use the right paint, you can save yourself hours of dusty work, not just at the beginning of the process, but in between each coat.
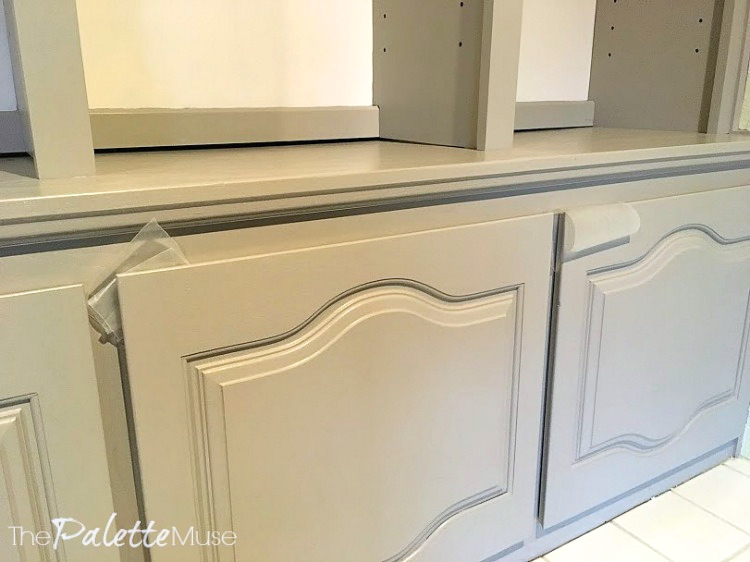
Forget to label doors and hardware.
You guys. I cannot stress this enough. Label all your doors and hardware! Before you take them apart! I promise you will not remember what door went to which cabinet after a few days and several shuffles of drying doors. Do yourself a favor and use the simple raffle ticket labeling method I covered in this post.

Pick the wrong color or sheen.
This is a tough one. Picking paint colors can be tricky. Be sure to test out the colors you like on a cabinet door before ordering all your paint. That way you can look at the paint in different places around the kitchen, and at different times of day.
Paint sheen is a little easier to decide on. Personally, I think "satin" is the right amount of gloss for cabinetry and most furniture. Fortunately, DecoArt's Satin Enamels already come in that sheen. The Valspar Cabinet Enamel comes in either flat, satin, or semi-gloss.
I could see using flat for certain furniture applications, and semi-gloss would work for trim, or if you just like a glossier finish on your cabinets. But you can't go wrong with satin!
Expect your paint job to last forever.
It pains me to say this, but paint is not eternal. Much like when you get a knee replacement or have heart surgery, you will probably have to re-address the problem some years into the future.
The BIGGEST question I get about my kitchen cabinets is how are they holding up?
Listen, I get it. Painting kitchen cabinets is a big job, and you never want to do it again. And if you do it right, you won't have to for a looooong time. But nothing lasts forever, and everything in your home needs maintenance over time.
Even if you buy painted cabinets from high-end manufacturers, they will tell you that movements in the wood will cause some defects over time. And high-touch areas get the most amount of abuse, which will lead to some inevitable chipping.
This is not your fault, nor is it the paint's fault. What I do is keep a little jar of paint on hand, and about once every year or two I go around with a small paint brush or Q-tip and touch up the tiny chips that have developed. It takes me about five minutes, and is the easiest home maintenance job on my list.
Way better than gutters or cleaning window screens, and so worth it for a pretty kitchen!
Now it's your turn
I hope these tips on what not to do to your cabinets have helped prevent some heartache along the way on your project. It may sound like a lot, but once you get a few of the basics straight, you'll be on the right track to a beautiful new kitchen. And don't forget to check out my comprehensive post on how to paint your cabinets, for the rest of the details you'll need to know.
Did I miss anything? Have you learned something the hard way that you want to share? I'd love to hear from you! You don't have to do this alone, and I'm happy to answer any questions, so drop me a comment below.


Nicole says
Thank you so much for this post. We were having a hard time painting our RV cabinets because the paint is chipping and you just gave us so much information and knowledge and my husband’s been painting for years but not so much RV laminated cabinets. I think we do need a synthetic brush and I know that they had brushes next to the Valspar paint at Lowe’s for cabinets. I’m wondering if that’s what you’re referring to is the best one to use.
Meredith says
Yes, I'm not sure exactly which brushes you're referring to at your store, but they should be very soft and smooth. Good luck, I hope this helps get you back on track!
Stacey says
Recently painted my entire kitchen cabinets, my concern is do I need any kind of sealant ? Worried about cleaning incase of splatter of sorts, its is water-based cabinet paint, not much of shine kinda dull look ..any suggestions appreciated.
Meredith says
Hi Stacey, it would help to know what kind of paint you used? Do you happen to have the brand or a picture of the can you could share? Thanks!
Allison says
Hi! I'm buying some cabinets that were already painted with Benjamin Moore, looks like semigloss. They look OK, but I would love a smoother finish. How would you go about this? Is this a case for some sanding qnd repainting with one of the paints you mentioned? Or should I strip them? I considered waxing bc I love the color already, but you just convinced me not to. (We're getting used cabinets bc they're cheap --,coming out of a renovation).
Meredith says
Hi Allison, do you mean a smoother finish because you can see/feel the raised brush strokes from before? If so, you'll need to sand and start over. Or do you mean that you want a glossier finish? If so, you could probably just put a coat of glossy polyacrylic over them, if you love the color already. I'm curious to hear what you decide!
Tammy says
I am wondering what your advice is on painting a kitchen table and chairs to match the painted cabinets? Is the prep and paint the same for sitting and eating surfaces?
Meredith says
Hi Tammy, yes you can use the exact same process for the chairs and table as you would on the cabinets!
Meg says
You didn't mention priming - a crucial step especially when painting over dark wood to prevent tannins from bleeding through.
I always prime before painting, not only for the above reason, but also to give the paint something to grip on to and give a better, longer lasting finish.
Liz says
Totally agree with your comment about sanding. As a professional cabinet painter I only sand in the beginning to sand off grease and grime if Krud Kutter doesn’t do the job.
Constance says
If there is al ready paint on your cabinets that has chipped in places- like around the knobs, do you then need to sand it before priming.?
Meredith says
Yes, if you have any chipped paint, it's better to sand it smooth first before trying to paint over it. Otherwise you'll see faint texture differences in the paint.
Marie Zaccaria says
Hello,
After reading everything, Nothing really was mentioned about spraying verses painting a Laminate cabinets.
Can you spray your cabinets if so can you use:
No sanding
TSP/Krud Kutter
Kilz product ( should it be oil based or water) spray vs Paint
Then your paint color ( spray vs paint)
Could you please provide your exbert advice.
Meredith says
Hi Marie, great questions! I cover them in this post: https://thepalettemuse.com/how-to-paint-laminate-cabinets-without-sanding/
WL Homeowner Research says
This is a helpful “learn from my mistakes” style guide. Skipping prep and rushing cure time are probably the two biggest cabinet-painting problems homeowners run into.