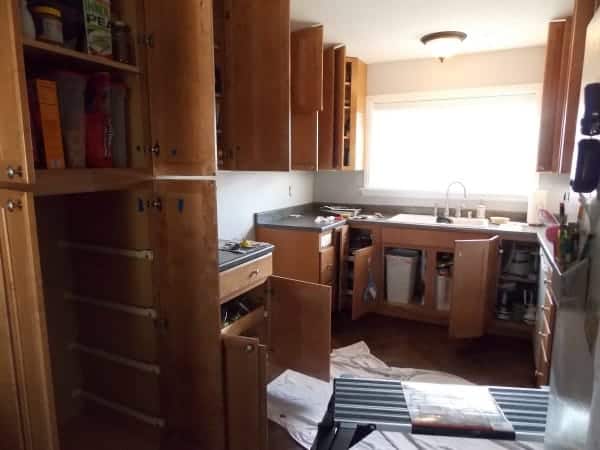
I'm halfway through painting my kitchen cabinets, and I thought I'd take a little break to update you and share a few things I've learned along the way. I'm planning a comprehensive "How To" guide when I'm finished, but while the paint is drying between coats, I've got a few previews.
Here's what I've learned so far in repainting my kitchen cabinets:
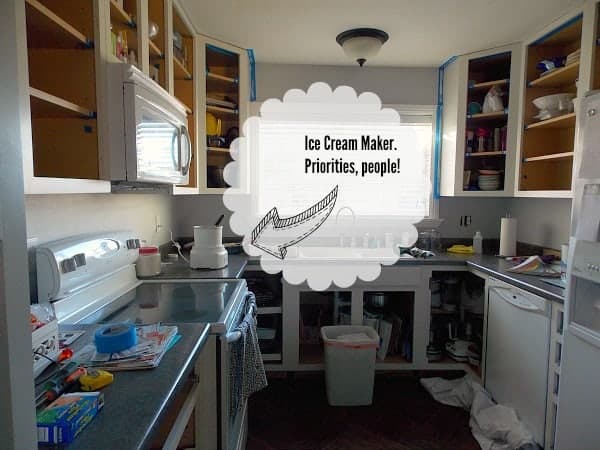
- Small kitchens are a blessing in disguise.
- Priming and sanding both have their place. I'd love be able to just do one or the other, but they each serve different purposes.
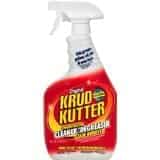
- Krud Kutter is my new best friend. I couldn't believe the stuff it cleaned off my cabinets. I wish I'd been using it all along. My kitchen will be cleaner than it's ever been when I'm finished with this project.
- Tearing up your kitchen the week of Thanksgiving is probably not the best idea. (To my friends who warned me about this, I give you permission to say "I told you so.")
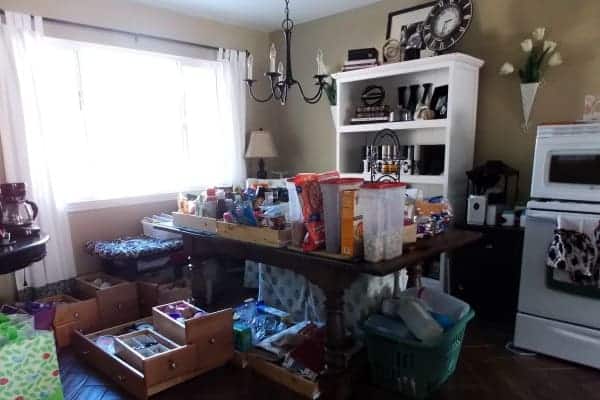
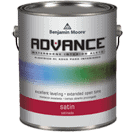
My dining room. No Thanksgiving dinner happening here! - Benjamin Moore Advance paint is worth it. It's a waterborne alkyd, which essentially means it performs like an oil paint, but cleans like a waterbased paint. It's got a longer drying time, so you have to plan around that, but that means it levels better (no streaks or brush marks!) and performs better in the long run. And since I'm never doing this project again, I want it to last!
- Mohair rollers. The best way to hand-paint without leaving marks. They're so soft you almost want to wear them.
- Don't overwork the paint. Rollers have a nap (direction the fibers lay). Find it and go with it. Rolling back and forth is what leaves marks and bubbles, so try to roll the paint on in the direction of the nap and keep going. It will level out as it dries.
- Label. All. Your. Doors.

(Pin this raffle ticket system for labeling cabinet doors.) - Leave your coffee maker and supplies out when you're packing away all your kitchen stuff. This project needs coffee. Often.
- For a smooth, professional finish, use 320 grit sandpaper between coats.
- Be patient. Let the paint fully dry before sanding and re-coating. If you sand too soon you will freak out as the paint starts coming off.
- You can cook almost anything with a microwave and a toaster oven. And last, but certainly not least...
- It's got to get worse before it gets better.
Boxes are painted and appliances are back in place.
Bonus #14: I've since learned of a better way to paint cabinets. Check out my updated Cabinet Painting Tutorial.
Someday everything will get back to normal, but first, I have to get the cabinet doors painted! Wish me luck, and I hope if you are taking on a project like this you've been encouraged by these tips.
Also, I know you've all been waiting with bated breath for the results of my paint color poll. So without further ado, I'm happy to report that the chosen paint color is... Valspar's "Totten's Inlet". (I don't know where they come up with these names.) As one of my reader friends so helpfully pointed out, "White is white." Now that I see it in person, I do think I could have gone with any of the three colors I was choosing between. Oh well, I sure appreciate all my friends' and readers' help figuring that one out!
Here is my current supply list, in case you're wanting a sneak peak before we get to the final reveal.
KITCHEN CABINET PAINTING SUPPLY LIST:
(Contains affiliate links)
- Sandpaper: 100, 200, 320 grit
- Sanding Block
- Orbital Palm Sander and replacement sanding pads
- Paint
- Primer (tinted close to paint color)
- Small Mohair Roller and Handle
- Synthetic Bristle Brush (I actually like the cheap foam brushes)
- Paint Trays (I cover mine with foil, so I don’t have to clean it every day!)
- Microfiber Cloths
- Rubbing Alcohol
- Drop Cloth or Floor Coverings
- Blue Painters Tape
- Krud Kutter
- Screwdriver for removing hinges and knobs
- Caulk or Wood Filler
Stay tuned for my final reveal and tutorial on painting kitchen cabinets!


Jeri Walker-Bickett (@JeriWB) says
I would love to try the Benjamin Moore Advance paint on my doors and closets. I painted a few of them before we moved out of our house for a couple of years, but got frustrated at the brushmarks and how finicky oil-based paint can be. Is it okay to use the Benjamin Moore paint on top of something that has been painted with oil paint with say just gritting it up a bit with sandpaper, or would some other type of prep need to be done?
Meredith says
Yes! It can go on top of oil paint, with just a light sanding first. I've been really impressed with the finish of this paint. And it cleans up like a dream. None of the downsides of oil paint. One thing I would say though is that I needed 3 coats to cover my medium-dark cabinets with white, so if you're repainting with a light color, you might want to go with a primer first.
Johanna says
I have tried to convince my mom we should repaint her kitchen cabinets!! Maybe I'll "give" that to her for Christmas...
Meredith says
Based on my experience with my little bitty kitchen, that would be a very generous gift! (Mostly in terms of time.) 🙂
Ken Dowell says
I was once invited to a relative's house for Thanksgiving. They were remodeling their kitchen. Couldn't cook at all. So they ordered a turkey from a local deli. Only problem was the deli closed at noon and they were planning dinner a 6. So they stuck the turkey in the fridge and ended up serving everything, turkey, stuffing mashed potatoes, gravy, ice cold. I still remember it as the worst Thanksgiving dinner I ever had.
Meredith says
Oh no, that sounds terrible! Fortunately, my mom hosted this year, and her kitchen was in good working order. It was nice to have a place to go, to get a break from the project.
andleeb says
I am living in a country where we have to get help of professional painters to paint our homes. But I am very inspired by your posts and I feel humans like me can also do this 🙂 .
I will look forward your guide and all tips are amazing I understand that even when we get our homes painted we make many mistakes in packing things.
OOOH sad about Thanks giving dinner. But you can have a party afterwards to amaze many.
Yesterday my daughter was saying that her friend has painted flower on walls and we do not have and ask painter to make them. May be on some point you can guide to make flowers on walls as well.
If you want to have a look on what I am talking I can share a picture with you.
Thank you.
Meredith says
Yes, Anna, send me a picture and I'll see if I can figure out how you can make the flowers!
Leora says
I admire you so much for doing this project! Maybe I will learn enough to paint my kitchen door. And get rid of those scratches.
"Small kitchens are a blessing in disguise." - I say this often about my yard!
Meredith says
Yes, Leora, it's true about yards as well! (And probably many other things in life.)
Arleen says
I think your timing would have put me over the edge, but you got it done.Taking before and after photos really help you appreciate what you did. I painted my kitchen cabinets and then after 10 years decided to buy new ones. The only reason I did is that the hinges were starting to fall off as after 40 years my cabinets had enough.
Meredith says
Wow, 40 years is a good long life for cabinets and hinges. I think they earned their retirement!
lenie5860 says
Meredith, I applaud you. I hate painting, even though a coat of paint does brighten things up a lot and I do it for that reason. I just finished painting my laundry room a light blue which was a good colour to choose as it matched my language. Seriously though, this was a great tutorial and I will definitely tune in for the final installment.
Meredith says
I don't blame you Lenie, it is a chore! After this, I don't think I'll be painting cabinets again. (Famous last words!)
jacquiegum says
I am breathless form watching this! I could NOT admire you more than at this moment...okay maybe a little more when you finish but all I can do is...applause...applause! I know I don't have the patience or talent for this...so it makes the watching all that more fun!
Meredith says
Thank you Jacquie! It's like I've got my own little reality show going over here, you never know what I'll get myself into next...
Catarina Alexon says
You are really doing a marvellous job with your kitchen. Great advice even though I'm not familiar with the American products mentioned. Have never taken on a huge job like that but maybe one day I will:-)
Meredith says
Thank you Catarina! I'm sure they have similar products closer to you, if you ever take on a project like this.
niekkamcdonald says
What you have learned will definitely help me. I anticipate having some painting projects in the near future and I am going to refer back to your post.
Meredith says
Thanks Niekka. Good luck to you, and let me know how they turn out!
Noelle McNamara says
wow...well done for taking on this project yourself and especially at this time of the year...looking forward to the big reveal!!!
Meredith says
Thanks Noelle, me too! 🙂
Jason @ TheButlerJournal.com says
Heck of a project. I know I wouldn't have the patience to do it though.
Meredith says
I don't blame you Jason. Heck, I don't even know if I have the patience for it anymore! 🙂
William Rusho says
I like your posts. You not only state about what you do, but also how to do it. Thanks for sharing, and look forward to the nest one.
Meredith says
Thanks William!
Donna Janke says
I wish I'd known about Krud Kutter this summer when I was cleaning my house to sell and later cleaning the one we moved into. That's quite a project you've undertaken, but what I can see in the last picture, it will be worth it.
Meredith says
Thanks Donna! I wish I'd known about Krud Kutter sooner too. I think my whole house would be cleaner.
Pamela@haartfelt says
Wow...amazing. I know I say this every time i comment on your blot Meredith but I am totally in awe of people who posses DIY ability and talent. It's a world I'll never know. Even your"job in progress" looks totally organized! In fact your work area looks more pulled together than my kitchen on a normal day. What a big job to tackle right before the holidays...beautiful work!
Meredith says
Thanks Pamela! That's so encouraging, especially when I feel like this project is taking over my house! 🙂
Ashley @ 3 Little Greenwoods says
I am planning on painting ONE little bitty bathroom cabinet this winter and I am pinning this great list of tips! Can't wait to see how beautiful your kitchen is going to be!
Thanks so much for sharing this post at Show Me Saturday! Pinning!
~ Ashley
Meredith says
Thank you Ashley! And good luck on your bathroom, can't wait to see it!
Candice says
Wow painting a kitchen...Great tips! Thank-you for linking up to Blogger Brags Pinterest Party. I have pinned this post!
Meredith says
Thanks for Pinning!
amy says
I am planning to paint my cabinets in the near future and appreciate your tips. I like your numbering system. Did you leave the inside of the cabinet doors the original color? Thanks!
Meredith says
Hi Amy, glad to be of help! Yes, I painted the insides of the doors, but not the insides of the cabinet boxes. That was the most natural division of where to stop painting. You could leave the doors unpainted on the inside and get away with almost half the work, but I thought it looked more "finished" to do the insides. Best of luck on your project, and be sure to check out my full tutorial, linked at the end of this post.
Cene says
I used porch paint w primer built in - Behr premium & liquid sander. Mine have held up very well. I also did touch ups by the knobs.
Meredith says
Porch paint is a great idea! That's what I have on my front door.
Cene says
Felt like i needed a hip replacement surgery after sitting on the floor for so long. But - totally worth it !!!
Meredith says
Lol! Yes this kind of project is not easy on the body!
Home Jobs by MOM (@HomeJobsbyMOM) says
I think your cabinets look awesome! Painting them made a whole new kitchen!!
Meredith says
Thank you! I do feel like it's a brand new kitchen now!
deanne0625 says
Love this!! Do you think that the paint you used could be used in a wagner paint sprayer? Seems like it would be even easier if you could...I'm getting ready to do my own and would like to do an almond/ivory color cabinet with an umber/dark brown glaze. What do you think?
Meredith says
I think that sounds lovely Deanne! I do believe you can use this paint in a sprayer, but you'd probably want to double check with your Benjamin Moore store to make sure. Since it's an Alkyd paint, that might affect how you thin it, if necessary. (I'd love to hear what you find out!) And I love the idea of creamy colored cabinets with a dark glaze. Let us know how it goes!
Emily says
Hello! You say that you used Benjamin Moore paint but then at the bottom of the post you said you chose a Valspar color. Can you clear this up? I am planning on painting my cabinets soon, I have started the sanding process. Thanks!
Meredith says
Hi Emily! What that means is I picked a color from the Valspar line, but then went to Benjamin Moore and had them use that color formula in their paint. Hope that helps, and good luck on your cabinets!
Rachel says
Beautiful work! My cabinets have those type of hinges. For this project, did you remove both parts--that is, the hinge attaching the door to the frame and the part attached to the door itself?
Meredith says
Thank you Rachel! Yes, I did remove both parts, to make it easier to paint the inside of the cabinet door. It was a little more work removing and replacing them, but I think it made for a nicer finish on the doors.
Rachel says
Thanks so much for the answer! Good to know!
Janet says
You are amazing, I am going to stalk your blog now. I am in the process of painting my bathroom cabinets and I'm using the exact same paint. I have sanded and primed, I'm waiting to paint until we have a sunny weekend. I started this project Thanksgiving week!! I made a note not to do the kitchen Thanksgiving weekend. I have two cabinet boxes, doors and drawers, open shelving and medicine cabinets primed and ready to be painted. I have my 320 sand paper on the ready. I had a lot of sanding to do because my cabinets had the baked on vinyl paint that really needed to be roughed up and I had some chipped paint as well.
I plan to do my son's bathroom and my kitchen within the next 6 months.
Janet says
About the mohair rollers. The BM Advance manufacturers suggest the micro fiber roller with 1/4 ' nap. Did you try those?
I still have some time to run out and get some mohair rollers if you think they are best. I put the primer down with high density foam rollers and they did a pretty good job, they really helped me to even out my brush strokes, I had to use a brush to get the inside beveling of my doors. I followed up by rolling out the brush marks as much as possible. I'm using a really thick, sticky primer because my cabinets were covered in that smooth baked on laminate paint. The good news is that I might only need two coats because I'm going white over white.
Meredith says
Hi Janet! Yes, I used the mohair rollers and they really are the best. Foam rollers can be good too, but you have to be careful of getting air bubbles. If it were me, I'd use the mohair rollers to save time in the long run. It's too big of a project to have to redo parts of it. Best of luck!
Brenlynwin says
I know it's been awhile since you posted this, but it's timeless & SOOOO helpful. I'm about to start painting the top cabinets in our kitchen to lighten it up, & your posts have helped tremendously. THANKS so much! <3
*drives to hardware store*
Meredith says
I'm so glad this was helpful for you! You're going to be so happy you did it!