This week of the $100 Room Challenge has been all about small progress. I always look forward to the big reveal, and get a little antsy during the tedious work stage, but I know it will be worth it in the end. 
~ This post contains affiliate links. If you make a purchase, I may receive a small commission at no charge to you. Thanks for supporting The Palette Muse! ~
Decluttering is one of my favorite things in life. Not that you'd know it if you popped over for a visit right now. With four people and a dog in our family, we generate our fair share of mess. (Have you ever noticed that messes multiply themselves in more of a logarithmic curve than an incremental one?) One day there's one sock on the floor, and the next day it's been joined by its partner, another pair, a jacket, and several open snack containers. How does that work?
In this case, my specific challenge was our bookshelves, and the black hole of cabinets beneath them. Believe me, these three cabinets hold far more than their mere size would suggest. Another odd law of clutter physics.
So I set to work throwing out the things we were no longer using and trying to bring order to the things that we want to keep. Once I had a handle on the clutter, I rewarded myself with an DIY closet door makeover that instantly updated the room!
$100 Room Challenge Closet Door Makeover
Let me show you the trick to easily painting your closet doors, without having to remove them.
As a quick reminder, here's where we started: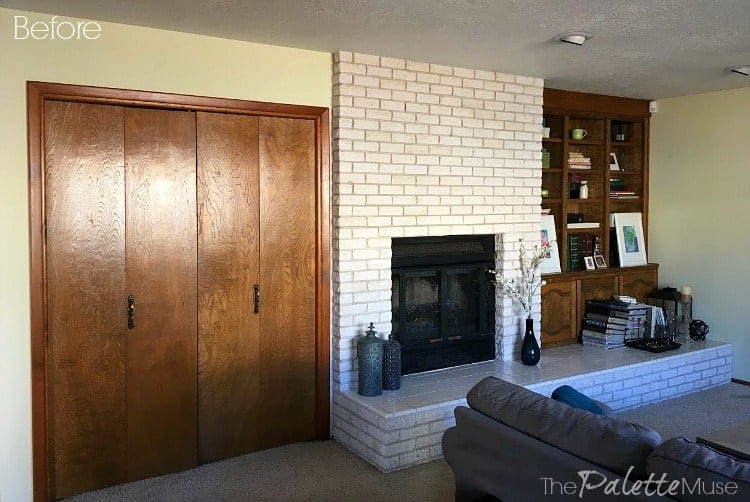
The first step with any painting project is always to clean your surface well. I just wiped these doors down with a slightly damp paper towel. I removed the door handles by unscrewing the screws on the inside of the doors. There's no need to remove the doors or even the hinges at this point.
Then I rolled on a light coat of Kilz primer to help the paint adhere to the wood. (No sanding necessary unless your doors are in rough condition.)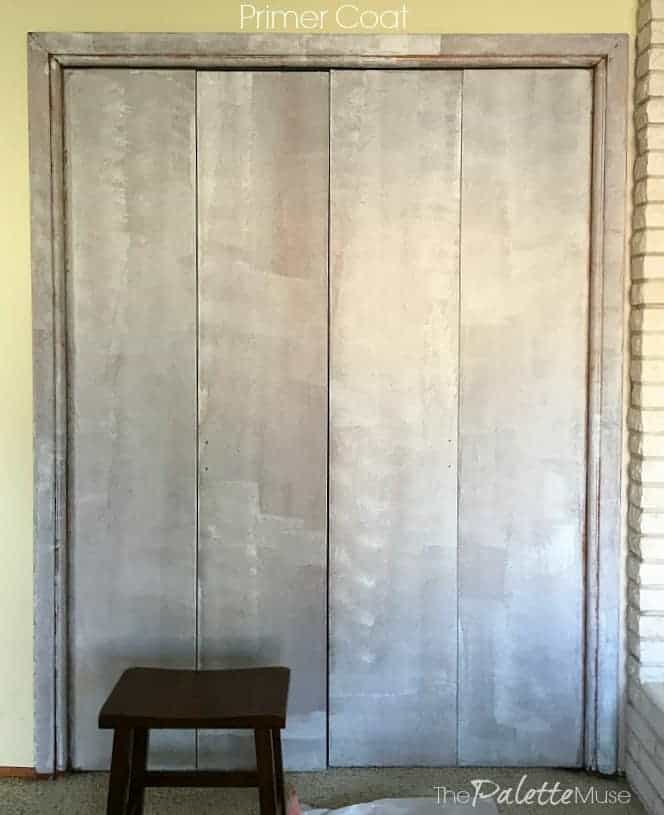
Wow, that does NOT look good!
Next, everything got a nice coat of paint. (You may need two coats, but I was pleasantly surprised to only need one.) I used Valspar Ashen Gray in Satin finish, and I used a roller for the larger areas, and my favorite wedge brush for the details and trim.
They're already looking better! But now there are some details to attend to.
First, I noticed while I was painting that there was a large gap in the corners of the trim pieces. Not to worry!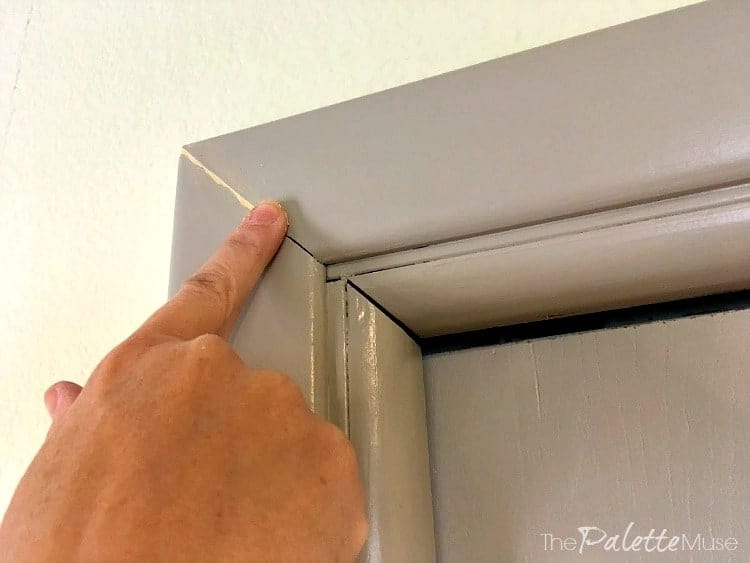 I just patched the gaps with a little wood-filler and gave it a quick coat of paint once it was dry. (I've also used caulk in the past for this purpose as well.) Voila! Invisible corners.
Second, the hinges are all painted over. That's OK, I did that on purpose. That's my secret trick to quickly and easily remaking closet doors. If you know you're going to be replacing the hinges (mine were all old and gross), simply paint right over them. Then once the paint is dry, you can carefully cut a line through the paint around the edge of the hinge and remove it.
Unscrew one hinge at a time and replace each one as you go. That way the the other two hinges will be holding the door for you while you do the work.
This way is much easier than removing the doors, taking all the hardware off, painting them, replacing the hardware, and then rehanging them. Whew, even that sentence is a lot of work!
Finally, the only thing left is to replace the ugly old door handles with new stylish ones, and these doors have a whole new look! (When you're picking out new door pulls, try to find ones with screw holes that match the width of your existing holes. This will save you from having to patch and paint the holes that are already in the doors.)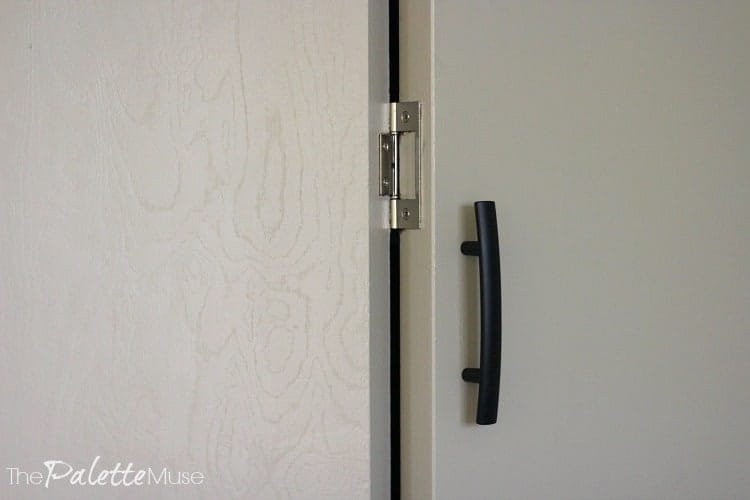
So far the only cost to this project has been the door handles and hinges, since I already had the primer and paint leftover from countless other painting projects. The handles cost me about $8 and the hinges cost about $12, for a total of $20 out of my $100 budget. Not bad for a brand new look!
Closet Door Makeover Resources
To makeover your own doors, you'll need paint of your choosing (Mine was Valspar Ashen Gray in Satin finish) and the following:
Roller brush and 6" fabric or mohair roller cover (Don't use foam as it will leave little bubbles on the smooth wood surface.)
Paint brush for trim
I know it's not super exciting to look at just the closet doors, but I can't show you what's behind them due to embarrassment. Suffice to say, that may be where all the clutter went that I cleaned up from the bookshelves and cabinets. Oh well, maybe this closet will be next on my $100 Room Challenge makeover schedule.
Instead I'll just show you my beautiful closet doors after their makeover: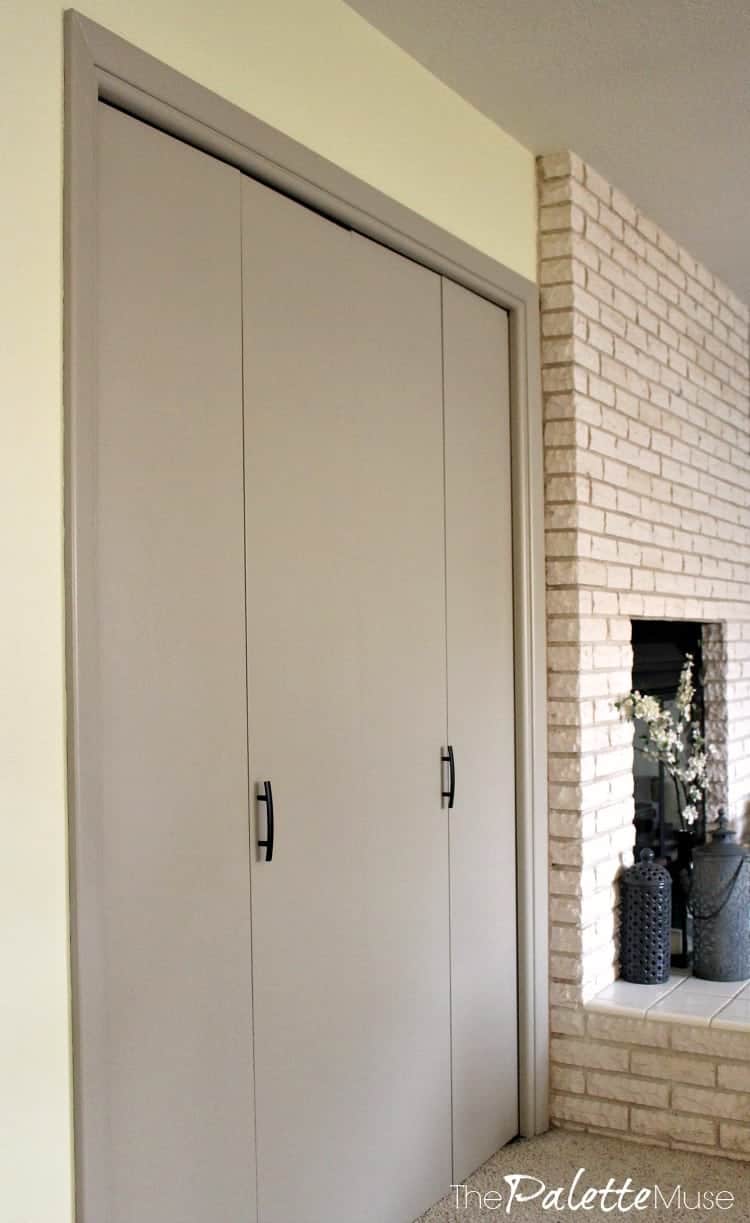
You think that's a big change? Wait till you see the cabinets next week!
Week 1 ~ Week 2 (You're here) ~ Week 3 ~ Week 4 ~ Week 5 (Reveal)
In the meantime, if you have sliding closet doors in your home, be sure to check out this post on painting and fixing them too.


Patti Estep says
Hey Meredith. The doors turned out great! Very modern and fresh. Looking forward to seeing what else you come up with.
Meredith says
Thanks Patti, that's exactly the look I was hoping for! Now on to the cabinets...
Jen @ Jenron Designs says
Wow painting those door really made such difference. I am happy to see another contestant doing a closet, tooo. I can not wait to see what you come up with for the inside.
Meredith says
Thanks Jen! The inside will have to wait for now, but I'm already looking forward to getting that done soon too.
Jeri Walker (@JeriWB) says
I'm now thoroughly acquainted with Kilz primer. My love used it to coat his kitchen cabinet doors. Since it's been cold out, he has them laying on plastic all over the downstairs floor. January perhaps is not the best month for redoing cabinets in a cold climate, but at least motivation has taken hold!
Meredith says
Don't worry, there's never really a good time for such a big project as that! Better started and someday finished, than never started for fear of the inconvenience!
meghemm says
Wow the doors look so good! It's amazing what paint can do, isn't it?!
Meredith says
You're so right Meg, it still surprises me every time!
Kristen says
Nicely done! I love that tip of just leaving the hardware on!
Meredith says
Thanks Kristen, I'm always looking for the easy way out!
Roxanne says
Wow, the power of paint never ceases to amaze me - the closet looks great!!
Meredith says
Thanks Roxanne, I'm always blown away at what paint can do!
Emy says
The doors look great! I love how they look against the brick now!
Meredith says
Thanks Emy, me too! Even the brick looks better, even though I didn't touch it!
Maria - House by the Preserve says
Wow! They look brand new! LOVE THEM!
Meredith says
Thank you Maria, I'm loving them too, although I had my doubts along the way!
Wendy says
Wow! What a difference paint makes!
Meredith says
I agree, Wendy! It surprises me every time!
Thehomeicreate says
They turned out great! The color and new handles gives it a much more modern look!
Meredith says
Thanks! I can't believe how long I lived with those old weird handles!
Erin Meyer says
The doors look amazing!!! Love the color! And what a great idea to just change out the hinges one at a time! Thanks for all the tips 🙂
Meredith says
Thanks Erin! I'm all about finding the easiest way out of a project like this one!
Annie Hardy says
Great Tips! Thanks for the tool list as well. Very helpful