It's easier than you might think to fix sliding closet doors and give them a professional paint job, for an entirely new look and function.
When we moved into this house, I didn't love the sliding closet doors in the bedrooms. Until I realized I could use this valuable real estate to help me get organized!
Closet doors are a necessary evil. They may be better than having to look at the messy innards of your closets, but usually not by much.
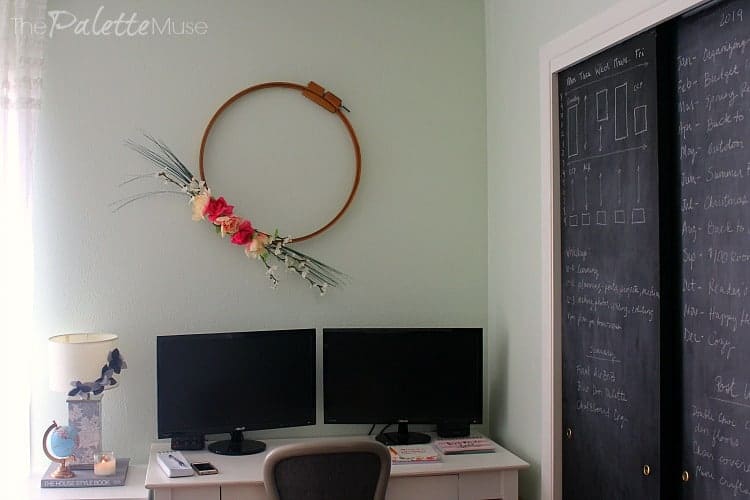
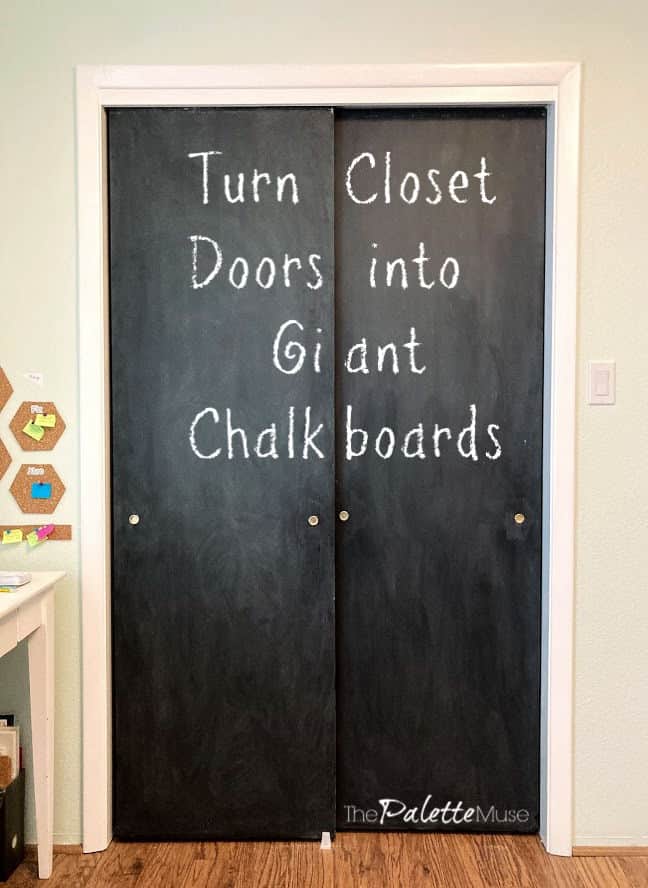
When I turned my closet doors in my office into giant chalkboards, I started seeing them not as a curse, but as a blessing to my creativity and productivity. Then my daughter decided she wanted the same blessing and she stole my closet doors!
I'm not even kidding. I came home one day from running errands to find my closet doors missing. She had figured out how to remove the doors and reinstall them in her room.
I was so impressed at her DIY skills that I couldn't be mad. Plus I figured if my 12 year old could figure it out, it might be a good tutorial for anyone else wanting to make a similar change.
Here's how to turn your sliding closet doors into a giant chalkboard, and a bonus tutorial on how to fix one of the most common problems with sliding closet doors, broken slider wheels.
This post contains affiliate links. If you make a purchase, I may receive a small commission at no additional cost to you.
How to makeover sliding closet doors with Chalkboard paint
When I first painted the doors in my office, I left them hanging and just painted them where they were. That worked fine, but I could have done a better paint job if I had removed them first. So that's what I'll be doing with my replacement doors.
(I didn't have the heart to take away my daughter's hard-won chalkboard doors, so I used her old doors to make new and better chalkboards for my office.)
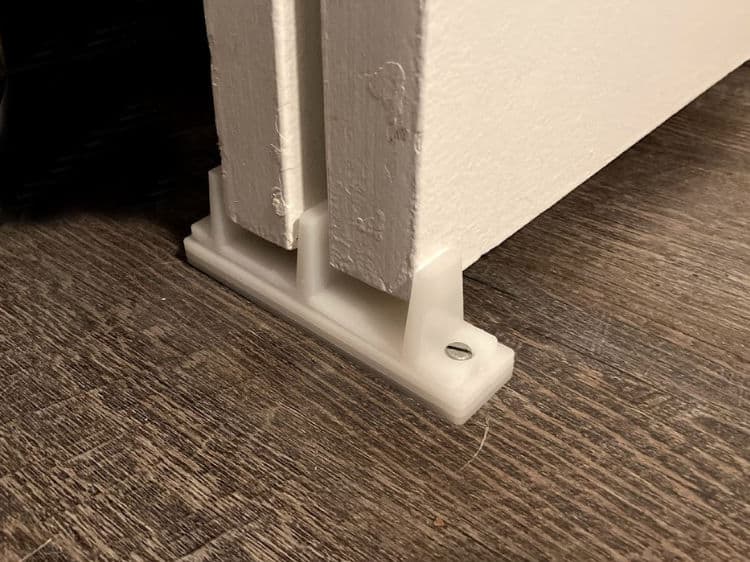
First, remove the guide-plate from the floor. This is a small, usually plastic, frame that keeps the doors from swinging in and out when you move them. Simply unscrew it from the flooring and slide it off the doors.
Tip: Save the screws by taping them onto the guide plate.
The doors are hanging from a track at the top of the closet, usually hidden by a piece of trim. You'll swing the front door out at the bottom and lift up off the track at the top.
Careful, it's heavy! You might want to get help for this part, unless you're a 12 year old girl with a deadline and something to prove.
Then do the same for the back door. Set the doors against a wall or on your floor for the next step, painting.
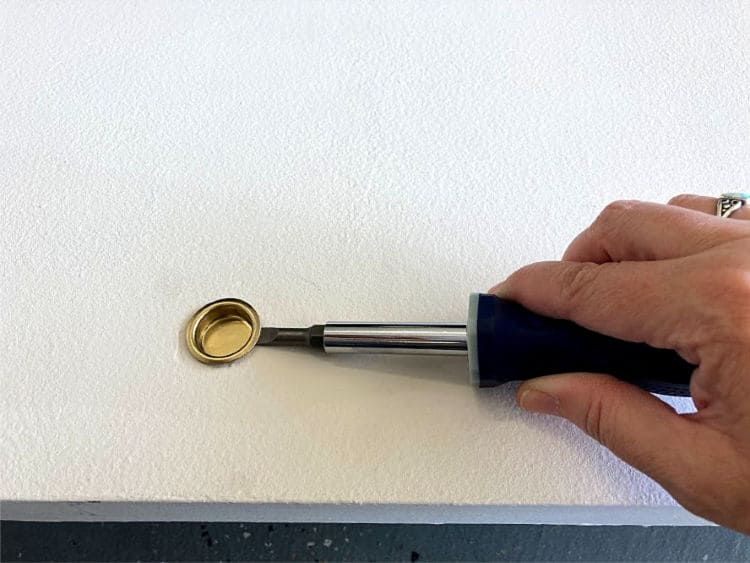
You might also want to pop the round handles off, to make it easier to paint around them. I tried to do this, but someone must have glued mine on.
(If you're simply repairing or replacing your doors without painting them, skip down to "Reattaching Sliding Closet Doors."
Painting a Door with Chalkboard Paint
Chalkboard paint is one of my favorite crafting supplies because it's so easy, fun, and useful. Several brand make a similar product, but I like Rustoleum's Chalkboard Paint.
Clean
First, clean your doors of any dust and dirt. You can use a slightly damp rag or paper towel.
Paint
Then use a 4 or 6 inch paint roller to roll a layer of chalkboard paint on, all in one direction, such as vertical.
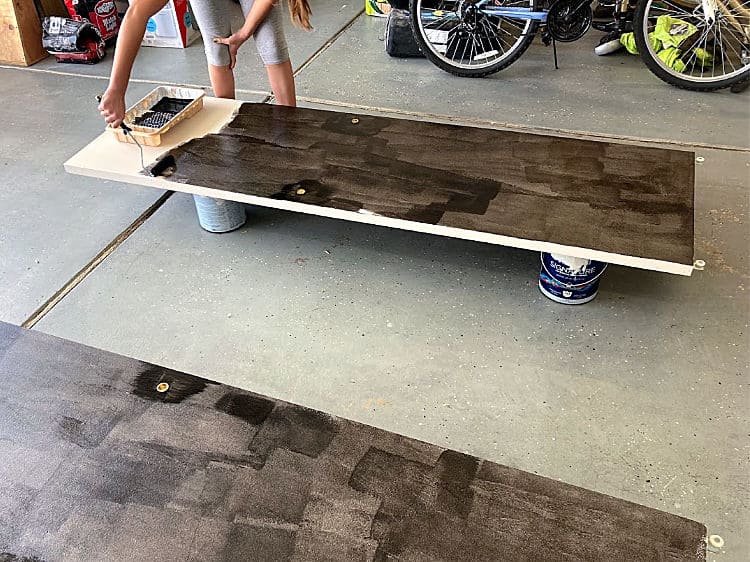
Don't forget to paint the edges of the doors!
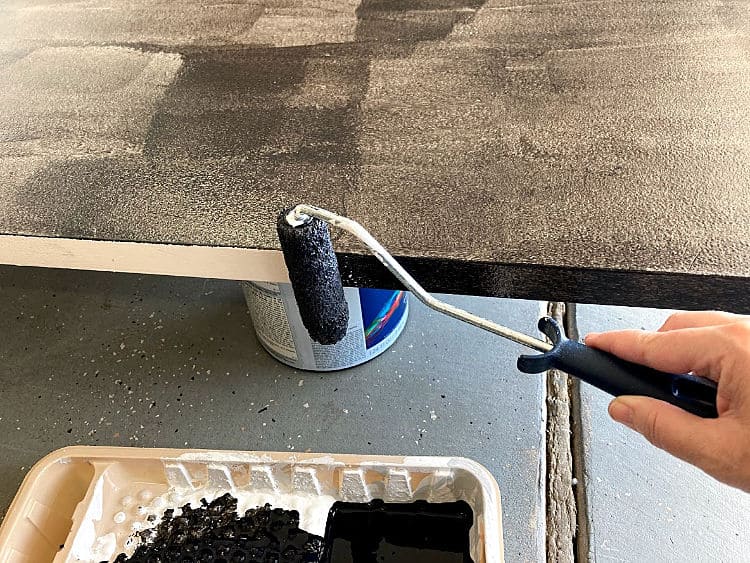
After the first coat is dry, roll another coat of paint on in the other direction, which would be horizontal if you went vertical first.

If there are any streaky or see-through areas in the paint, finish with a third coat in the first direction.
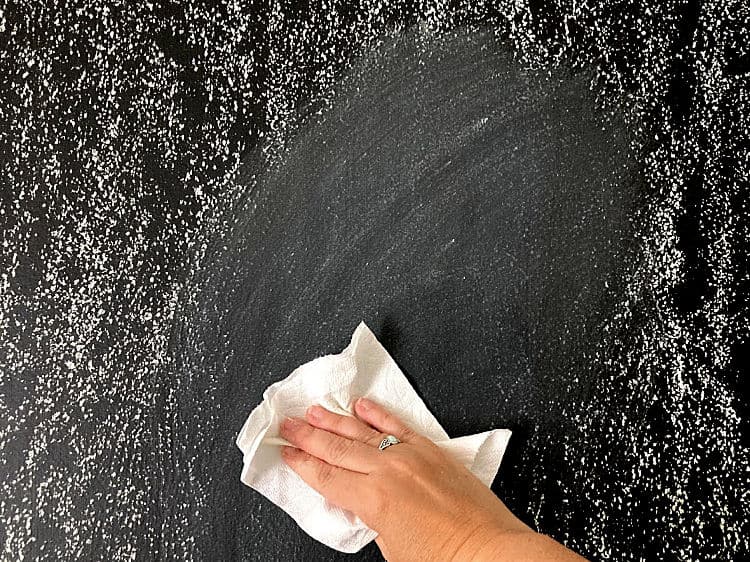
Season
Now you're done painting, but there's one more important step in creating a good chalkboard. Once the paint is good and dry, you need to "season" your chalkboard with chalk. This just means rubbing a piece of chalk all over the board.

(I don't know why this works, but I can tell you it makes a world of difference.)
I found the best way to do this was to take a big piece of my kids' sidewalk chalk, and rub it on its side. That's the fastest way to cover the most area.
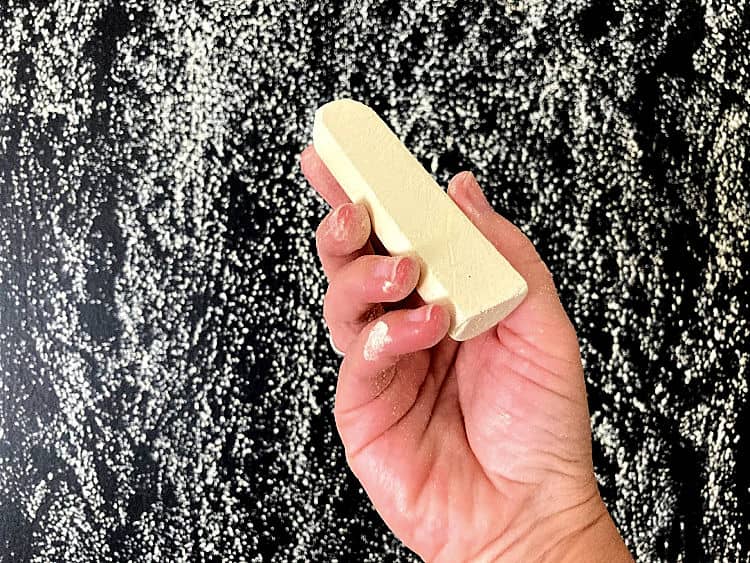
Then you'll use a chalkboard eraser or simply a dry paper towel, and erase all the rubbings. You'll be left a with a slightly cloudy chalkboard, which will accept new chalk much better than if there was no chalk dust on it.
Reattaching Sliding Closet Doors
To reattach your closet doors, hold the back door up towards the innermost top track, with the bottom of the door tilted out at about a 30 degree angle. Hang the door on the track, making sure both rollers catch the track. Swing the door back in so it hangs straight up and down.
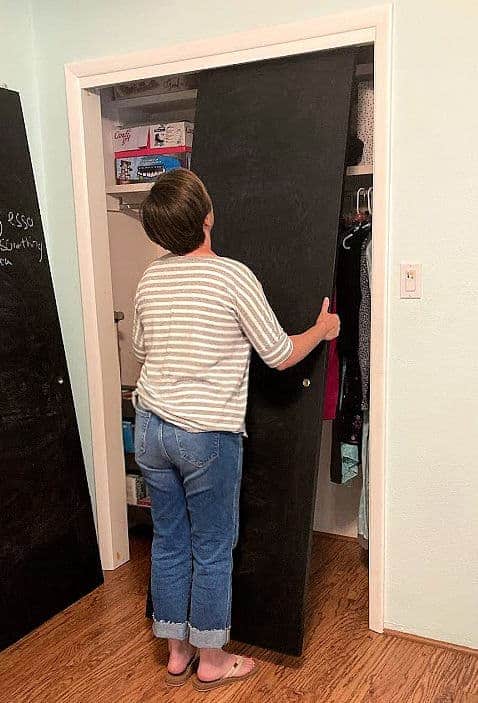
Do the same for the front door. You may not have thought about which door is in the front when you removed them, but I promise you'll notice now if you accidentally hung the front one first. You won't be able to angle the back one in if the front door is already in place. I speak from experience.
Now you'll attach the floor guide plate. With both doors rolled to one side, slide the plate onto the bottom of both doors. Screw back into place using the screws that you saved when you removed it.

That's it! Now you have doors that serve two purposes: keeping you from being embarrassed by your overflowing craft stash, and keeping you organized with a giant chalkboard for brainstorming and keeping track of thoughts.
Simple Fix for Sliding Closet Doors that Won't Slide
But what if, when you replace your doors, you notice they aren't sliding smoothly anymore? This happened to my daughter, and she thought she'd be in trouble for breaking something when she made off with my doors.
It turned out to be such a simple fix that I thought I'd share it with you in case you have the same problem. Don't worry, you can fix it for about $4!
(Hopefully you realize this problem before you've reattached your floor guide, because you'll have to remove the door again to do this part. Simply follow the steps above to remove the door.)
The problem was the little plastic wheel that slides along the track had cracked and broken, after 40 years of use.
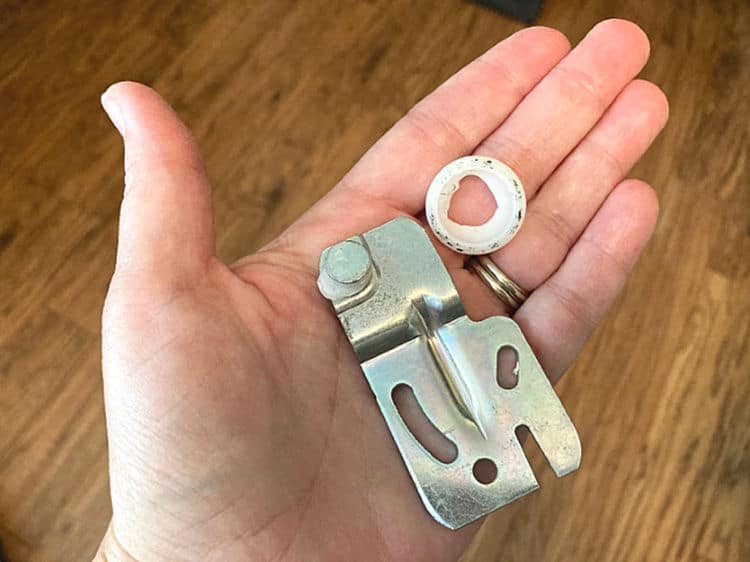
I did a little research and found they still sell exactly the same bracket at any home improvement store. Apparently we are not the only ones with 40 year old doors in our house.
Select the Correct Size Replacement Roller Plate
Be sure to buy a new plate with the same offset as your existing one. (The offset is the little bend where the plate meets the top of the door.)
They come in ¼" offset and ½" offset because in most sliding door configurations, the ¼" goes on the front door, and the ½" goes on the back door, to allow a little more room for them to slide past each other. Simply match your new plate to your old plate and you'll be good to go.
Lay the door on the ground, face down. Using a screwdriver, remove the old plate by unscrewing both screws.
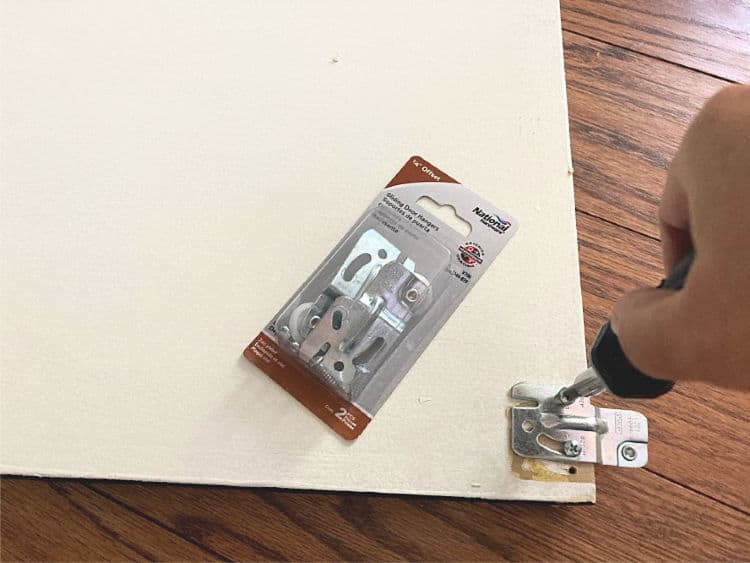
Then simply screw on a new plate. Easy-peasy!
Now you just have to rehang the door, following the instructions above, and enjoy the smooth sliding effects of your labor.
There's nothing more annoying than a rickety old closet door that threatens to fall off its track every time you try to get dressed in the morning. Don't put up with that, when you can fix it with a screwdriver and a $4 part from the home improvement store!
Better than New Sliding Closet Doors
Now you have brand new doors! Or at least doors that look and function like new, for a tiny fraction of the cost. Even better.
Soon we'll talk about how to organize that craft stash your doors are hiding, so be sure to check back for that, and sign up for my newsletter to get access to all my free printables.
And as always, let me know if you have any questions about refreshing your sliding closet doors!


Leave a Reply