Thinking of stenciling tile in your home? Here’s how this tile stenciling project made our fireplace makeover possible while staying in our budget for the $100 Room Challenge.
I learned something very important while working on this week’s challenge project: I really dislike stenciling.
But I love the effect, so I’m determined to press on. And I’m sharing with you some of the tips and tricks I’ve learned for stenciling tile.
First I want to say a big Thank You to DecoArt for providing the Chalky Finish paint for this project. Although this is a sponsored post, all opinions are my own.
$100 Room Challenge Week 4 – Stenciling Over Tile
Have I mentioned how glad I am that there are five weeks this January? I’m sure I wouldn’t be able to get this challenge done without that extra week. So far, I’ve painted my closet doors and the built-in bookshelf/cabinets next to my fireplace.
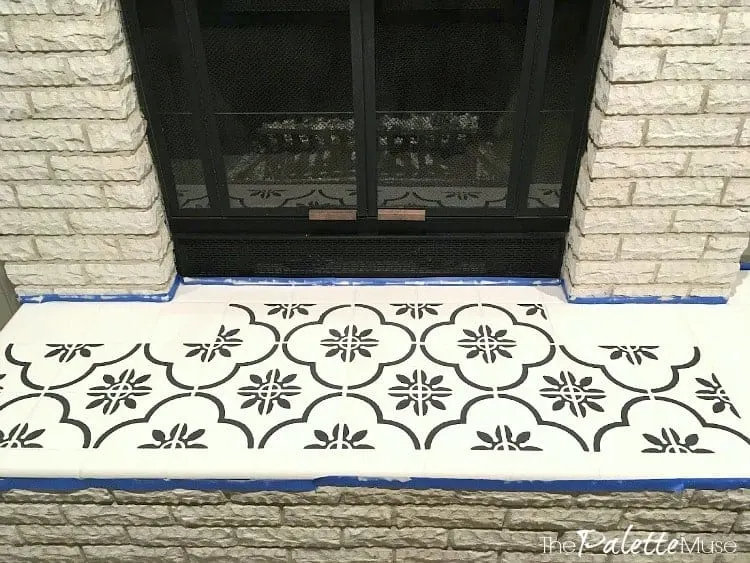
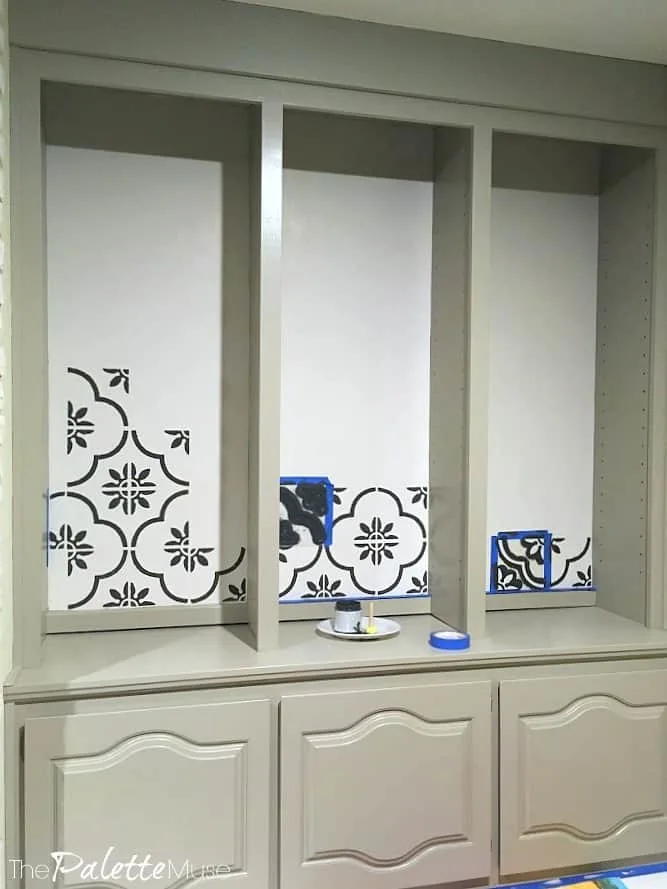
This week, I’m stenciling over the tile on the fireplace hearth in a concrete tile design. I’m also adding that same stencil design to the back of the bookshelves. Boy did that end up being more work than I anticipated!
No reveal photos yet this week (since I’m still working on the project), but that will make next week’s full reveal even more fun! At least that’s what I’m telling myself.
If you’re just joining me this week, welcome! And be sure to check out week 1, week 2, and week 3 of the challenge for a better idea of what’s going on.
Stenciling Tile
Let’s talk stencils. I was really tempted to make my own, using my Silhouette Cameo machine. This thing makes me feel like a design rockstar. I was going to design and cut my own stencil, but when I realized I needed a new blade and some new stencil material, I decided it would be a lot quicker and actually cheaper to order one.
I found this adorable shop on Etsy that specializes in this kind of thing, and I love supporting other designers and makers, so that was a no-brainer.
If you’re thinking of making your own stencil, Kati at Houseful of Handmade has a wonderful tutorial on how she did it, including a free download of her design, which is gorgeous.
If you want the one I used, as well as lots of other cute designs to choose from, you can find it here, at Pearl Design Studio’s Etsy shop.
I decided to go for a simpler design, since my tiles are only 6″ and I didn’t want the finished product to look too busy. There’s a fine line between “Awesome pattern!” and “Yikes! Too much!” Am I right?
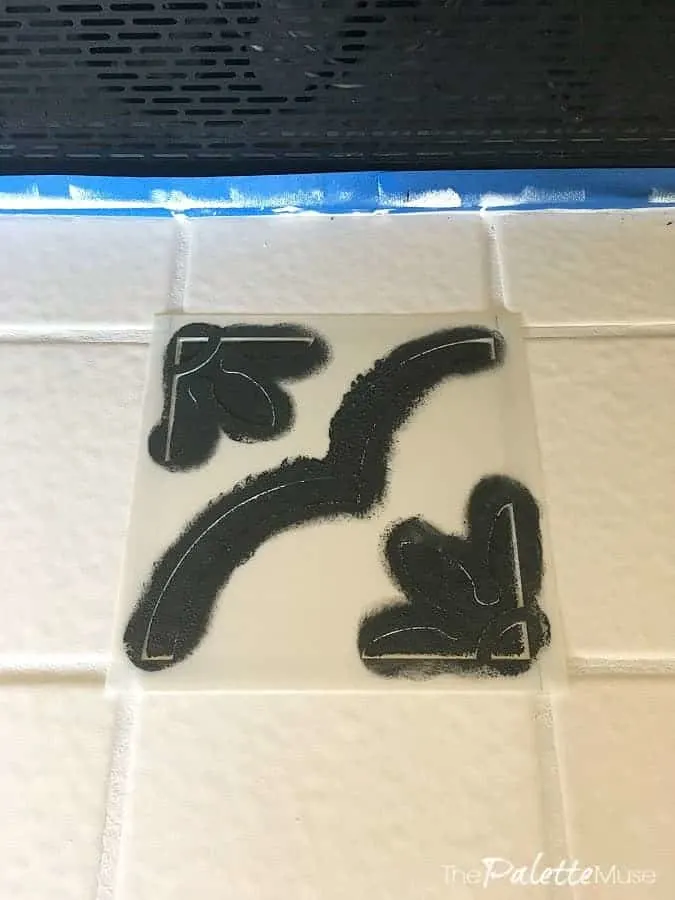
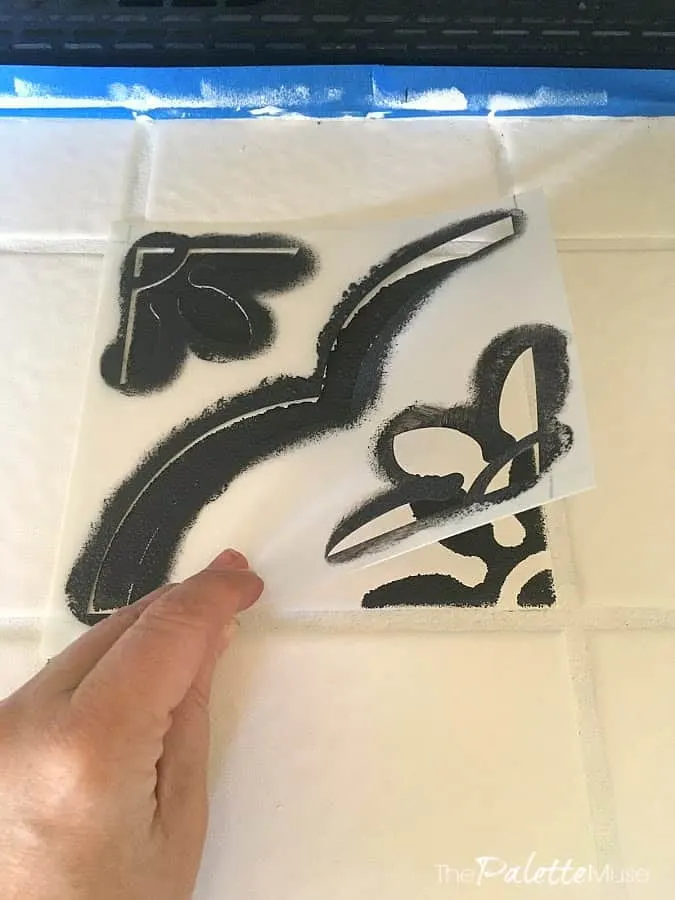
So this pattern is what’s called a “quarter tile”, which means you have to put four of them together to get a full repeat. It’s a little more work than working with a larger stencil, but I think it gives a more authentic hand-painted cement tile look, with the subtle variations between tiles, which is what I was going for in this room.
How to Stencil over Tile
Let me start by saying I’m not the best stenciler. (Is that a word?) I just don’t have the patience for it, and it’s very tedious and detail oriented. I’m trying to be disciplined here and see this as a good character building exercise, but I’m pretty sure I’d rather lay new tile next time than stencil over this much tile again. (Just keepin’ it real y’all!)
If you’re the type of person that likes to give great attention to detail, then you may love it and I don’t want to turn you off to stenciling, because sometimes it’s just the best way to get the job done.
With that said, here are the steps I took, with some tips along the way to hopefully help you save your sanity.
- Prep. Simply clean the area well and make sure it’s free of dust. Tape around the edges where the stencil brush might hit the surrounding wall.
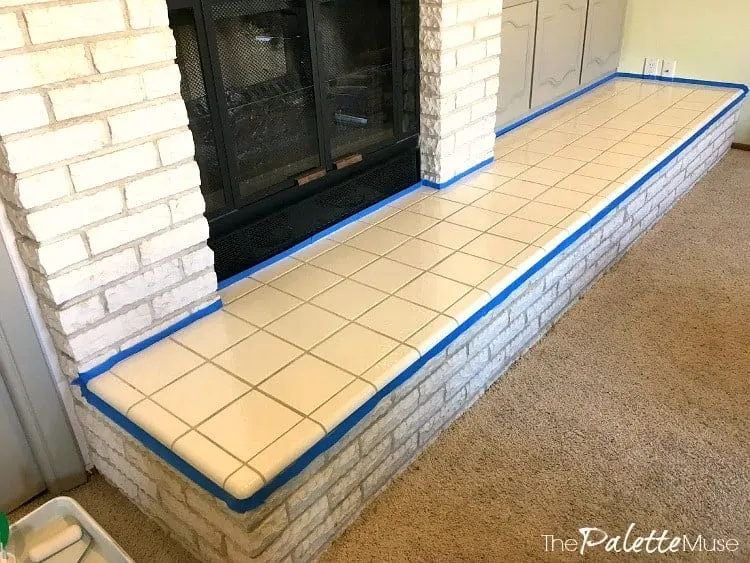
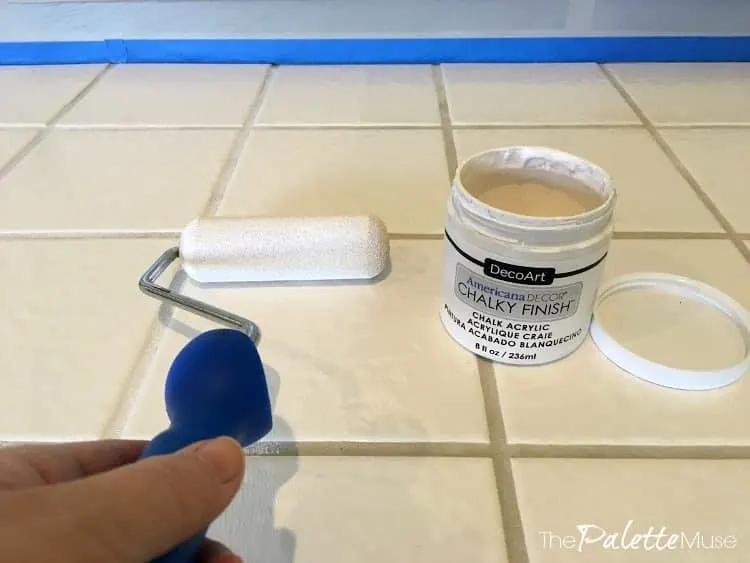
- Paint Base. Roll on your base coat of chalk paint. I used two coats and just painted right over the grout as well. Chalk paint is great because it sticks to just about anything and doesn’t need sanding or a primer.
- Center your first stencil and do a test. Be sure to think about how your pattern will look in the space. I chose to center mine on the fireplace and work out from there. Once I knew my starting point, I painted a test stencil to make sure everything would work right. It’s better to know now if something doesn’t work quite right.
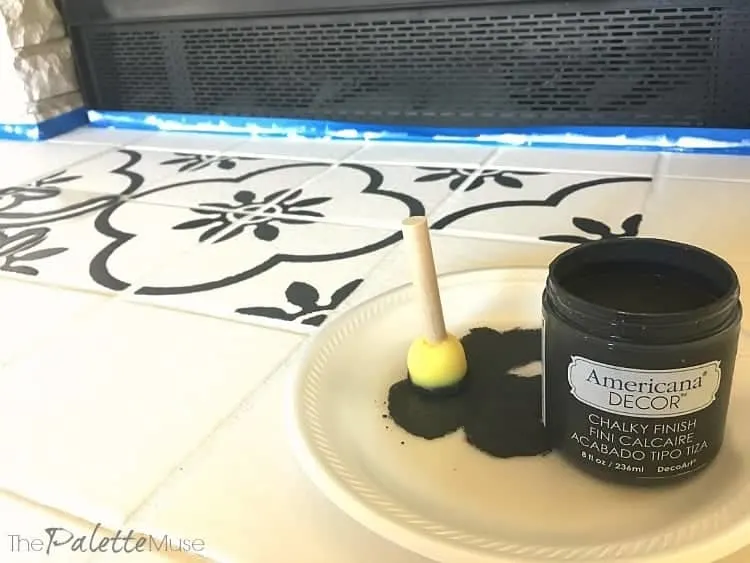
- Repeat ad nauseum. Yeah, this is the fun part. As you’re working through the pattern, keep skipping around so you don’t lay the stencil over wet paint. It can be easy to lose track of where you’re at with the pattern, so take your time and make sure you look at the overall design each time you lay down the stencil again.
- Finish with Polycrylic to seal the chalk paint. I haven’t done this yet but it’s on the list! Chalk paint needs to be sealed or it can be easily scuffed. Often furniture painters use a wax paste to finish and seal, but in this case I think Polycrylic will provide a more durable finish. This area won’t get much foot traffic, but we do sit on the hearth, and we’ll need to be able to easily clean up after having fires in the wood-burning fireplace.
Stenciling Tips:
Make extra stencils for small spaces. I used my stencil to trace and cut out smaller stencils to fit around the edges of the design. You can also cut down your stencil as you go, but I wanted to keep mine whole in case I forget how much work this is and want to use it again someday.
Be sure your brush doesn’t have too much paint. This is just about the most important technique to good stenciling. Don’t use too much paint or it will bleed under the edge of the stencil. Dip your brush in the paint and lightly dab it on a paper or foam plate to get the extra globs of paint off. Once you see a uniform dab of paint on the plate, it’s ready for stenciling.
Wash your brush and stencil often. Paint accumulates around the edges of the stencil, so it’s a good idea to rinse it off in between every few times, as well as your brush.
Use an actual stencil brush. I’ve tried stenciling before with other kinds of brushes (‘cuz I’m cheap), but there’s a reason for these brushes and they really do work better.
When stenciling on a wall use lots of tape. It’s one thing to lay your stencil on a floor tile and go to town, but when you’re stenciling on a vertical surface it’s a lot harder to keep the stencil straight while you’re working on it. Some people use stencil adhesive, but I like tape because it’s so easy to remove and it’s not messy to apply.
Keep track of where your lines are. When stenciling tile it’s pretty easy to follow the lines of the tile and grout. But when you’re stenciling on a wall, be sure to mark your lines so your stencil doesn’t end up running off on a slant.
Do you have any other stenciling tips for me? I could use all the help I can get!
Tile Stenciling Resources
To do your own stenciled tile project, you’ll need the following supplies:
- A good stencil – here’s the one I used. (If you’re making your own, be sure you use proper stencil material, preferably around 10mil thick. Don’t use adhesive stencil vinyl, as it won’t stand up to the extensive re-positioning that’s required.)
- Foam stenciling brush – I recommend getting 2-3 so you can wash them often and keep working.
- Chalk paint for the base coat – I used DecoArt Chalky Finish Paint in “Everlasting” and added a few drops of “Sable” to cut the bright white a little.
- Chalk paint for the stencil color – I used DecoArt Chalky Finish Paint in “Relic” and I love the charcoal color, with a slight hint of blue undertone.
- Blue painters tape
- Paper or foam plates for tapping excess paint off your brush
- Polycrylic for sealing after painting – Matte finish will give you a more authentic concrete tile look
- Roller brush and dry brush for applying the Polycrylic – check out last week’s post where I show you how to get a good clean finish on the Polycrylic coating.
Sooooo, if you love stenciling and have some free time this week, come on over! I’ll put you to work. And even make you coffee. But if you just want more design inspiration, check out these other amazing bloggers’ journeys through their own $100 Room Challenges…
And make sure you check back next week for the final reveal!

Erin Meyer
Monday 5th of February 2018
While I can only imagine how long and tedious this process is, it is looking incredible! I cannot wait to see how it looks all finished!!!
Meredith
Friday 9th of February 2018
Thank you Erin! It was definitely long and tedious, but so worth it in the end!
sweetparrishplace1970
Sunday 28th of January 2018
OMG, that is going to look so good! I can't wait to see it!
Meredith
Friday 9th of February 2018
Thank you! It gave me some fits along the way, but I think it'll be worth it!
Patti Estep
Thursday 25th of January 2018
That stencil is so bold and beautiful. I would never have thought about stenciling tile like that but it looks like it is going to be beautiful. Can't wait until next week for the big reveal.
Meredith
Friday 9th of February 2018
Thanks Patti! I was worried it would be too bold, but I think I love it!
Ashley@BiggerthantheThreeofUs
Thursday 25th of January 2018
I didn't notice that tile on the hearth in the first place and to be honest, that's a weird add for around where we live. Is it a normal add-on for fireplaces where you live?! Love the idea of stenciling it to give you a fresh new look!
Meredith
Friday 9th of February 2018
I thought it was weird too! It's not uncommon around here, but it sure did give me a decorating challenge!
Dawn
Thursday 25th of January 2018
WOW! what a great idea. Cant wait for the full reveal.
Meredith
Friday 9th of February 2018
Thanks Dawn, me too! :)