Painting a room doesn't have to be difficult or intimidating. Make painting simple with the right tools, and a few insider tricks.
I've been meaning to write this post for years, but I always assumed I'd be telling you something you already knew. That changed this week when I stopped by a friend's house as she was painting her living room.
Watching her try to do the job with only a roller and a paintbrush made me realize it's time to share what I've learned over many years of painting rooms. (Hint: the right tools make all the difference!)

Some folks are intimidated by painting rooms, since it's such a physically large job. I mean, if you screw it up, it'll be all over your living room! But don't be afraid. It's actually not hard, and I'm about to make it even easier for you.
This is a DIY job that every home owner should know how to do, so you can save money instead of calling in the pros every time you want to make a color change.
~ This post contains affiliate links. If you make a purchase, I may receive a small commission at no additional charge to you. ~
How to Make Painting Easier
Painting a room doesn't need to be scary. In fact, it's one of my favorite ways to improve my home, so I tend to do it a lot.
You can make it easier and more successful with a few simple tweaks. I'm going to break it down for you, step by step, with special attention to the tools that will make it easier along the way.
Picking Colors and Using Samples
If you're getting ready to paint your room, chances are you already have a color in mind. But if you don't, here's a simple piece of advice that I always give my design clients:
Don't fall in love with a wall color until you've already picked out all your big investments, like furniture, rugs and curtains.
In other words, you may have a color in mind for your walls, but will it end up matching the rug, curtain, or couch that you're about to buy? Wait till you've anchored in those big ticket items, then pick your wall color by coordinating with those things that you love.
(Psst, I love color. So much so that I originally based this whole website around color. Check out my color palettes for inspiration if you're still looking for the right color.)
When you've narrowed down your color ideas, try picking up sample jars of the few that you're considering so you can try out the color on your walls.
Even better, grab a couple of Spot On Removable Decals so you can put your paint samples on them and then move them all over the room to try out the colors in different lighting conditions. (These are one of the best inventions in paint accessories!)
Get the Right Paint for the Job
Once you've got your color picked out, it's time to buy paint. (This seems like a good time to remind you that paint is one of the cheapest investments you can make for your house. Don't be afraid to go for it, as you can always repaint without breaking the bank.)
Paint is one of those items where you get what you pay for. I'm willing to pay a little extra for good paint, especially in high-traffic areas. In order of my personal preference, here are the brands I recommend: Benjamin Moore, Sherwin Williams, and Valspar. (That list also happens to be in order of decreasing cost.)
All three brands have consistently exceeded my expectations, while the prices are still in my budget. Don't skimp on your paint budget. Once you've put in the work to paint your room, you don't want to be touching it up and repainting it all the time because you used cheap paint. Believe me, I have learned that the hard way!

Paint Tip: Did you know that if you fall in love with a color from one brand, you can get it mixed in paint of another brand? There might be very slight differences, and some exceptions, but usually you can take any paint swatch into any store and get that color in the type of paint that you like.
Picking the right Paint Sheen:
Let's talk paint sheen for a moment. This is one of the most common questions I get asked about paint.
Conventional wisdom says you must have higher gloss in high traffic and wet areas, and there's certainly nothing wrong with that advice. But personally, I usually love flat paint on all walls.
If you get a decent quality paint (and you always should), you no longer need to worry about it being washable and stain resistant. So I put flat paint even on my kitchen and bathroom walls.
(In case you're confused by the terms, the paint sheen continuum goes like this: flat, eggshell, satin, semi-gloss, gloss, high-gloss.)
This is one of those areas where traditional rules really don't apply any more. Use whatever sheen you like, and don't worry about the fashion police coming to get you.
Paint Sheen Tip: The higher the gloss, the more you will see the dimension of the texture of the wall or wood beneath the paint. My walls are medium-high texture (sigh) so I like flat paint because it gives the wall a more flat, even look. For painting cabinets, furniture and wood trim, I like satin or semi-gloss sheen to show off the pretty texture of the wood.
Make Painting Simple with the Right Tools:
The older (ahem, "more experienced") I get, the more I see the wisdom of investing in the right tools for a job. Having the right tool always makes the job easier and more successful, and usually ends up saving money and time. Win-win! These are the tools I use every time I paint a room:
Stepstool - Unless your ceilings are vaulted, step stools are a lot easier to use than ladders. Since I clock in at a whopping 5'2" tall, I keep stools in almost every room in my house. But for painting, I need something even higher, like a two-step stool. Even better, I prefer this platform stool since I paint so often. It lets me take a few more steps before moving the stool, which saves a lot of time in a big room.
Extendable Handle - This is THE ONE extra tool I can't paint without.
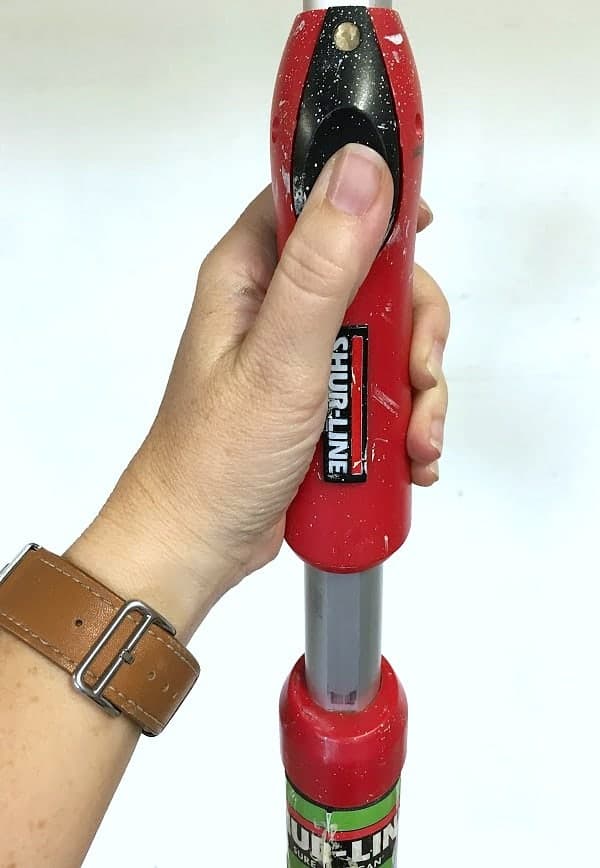 If you don't use any of my other recommendations to make your life easier, at least use this one. With it's one-touch extendable handle, it makes adjusting the length of your roller effortless. (This is important for when you're maneuvering around a small space or furniture and you need to extend the handle for some spots, but not others.) And the cushioned handle really helps save your hands on big jobs.
Paint Rollers and Roller Handle - Here again, you get what you pay for. It's worth it to pay a couple extra dollars for rollers that hold up well and don't shed fibers all over your freshly painted wall. (Gah!)
Paint Tray and Tray Liners - Be sure you buy the right size paint tray for your roller. (Most are a standard 9" wide.) And I always use tray liners to make cleanup so much easier. At less than a dollar apiece, they are worth it!

Drop Cloth - You can use just about anything for a drop cloth, but I prefer the actual fabric drop cloths over plastic tarps. They last a lot longer than plastic ones, and are a lot easier to wrangle into position and move around the room. Plus, I usually paint barefoot (I know that's weird, but then I know if I've stepped in a drop of paint.) and they're more comfortable on my feet.
Tape - Blue painter's tape is called that for a reason. This is the go-to the pros use for taping off edges. It's meant to be pulled off easily afterwards, which is what sets it apart from regular masking tape. It does a great job and is just easier to use than any other type of tape.
Screwdriver for cover plates - I always forget this when I'm prepping my room for paint. And then I forget that there are always both types of screws in any room I paint, so if I grabbed a phillips head, I always have to go back for a flat head when I get to that one plate that used the wrong screw. If you get a painter's tool (see below) you won't have to remember to bring two screwdrivers.
14 in 1 Painters Tool - I love this tool so much I wrote a whole post about it. You definitely need one, and not just for painting!
Putty for patching holes - I like this lightweight fast dry spackling for most drywall applications. It's easy to use and clean, and dries by the time you're ready to paint.
Plastic Cling Wrap or plastic bags - This is last because it's kinda weird. I'll cover this in the cleanup phase.
Preparing to Paint
Preparing a room to paint is actually pretty simple. Once you've gathered your tools, you'll want to do these three things:
- Remove any artwork from the walls, take down the curtains and remove their hardware from the wall, and remove switch plates and plug covers.
- Use lightweight spackle to fill in any holes left by the step above.
- Move the furniture out or to a pile in the middle of the room. Cover the edge of the floor with a drop cloth. (I just use one and move it around the room with me, but you could use several and save yourself the trouble of moving while painting.
- Optional: if you're using painter's tape to cover your baseboards and line around the edges of your trim, this is a good time to get it in place.
Wait... if? Doesn't everyone use tape for their edges? Well, no. Personally I find it easier to use my edging brush to carefully cut in around the edges than to stick on, paint, and later remove painter's tape. And there's always the inevitable touch up where paint seeped under the tape.
So over the years I've honed my edging skills. If you plan on doing a lot of painting, you might find it easier over time to freehand the edges, but that's just a preference thing. If you tend to be a messy painter, then by all means, blue tape is your friend!
First: Paint Big
Once you've prepped the room, paint all the biggest areas first. Slap that paint all over the walls and have fun doing it! I just have a few tips for this part:
- Be careful not to bump your roller into the ceiling when you're doing the top of the walls.
- When rolling the walls, it's better to use a random pattern all over than perfect up and down strokes, especially with textured walls. This will help fill in any valleys between the texture and avoid leaving lines where your roller overlapped. Some people describe this as a "W" pattern. I say it doesn't matter as long as you get plenty of paint on the walls.
- How many coats? You'll see many paints with a one-coat-guarantee. That really just means that if you're painting almost the same color over the existing color, and your existing paint is in perfect, clean condition, and the planets have all miraculously aligned, you may be able to get away with one coat. If you're painting navy blue over a white wall I promise you will need more than one coat. The good news is the second coat is always easier and faster.
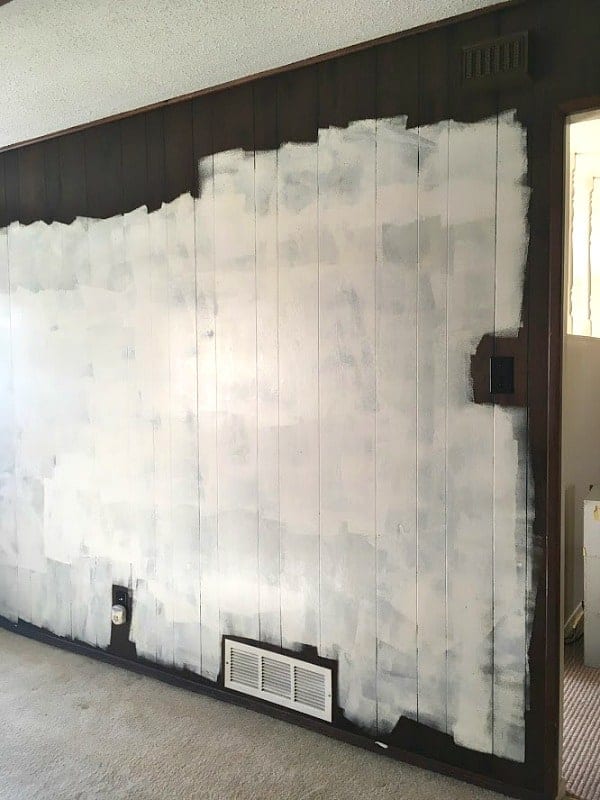
- Do you need primer first? Only if you are painting on wood, fresh drywall, or a wall with stains on it. Otherwise, a good quality paint will be fine (and most include primer now anyway). If you do need a primer (ie. you are painting over wood paneling), have it tinted similarly to your paint at the paint or hardware store.
Then: Paint Small
Once the majority of your walls are covered with the first coat of paint, it's time to paint around the edges, called "cutting in." This takes a little more precision and attention to detail. Here are a few ways to make it easier:
- Get a buddy! My friend Jana and I like to paint together. She does the big stuff and I do the little details. It goes twice as fast, and it's a lot more fun to have someone to talk to while your hands are working. If you're working with another person, have them start on the wall opposite you. Then both work around the walls in the same direction so you're not stepping over each other.
- Use a small bowl or plastic container to hold about 2 cups of paint at a time. This makes it easier to carry up and down the stepladder, and easier to cleanly dip your brush.
- Be sure you start with a clean, good condition brush and you're not overloading your brush with paint. This will allow you more control of where the paint goes.
- If you're not so coordinated with a brush, try this handy edging tool. It's like a sponge and will give you nice straight lines as you're painting around obstacles and next to trim.
- When you're done with the edging, your walls should be dry and ready for a second coat.
Quick Cleanup Hacks
Who loves cleaning up when you're exhausted from a day of painting? Not this girl! Make it easier on yourself with these cleaning hacks:
- If you need to walk away for a few minutes, use plastic wrap or a plastic bag to wrap your brush and roller. That way you don't waste paint and time by washing them out every time you need a break. When you're ready to paint again, you can peel off the plastic and start right back up.
- At the end of the project, I like to wrap my roller tightly in plastic and leave it for a day or two. That way if you find a spot that missed a little paint, you can easily touch it up without getting out all your supplies again. Simply roll over it again with the paint left on your roller.
- Speaking of rollers, my favorite cleaning hack for them is this: don't. Just don't bother trying to clean them. It will take gallons of water and you'll still probably end up with a roller that has lost a bit of its cushion and won't work as well next time. Just factor in the cost of a roller with the cost of your paint and buy a new one each time.
- Do wash your brush! If you've bought a good quality brush, it will wash well with warm soapy water. Make sure you wash it until the water runs clear. If your brush has dried bits of paint on it, try spraying a little Krud Kutter on it and let it sit for a few minutes before massaging the bristles under warm water. (If you've ready any of my kitchen cabinet painting tutorials, you already know how much I love Krud Kutter!))
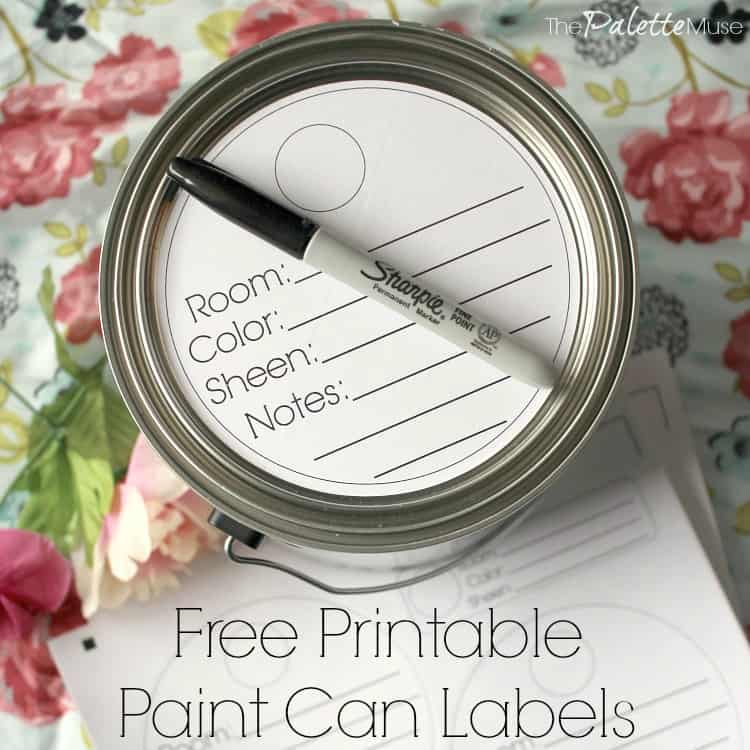
- Cover your paint can every time you pour out paint. This will keep your paint from drying out, and keep you from tragedy if you accidentally kick it over. (Yep, personal experience again.) When you're done with the day of painting, be sure to seal the lid on with a few gentle taps of a hammer or rubber mallet.
- Don't forget to label your paint cans so you can remember which rooms they match! You can get my handle
Now Go Paint Something!
Whew, that's a lot to take in! Maybe I should have written several different posts on the subject. Did I miss anything or do you have any new tips for me? I'd love to hear from you!
I hope your next painting project is easier and faster, or if you've never painted a room before, I hope you're encouraged to give it a try. Now go get some color!
And if you're thinking of painting cabinets, check out these posts:
- Everything You Need to Know About Painting Cabinets
- How to Paint Kitchen Cabinets with no Sanding
- How to Paint Laminate Cabinets
- What NOT to do when Painting Cabinets


Anita says
Wow, I learned a lot of new things in this post. Not that I'm planning to paint any walls, but it was interesting reading.
Meredith says
I'm so glad! Now you'll be prepared if you ever get the urge to paint!
jessa says
We give a “Painting Tips” class at the Home Depot Weekend Workshops all the time. My tips: Wrap the roller in blue tape and then rip it off (Ouch)…it eliminates any lint or loose fibers. Dampen your roller with water (use a spray bottle)….it helps the roller fibers absorb the paint.
Sheila says
You confirmed I have been doing it correctly
Theresa says
I paint bare foot too for the same reasons you do. It makes it much easier to tell if you stepped in wet paint.
Meredith says
Oh good! I'm glad to know I'm not the only one who does that! 🙂
Thomy S. Boulto says
Very good. Thanks for this wonderful share. Last summer I did work for my house remodeling and everything was cleaned up so well. I bought a few decor items and stuff in Waltham for my kitchen and bathroom. I painted the living room all by myself without hiring any painters although I have chosen Sherwin-Williams paints with white color and scrub proof feature! I have read a post somewhere in walthampaintingcompany for the painting arts. I am not an expert but am proud. Will plan to have the living rooms painted next month as long as my budget is good and will definitely take all your tips here. Thanks and Have a great day. ~ Thomy here~
Meredith says
Thanks Thomy! Best of luck with your painting projects!
Kelwinkwel says
I found your your website after I was done painting bathroom, kitchen a jd deck for my folks. Even though five had experience in painting, I enjoyed reading your tips and tricks. I was relieved to know that I followed a majority of your tips. except it’s kind of funny I did the opposite. I did the cut in first then I wrote the paint I never thought of doing the opposite!! Thanks. The plastic wrap is genius.