Beginning a new DIY project can be daunting, especially if you feel like you don't even know how to hold a paintbrush. Let's get that cleared up so you can get on to the fun stuff!
Welcome to my DIY 101 mini-series, where I'm sharing basic skills that sometimes get in the way of beginner do-it-yourself-ers.
Sometimes on the blog I'll share a whole in-depth tutorial, while forgetting to cover the basics first. Everyone's got to start somewhere, so today we'll cover the biggest complaint I hear from readers: "But I don't even know how to hold a paintbrush!"
Believe it or not, there is a right and wrong way to hold a brush, and there are several ways to making your painting projects easier, just by how you treat your brush.
This post contains affiliate links. If you make a purchase, I may receive a small commission at no additional cost to you.
Paintbrush Basics
Here's what we'll cover today. Feel free to skip to number 4 if you're good to go on the first 3!
- Pick the right brush
- Pick the right paint
- Take care of your brush
- Hold your brush correctly to avoid fatigue and increase accuracy when painting
Pick the Right Paintbrush
OK, this one's easy. I do ALL my non-roller painting with one brush, the Wooster Shortcut.
Sometimes people will recommend different size brushes for different jobs, and that does make sense. But I think it's easier to learn to use one brush well, and this brush is perfect for just about every application, especially cutting in lines and corners. Anything smaller is inefficient, and anything bigger is hard to control.
But my favorite thing about the shortcut is its handle. It's short, balanced, and flexible. It feels comfortable in my hand, and it's just the right weight to balance the brush without causing unnecessary fatigue on your wrist.
And by flexible, I mean it actually flexes! The blue part of the handle is made of rubbery material, so it moves with your hand. That really matters when you're doing a big project like cutting in a whole room, and it's the main reason I love this brush.
Pick the Right Paint
Your paintbrush will perform better if you use the right paint. For most home improvement projects, especially painting walls, I recommend getting a good quality latex paint. I find that Sherwin Williams, Benjamin Moore, and Valspar all make great quality paints, and are pretty competitively priced with each other.
You can certainly pay more to upgrade your paint, but I wouldn't recommend trying to buy cheaper paint. I've done it and regretted it every. single. time.
If you are painting cabinets or furniture, you'll be better off with a different kind of paint than latex, and you can find the right kind of paint for these types of projects in my post Everything You Need to Know About Painting Cabinets.
Take Care of Your Paintbrush
Clean your paintbrush with warm, soapy water as soon as you get done using it. If your brush gets gunky with dried paint (as mine inevitably do at some point) you can use Krud Kutter to loosen the dried paint. Simply spray the Krud Kutter on liberally, then massage it through the bristles. Let sit for a few minutes and wash with warm water.
Store your brush hanging from the handle, if possible. If you don't have a way to hang it, you can lay it on its flat side, once it's completely dry. Just be sure not to have other painting supplies pushing up against the bristles. That would deform them over time and make it hard to get a nice clean edge while painting the next time.
Replace your paintbrush when the bristles get mishapen or dried together. There's nothing more frustrating than a paintbrush that doesn't paint evenly! These brushes are so affordable, it makes sense to replace them when needed, rather than fighting with your brush through your next project.
Bonus Brush Tip #1
If you're stepping away from your project for a few moments, wrap your brush in a plastic bag or even a damp paper towel to keep the paint from drying on the brush while you take a break. That way you don't have to wash your brush when you want to have lunch. Just don't leave it too long or it will dry out anyway.
Bonus Brush Tip #2
Try slightly dampening your brush before using it. This will help keep the paint from drying in between the bristles as you work.
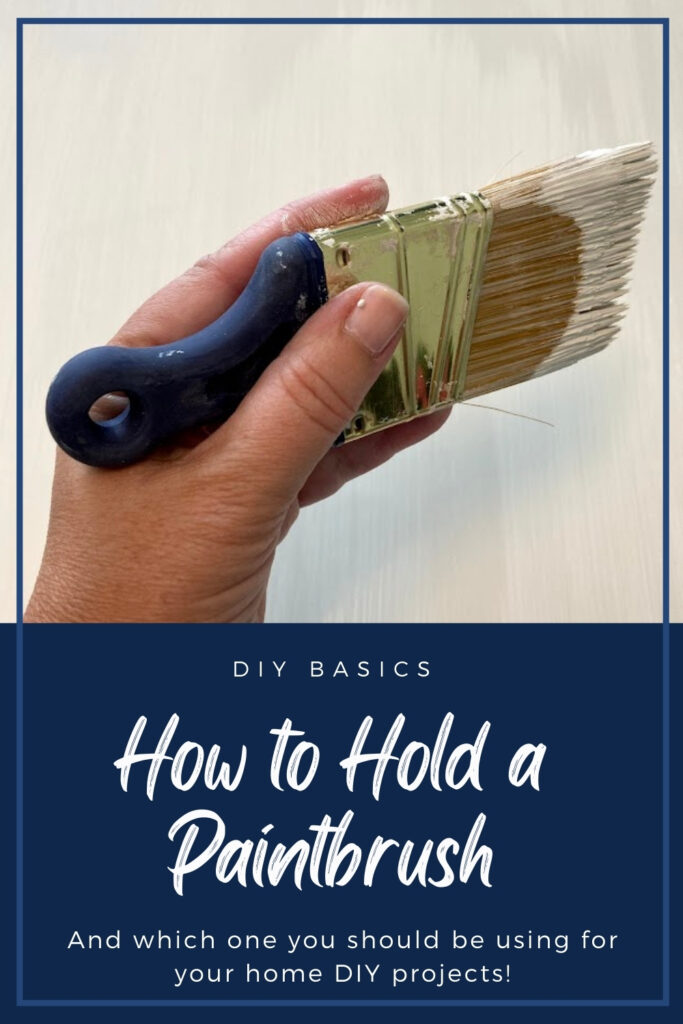
How to Hold a Paintbrush Correctly to Make Your Project Easier
Different shaped paintbrushes will require you to hold them slightly differently, which is why I recommend getting really comfortable with one brush at a time. This brush, with it's angled bristles, allows for the most comfortable hand position as you work. Here's how it looks:
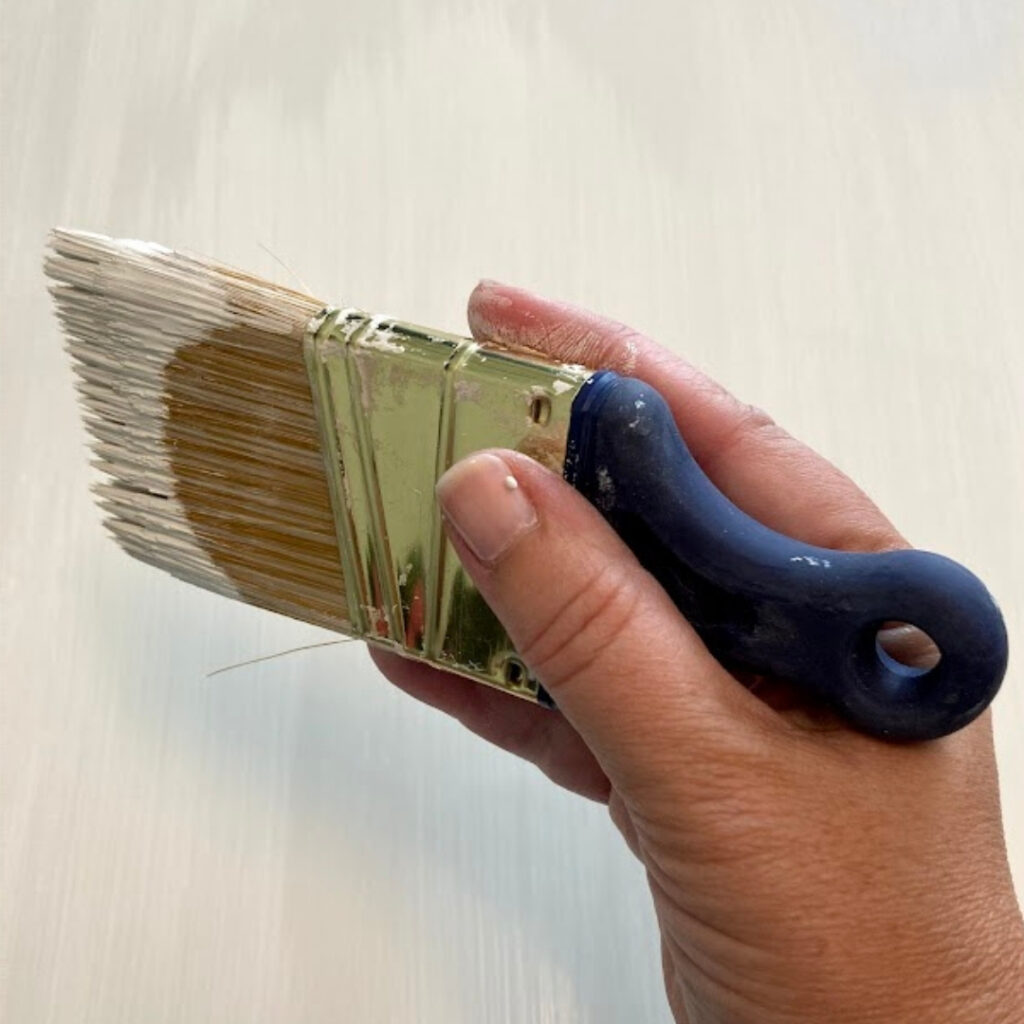
Using your dominant hand, cradle the handle between your thumb and fingers. Grip loosely enough that you don't drop the paintbrush, but not tight. The tighter you hold your brush, the quicker your hand and wrist will get tired.
Now dip the brush into the paint, about a half inch. Slightly scrape the end of the brush on the side of paint can so you don't sling paint when moving it.
Pull the brush along the line you are painting. Don't ever push forward on the brush as this will damage the bristles and mess up your paint finish.
Continue dipping and dragging, back and forth till you are comfortable with the brush. At this point you can experiment with more paint and different angles. I even use my other hand when my dominant hand gets tired.
As with anything, the more you practice holding your paintbrush, the easier it will get. Keep doing painting projects, and soon you'll be a pro. (Or at least you'll save yourself lots of money along the way on DIY home improvements!)
DIY Basics Series
If you found this article helpful, be sure to check out my other posts in this series:
- Sanding and Prepping 101
- How to Measure Square Footage
- How to Use a Screwdriver (yes, really!)
- What NOT to Do when Painting Cabinets
Questions? Let me know in the comments below. I love to help!


Leave a Reply