I love the satisfaction of a completed project! This little camper gave me a run for my money, but she's finally ready for her big reveal.
The Big Reveal of our Little Camper Makeover
Y'all know I'm a big fan of the $100 Room Challenge because it gives me a deadline. Without that deadline, I'm sure I'd still be wallowing around in the beginning stages of this project, because there was just. so. much.
And without the $100 budget, there's no telling what I could have spent turning this little diamond-in-the-rough into a polished gem.
So thank you Erin, of Lemons, Lavender, & Laundry, for being the inspiration, motivation, and organization behind the $100 Room Challenge! (My family thanks you too.)

This post contains affiliate links. If you make a purchase, I may receive a small commission at no additional cost to you.
Our Little Camper Before
In week 1, I showed you our plans for this little camper, along with what we'd already done to make the bed more comfortable. Here's a quick reminder of where we started. This is the kitchen, bathroom door, and bunk beds.

And here is the view that greeted us when we would open the door.
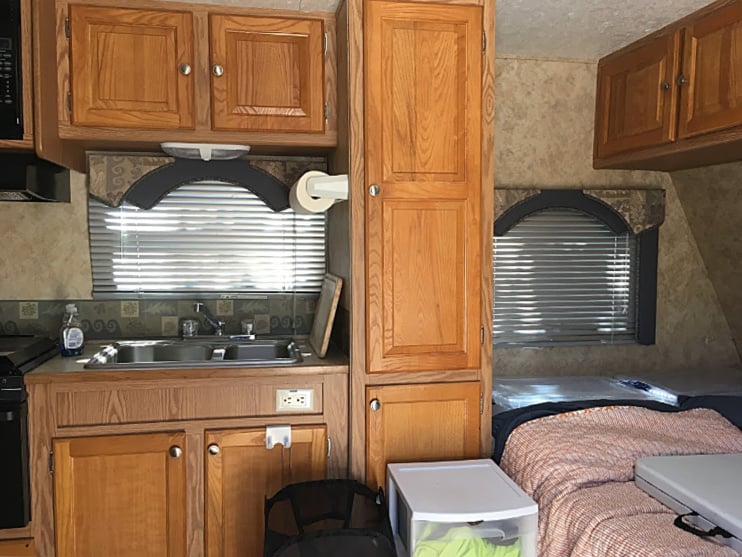
There was lots of orange wood cabinetry everywhere. Great for storage, not great for style. And to make it worse, the cabinet doors were made of real stained wood and the frames are laminate, so over the years the stained wood started aging to a different color than the frames. Ick.
I didn't mind the khaki walls, but the dated window coverings and matching wallpaper border as backsplash just made everything feel dark and heavy. This makeover was going to take a lot of paint, and some creative thinking to cover up all the orange and blue!
The Big "After"
This little camper has come a long way!
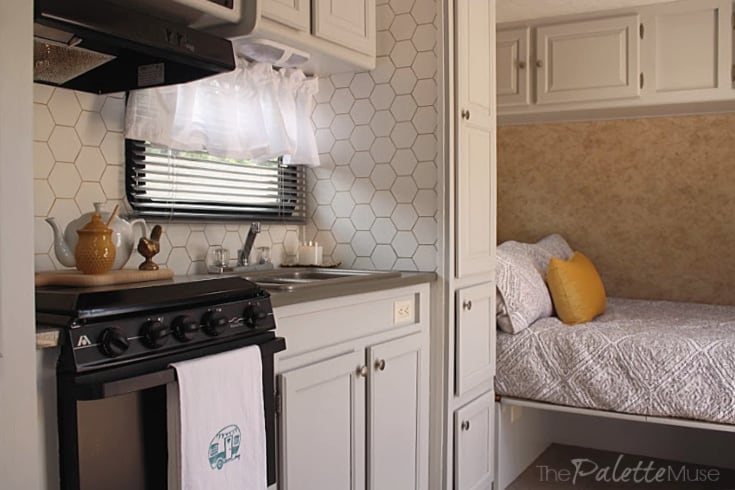
She got painted cabinets, a new backsplash, fresh window treatments, and new bedding. (I'll show you how the budget worked at the end of this post.) During Week 2 (and beyond), I painted the cabinets with DecoArt Chalky Finish and Satin Enamels. I'll be doing a whole tutorial post on this later, for all my readers who have asked how to paint laminate, so stay tuned for that. But for now, let's move on to more pictures...

The backsplash got a chic update with a gold-on-white hex pattern that's subtle but super light and pretty. I'll have a tutorial on this next week. (Spoiler alert: you'll need a gold Sharpie!)
I splurged and bought a cafe curtain for the kitchen window. I love how the fresh white brightens up this space and reflects the light from the window. And it only cost $11 for the curtain and tension rod from Walmart!
If you read my earlier posts, you'll remember that I had planned to use removable wallpaper for this backsplash, but that project turned into a massive fail. Ironically, I like how this method turned out even better. Sometimes, in life as in crafting, our failures clear space for improvements!
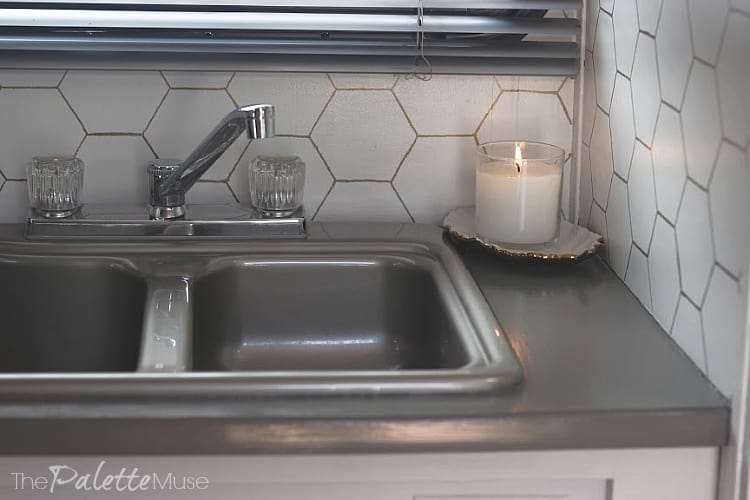
In week 3, I painted the countertops with Rustoleum's Countertop Paint. It was a great experience, and I love how they turned out! This color is called Putty and it's a warm modern gray with a satiny sheen.
Here's a view looking from the entrance toward the back of the camper:

I happened to have a pretty shower curtain leftover from our flip house staging, and used part of it to recover the window treatments. Then I replaced the bunk-bedroom curtain with the remainder.

All the new bedding was leftover from the flip house as well. Honestly, I feel like I cheated a bit with this part, because new bedding for the "master" bed, as well as the bunk beds, would have cost at least $100 on it's own. But I really didn't know what else to do with these piles of linens that were sitting on my work table, so it was a win-win for my camper.

We probably will leave the white bedding at home, as well as some of the staging decor, when we actually go camping. But at least this way, the camper is set up as a sweet guest house for when our family comes in a few weeks for Balloon Fiesta!
Here are a few more views of the camper, just because I couldn't help myself.
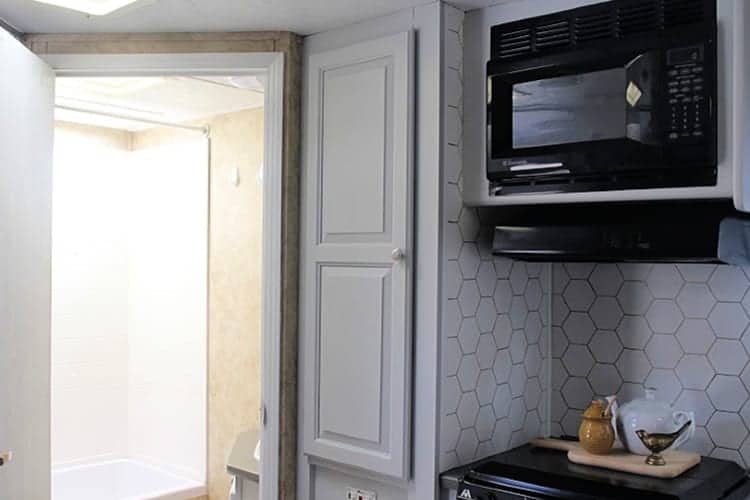
We didn't do much to the bathroom, other than paint the cabinets and countertop to match the rest of the camper. And we painted the door white, using leftover trim paint from the house.

I decided to paint the fridge black to match the other appliances, but the only black paint I had on hand was chalkboard paint, so we may eventually use this as a chalkboard as well. The things we do for the budget!

I had so much fun staging this little camper as a guest house, using bits and pieces of decor that I had lying around in the house. I especially love this little tea towel, because it was the first one I ever made for my Etsy shop. (I've since closed down the shop, but I do have a few towels left if you want one!)
Camper Makeover Cost Breakdown
Here's how the budget went, and boy did it go fast!
- Countertop Paint: $22
- Cabinet Paint: $60
- Trim Paint: $0
- Fridge Paint: $0
- Backsplash Materials: $10
- Kitchen Window Valance: $11
- Other Window Treatments & Bunk Curtain: $0
- Bedding and decor: $0
- For a grand total of $103. Not bad for a whole house on wheels!
I'm super proud of how this little camper turned out. She kept me hopping for a whole month, but it was totally worth it!


Terrie Tipler says
What an amazing transformation! I love what you did with your camper. I bet you can't wait to go out camping in it. Happy camping!
Meredith says
Thank you Terrie! We're actually going camping this weekend to celebrate!
JENRON DESIGNS says
WOW this looks amazing I super pumped to see the Sharpie DIY for your backsplash that looks great! Nice job
Meredith says
Thank you! That was a really fun project that paid off big!
Elizabeth Jones | Jonesville says
So cute! Campers are such fun projects! Great job!!
Meredith says
Thank you! It's fun to have a "play" house to work on sometimes!
Cindy Richter says
I'm still picking my jaw up off of the ground! What a huge huge huge difference! This has got to go down in the books of amazing transformations. Fantastic job! It makes we want to camp/glamp. And I am not a camper!
Meredith says
Ha! Thanks Cindy, that's a high compliment indeed. You should try it some time!
sherrygcole says
This camper is beautiful now! I am with you in that I love this challenge because it makes you get the job finished. Your DIY backsplash is my favorite!
Meredith says
Thank you Sherry! Here's to finished projects!
Kathy A says
Love how your camper turned out! It's beautiful!
Meredith says
Thank you so much Kathy!
Joy says
Wow my jaw dropped when I saw the after photo! My favorite is the backsplash and how you used the shower curtain! You did such an amazing job with this makeover.
Meredith says
Thank you Joy! That shower curtain saved me a lot of money on multiple projects!
Alayna says
That looks fantastic! I can only image the number of hours you spent painting. So much work looks well worth the effort and I'm sure you'll enjoy having such a bright "new" trailer.
Meredith says
Thanks Alayna! Yep, I got caught up on a lot of podcasts while painting this one!
Morgan Murray says
Holy camper, Batman! (Sorry! I couldn't resist!) But REALLY- this is AMAZING! I have been loving that you have been renovating a camper for this challenge and have enjoyed following along! This looks like the perfect space to make some wonderful family memories. You did such a remarkable job! I hope you can put your feet up and relax now!
Meredith says
Bwahaha! Thanks Morgan! This was truly a heroic effort, but I'll be enjoying it this weekend when we go camping!
Erin Meyer says
AHHH!!! This is SO GOOD!!! You sure did brighten up this space a ton. I LOVE the backsplash you created. I am seriously in awe of everything you were able to accomplish in such a short time with such a tight budget! YAY!!! I am so glad you participated again this month, and it is so fun to have the first camper makeover for this challenge!
Meredith says
Thank you so much Erin! I always love this challenge and am already planning for the next one in January...
Carole West says
So I'm curious if you were to cover the walls would you have painted them and if so what kind of paint would you use? Brand? I'm thinking chalk paint, is that right? So tempted to paint our cabinets too. So tempted.... Going to have to think on this, make a plan and begin in 2020.
Meredith says
I was planning on painting them with regular latex interior paint. That's what I used on the backsplash area and it worked great! (Valspar semi-gloss) I guess it would depend on what your walls are made of. Ours are that Luan material, which is kind of like a thin layer of wallpaper on a plywood backing.
Lindsey @hilltown_house says
How cute is that gold sharpie backsplash! Love it
Meredith says
Thank you Lindsey! ?
R H says
Nice work
We are Not fans of painting stained woodwork in homes or campers - too much HGTV
Also enjoyed your Apache project
Meredith says
Thank you! That Apache project was so fun, those little campers are classics!
Carol says
You did an awesome job and I'm gonna use that 1 technique on the I'm rapping Around that border that you did Thank you so much Good work
Meredith says
Thanks Carol, glad this was helpful!
Candice Rabbitt says
Hi!
I have the same refrigerator. What would recommend for the black paint other than chalk paint?
Also, any suggestions for painting over the light tan walls I also have in my MH?
Thanks
Meredith says
I think you could use cabinet enamel for the fridge, and it would probably also work for the walls. You might could use regular latex paint for the walls too, as long as they don't have a glossy finish already.