It's already week three of our $100 Room Challenge, which means there's only one week left, and I'm wishing there were about three or four. And another $100!
(Be sure to check out Week 1 and Week 2 if you're just joining me!)
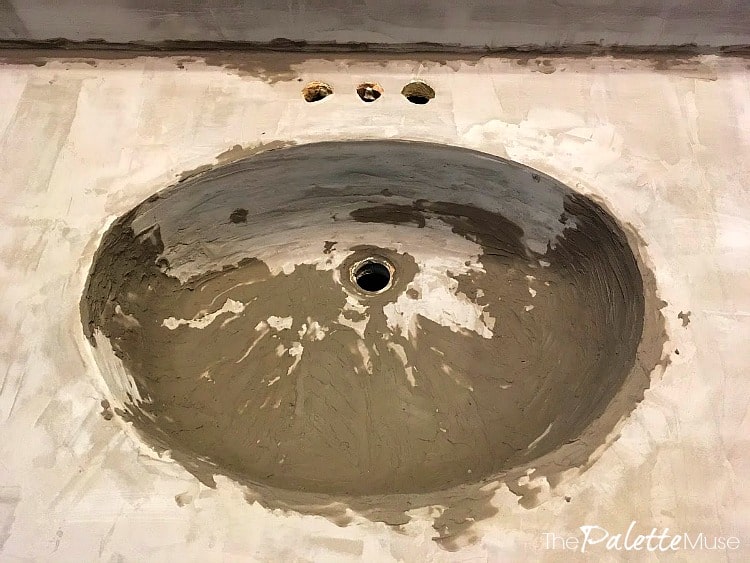
Today I'm going to be sharing some in-process photos of my new concrete countertops. That's because there are no "after" photos to show you yet. Sad face. But hopefully that means next week's reveal will be spectacular, since we've had very few previews along the way!
~ This post contains affiliate links. If you make a purchase, I may receive a small commission at no extra cost to you. Thanks for supporting The Palette Muse! ~
As a reminder, here is the sink and countertop I started with: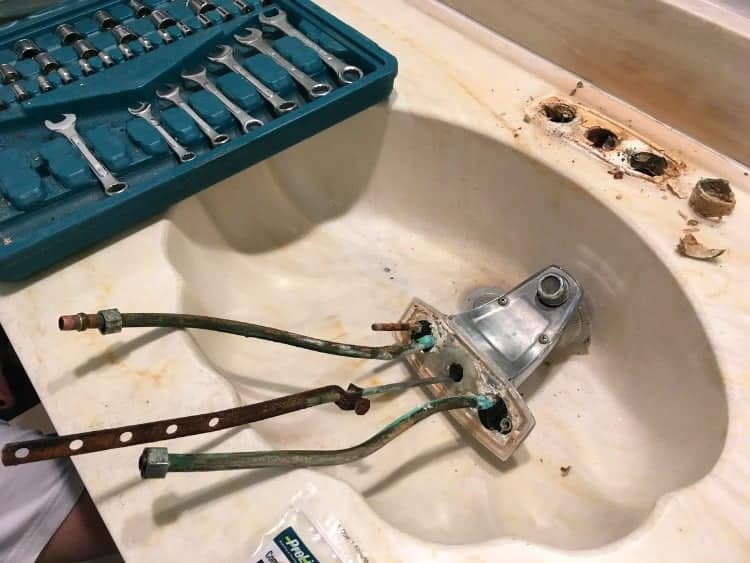
I'm sure the yellow cultured marble was the height of sophistication back in 1979, but have you ever tried to decorate around dirty yellow? Not a good look. And the scalloped sink just added that extra special touch of Miami-Beach-meets-the-Taj-Mahal. Time to catch up to 2016. In decorating, what do you do when you can't afford to replace something? You cover it up! So I'm covering this bad boy with concrete and filling in the scallops.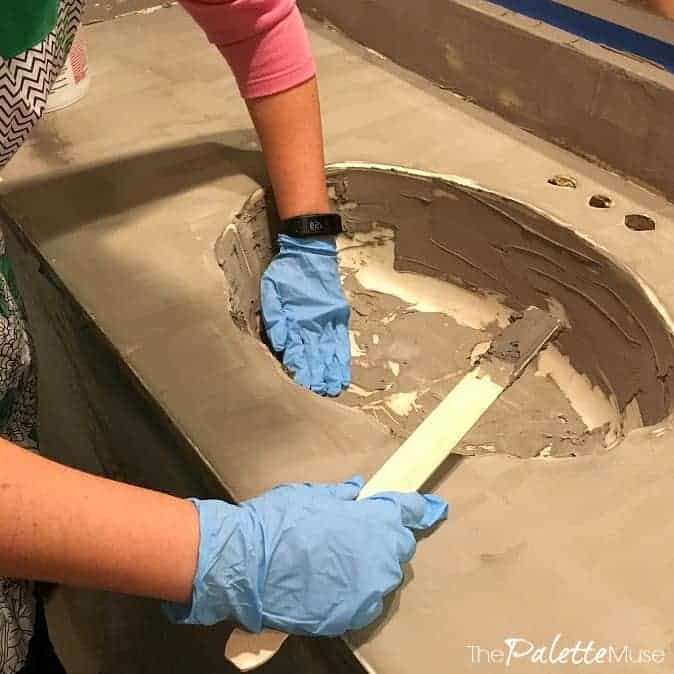
There are some great tutorials on concrete countertops already out there, so I'm not going to write another one here. But I do want to share the ones I found most helpful, and then add a few of my learned-the-hard-way tips at the end.
Feather Finish Tutorials:
If you google "feather finish countertop" or "concrete countertop" you'll get a whole slew of DIY tutorials and videos. Here are a few of my favorites:
Designer Trapped in a Lawyer's Body (This one I stumbled across near the end of the project and I wish I'd started with it!)
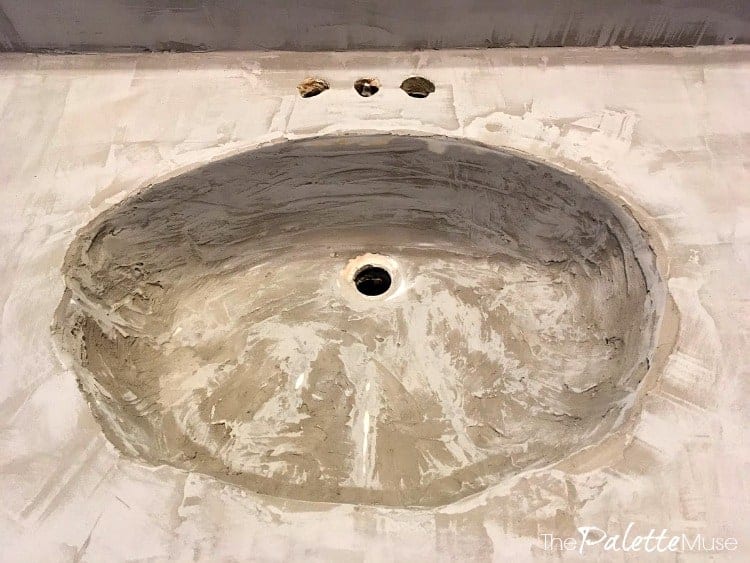
I was surprised to find that working with the concrete is pretty easy, and I was pleased with how well it applied to my countertops. What I wasn't prepared for was how hard it was to get it applied evenly inside the sink. Turns out flat surfaces are a lot easier to work with than curved! But with a little trial and error, I think I'm pretty close to getting a good even finish on the counters and sink.
First coat: Pretty sloppy!
Second Coat: Still pretty choppy but trying to filling in the scallops.
Third Coat: I started using my gloved fingertips to fill in more of the holes.
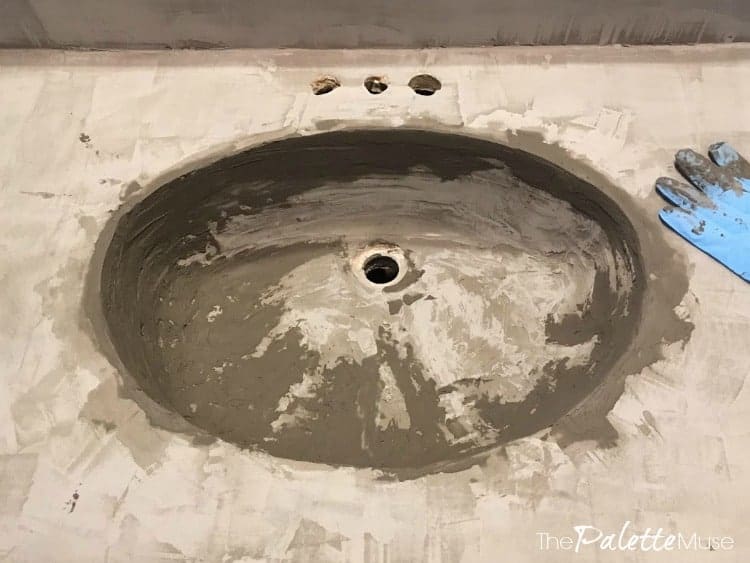
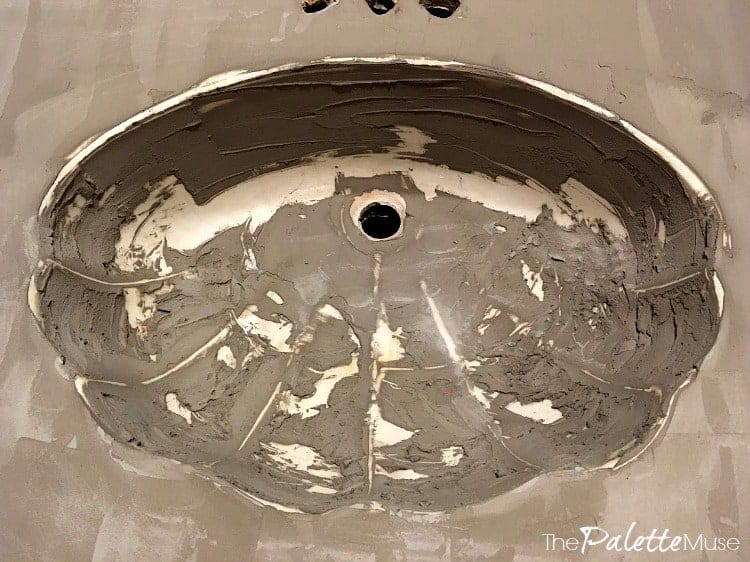
Fourth Coat: Now we're really getting somewhere! For this one I used the back of a plastic spoon.
Concrete Countertop Tips:
- Have patience. This is not a one day project! You'd be really pushing it to get it all finished in a weekend. It could probably be done, but at potential peril to your marriage.
- Use your safety gear: Gloves are a must if you're handling the concrete because it's really hard on your skin. A dust mask is absolutely essential for sanding, as well as good ventilation and a vacuum cleaner! And be sure to use safety glasses while you're sanding, so you don't kick up particles into your eyes.
- Building up the concrete in several thin layers is worth the time, and much better than trying to slap it on and sand out the imperfections later.
- Work in small batches. This stuff dries fast!
- Think of it as if you're icing a very large, very ugly cake. With a trowel. (This might not help you work better, but it will make you think happy thoughts about cake.)
Concrete Countertop Resources:
Disposable Gloves (These are great for all sorts of jobs around the house!)
Sand Paper Replacements
Concrete Sealer in Satin Finish
I'm itching to get finished with this part of the project, so we can install the new faucet and see how everything looks together! I think one more coat will just about do it, and then I can start making this room pretty again. Be sure to check back next week for the big reveal!


Karen says
Confession: your project is the first time I've ever even *heard* of concrete countertops. I had no idea...so you have a very captivated audience here. Can't wait to see the finished project.
Meredith says
I'm so glad to hear that Karen. I love trying new things!
Natalie @ A Turtle's Life for Me says
My jaw is on the floor! I am SO impressed that you were able to fill in the scallops! That looks just like the countertop/sink that we got rid of at the beginning of this project! I have another one in our master bathroom with the scallop sink that I despise! Can't wait to see how this turns out!
Meredith says
Gotta love those scallop sinks! I felt a little guilty covering it up because I know someone who designed it originally thought it was the best thing ever. Oh well, such is life and design!
Carole West, Garden Up Green says
I had no idea you could do concrete counter tops this way. I remember gutting our old sink and vanity it took forever to remove and so disgusting because it dated back to 65. This is awesome Meredith , I'm amazed and simply can't believe the transformation. Looking forward to your next post. Pat yourself on the back you're working in your element of greatness.
Meredith says
Thank you Carole, that's so kind! Yes, I was afraid of what we'd find if we tried gutting the whole vanity and sink. For now, it's better just to cover it up until we can afford a whole remodel.
Zografia | Bisozozo says
You made it! Can't wait for the big reveal!
Meredith says
Thank you, me too!
Erin @ Lemons, Lavender, & Laundry says
I cannot wait to see how this countertop looks when it's finished. Now you've got me thinking about doing this in our master bathroom 🙂
Meredith says
You should do it! I was surprised at how easy it was, with a little patience...
Jeri Walker (@JeriWB) says
Good work! Patience is indeed key with projects like this. A friend of mine recently moved into a condo and had an artist friend help me paint his concrete countertops. Then he applied coats of epoxy (yes, he knows it is scratchable). His impatience resulted in a spot that got all goopy and bumpy and will never dry properly. Now he's going to clear that spot for an inlaid cutting board. Home improvement projects tend to necessitate some creative thinking to fix mistakes 😉
Meredith says
Yes they do! Nothing like having to improvise as you go along! But I love the idea of fixing the problem with an inlaid cutting board. That's real creativity!
Kristen says
Oh wow! Its working soooo good to fill in those scallops with the concrete! That is so great! Can't wait to see the full reveal !
Meredith says
Thanks Kristen! I had a few moments of doubt along the way, but it's coming together!
Colleen Stevens says
I am amazed that you were able to simplify the shape of the sink. That will make a huge difference!
Meredith says
Thanks Colleen, I already like it much better!
Patti @ Garden Matter says
Meredith, this is amazing. You are so brave. I really can't wait to see it all done!
Meredith says
Thanks Patti! Not sure if it's bravery or something a little less admirable and more desperate, but one way or the other, it's getting done!
Johanna says
This is so cool! When I made a concrete countertop my friend helped me completely make one with a form and everything! This seems much simpler. 🙂 Excited to see how it turns out!
Meredith says
I remember that Johanna! Yours looked really cool, but I was looking for an easier way, and I think this way worked pretty well, at least for me.
Amy | Stow and TellU says
I've been longing to do a concrete counter top for years. Marking it down for our future bathroom remodel. Can't wait to see this whole room when it's done. Thanks for sharing the other tuts on how to do this. Great reference!
Meredith says
Thanks Amy, I always think it's helpful to have several points of reference when you're taking on an entirely new project!
simple nature decor says
Wow, i can't believe I missed this post last week! This is amazing and it turned out just like if you poured the concrete into a mold. Great Job
Maria
Meredith says
Thanks Maria, I was surprised at how easy it was to work with the concrete. Now I'm wondering what else I could do with it...
Stacy Sample says
I am thinking of doing this in our bathrooms as we have, also, been blessed with the 70's style shell sinks that I hate with a passion. I was reading your comments about the application inside the sink with the concrete and how difficult you found it smoothing the rounded surfaces. I was wondering if the back portion of large curved kitchen metal spoon would be a good tool to use to form the curved surface areas? What do you think?
Meredith says
I think it's definitely worth a try! Let me know how it goes so I can share your experience with other readers!
Tara Douglas says
How is it all holding up? The concrete? I’m about to do this in our kids/guest bathroom and wanted see if you have anything you would do differently?
Meredith says
Hi Tara, it's holding up beautifully! I've been impressed with how easy it is to keep clean. That's something I was a little worried about. It still looks great, but I can see where there is just a little bit of darkening around the sink drain. I'm guessing that's because water sits there and stains it. I think I'll be able to fix that with another coat of sealant, but I'm not in a big hurry because it's such a small thing. For me personally, I still wish I had a white porcelain sink, so that's one thing I might do differently if it was in the budget. But considering how little this cost and how well it's lasted, I'd say go for it! Good luck!
Kristi Kelley says
What do you suggest for someone who wants to do this, but has a sink that the edges are on top of the counter top.
Meredith says
Yeah that's a tough one! I would say to leave the sink as is and just concrete over the flat portion of the countertop. You would need to tape around the sink before applying concrete to the countertop.
Maria says
What do you use to seal it with? Lovely work. I tackled my bathroom with motor and and bricks, and also used the mortar on my countertop tops and sink so they would match nicely. Love the look but wasn’t sure what to use to seal it.
Meredith says
Great question! I cover it more in this post:https://thepalettemuse.com/finishing-touches-to-my-guest-bathroom-remodel/ The short answer is I used Quikcrete's Concrete Cure and Seal. Here's a similar product that's more easily available: https://amzn.to/4kD9opL