This week's $100 Room Challenge Farmhouse Table project is brought to you by elbow grease and sweat. Lots of sweat.
There's no question - painting furniture is easier than unpainting it. I'm glad I tackled my kitchen table for the first project of this challenge, because after this all the other projects should be easy!
If you're just joining, check out my previous post on my 
~ This post contains affiliate links. If you make a purchase I'll receive a small commission at no charge to you. Thanks for supporting The Palette Muse! ~
This black kitchen table is the perfect size and shape for my breakfast nook, but the black color was a little too intense, and the paint was beginning to show signs of wear and tear.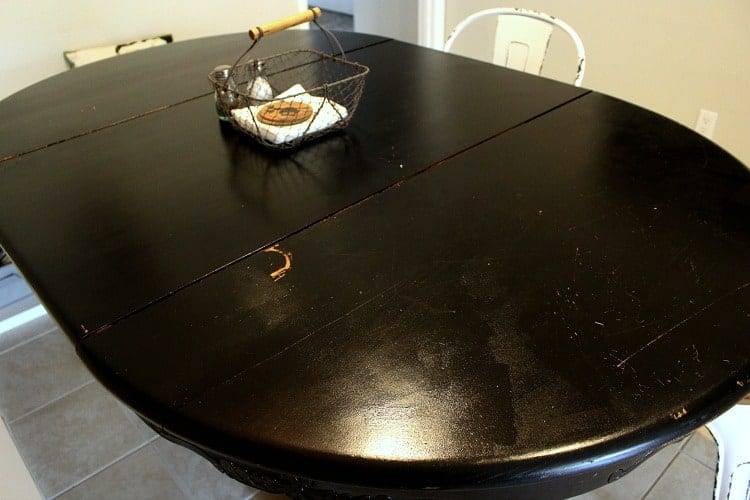 We're at least the 4th family (that I know of) to own this table, and I love that it has a little history to it. So I wanted to do something special to bring it back to life.
Usually, I repaint things when they need a makeover. Paint is what I know. Chalk paint, enamel, latex, oil, acrylic. You name it, I love it. What I don't love is sanding, and this project required a lot of it.
I thought "I'll just refinish the top and paint the bottom. How hard can it be to sand and stain a flat surface?" I should know better by now than to ask questions that start with "How hard can it be...".
This project had me wishing I'd taken a shop class or two in high school, rather than all those art classes. (Back then Shop was for boys and Home Ec was for girls. I bucked the system by filling up my electives with art classes instead of Home Ec, much to my family's detriment now. But again, I digress.)
This was a crash course in sanding, staining, and sealing. And I'm sharing it all with you, in case you opted for skipping shop class when you had your chance too.
How to Refinish a Farmhouse Table
Taking a table from painted to stained is a simple prospect really, if you have the right tools and a little patience. (I had the former but not the latter.) You'll need:
- Orbital sander or palm sander
- Several sheets of 80 or 100 grit sandpaper for your type of sander
- Optional but suggested: paint stripper
- Stain - I used Minwax Classic Gray
- Rags - I cut up one of my hubby's old t-shirts
- Polycrylic Sealer
- Synthetic bristle brush
- 1 sheet of 220 grit sandpaper
- Americana Decor Chalky Finish paint
- Americana Decor Creme Wax
This might look like an intimidating list, but if you're like me, you may already have most of these tools and ingredients in your garage. Fortunately I had the sander, all the sandpaper, the brushes, paint and stain already. All I needed to buy was the Polyacrylic top coat and paint stripper. (That's important because of our $100 budget for this entire challenge!)
This is basically a 3 part process: Sand top, stain & seal top, paint & seal bottom. Let's take it one step at a time...
Farmhouse Table Step 1: Sanding
The really messy part of this project is sanding. I sweet-talked my hubby into helping me move the table outside onto our back patio, so I wouldn't have to worry about sanding dust getting all over my kitchen. Then I attacked it with the sander.
The black paint came off just fine, but then I realized that I really needed to get below the previous varnish in order to stain the wood. That part wasn't so easy.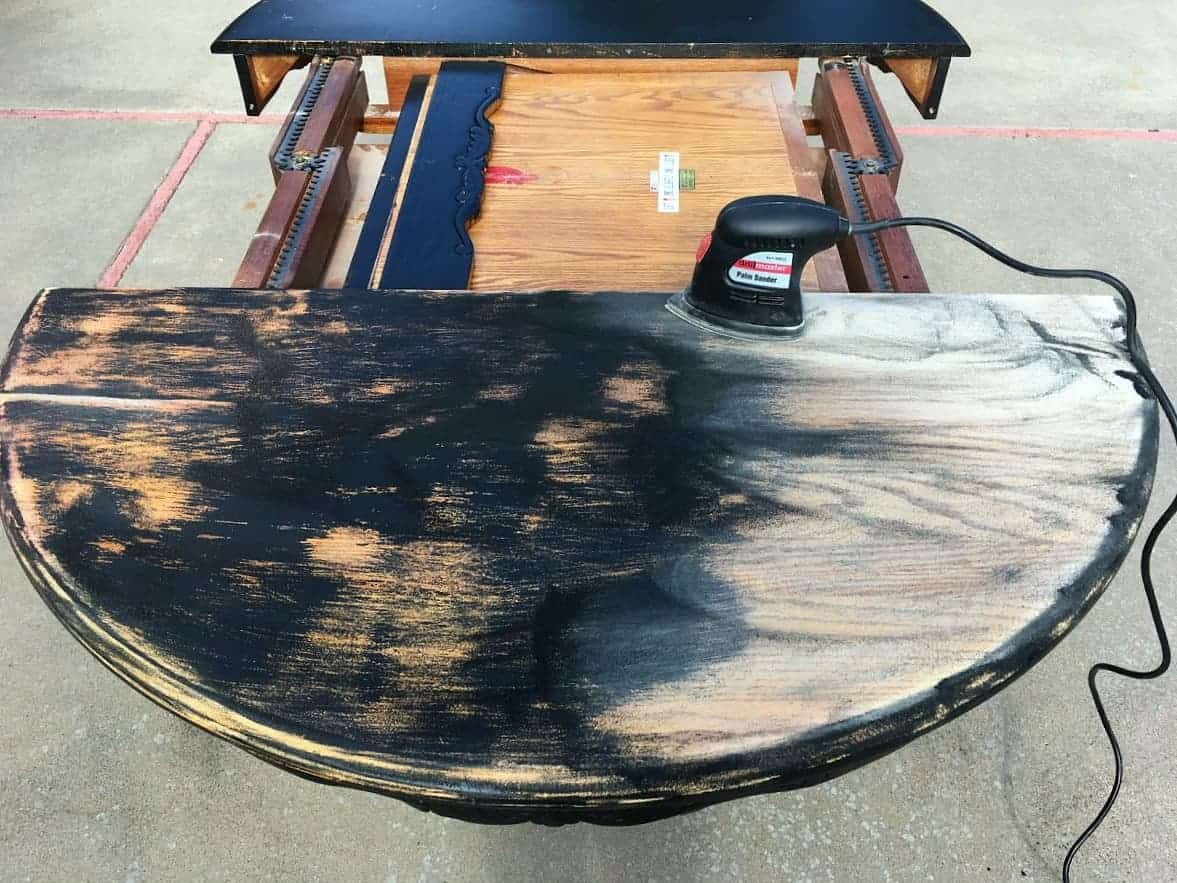
I ended up using a chemical stripper to cut down on sanding time. I'm usually against using a stripper but I got so tired of sanding that I decided to go for it. I applied the stripper, let it sit for an hour, and scraped it off.
Then I sanded everything down again. I still had some patches where the varnish remained, and I had a little time on my hands, so I decided to repeat that process again.
Finally, I had made it through all the coats of paint and varnish, and was left with a bare wood table top. Now it's time to stain...
Farmhouse Table Step 2: Staining/Sealing
Once you've completely sanded through any type of sealant that's on your table, you're ready to stain the wood. First, clean off any sawdust. I used a dry paper towel to dust it off, then came back with a barely damp paper towel to pick up the fine dust.
Then I dipped one of my rags in a little stain and rubbed it on, in the direction of the wood grain. (I was in such a hurry to get this part done that I completely forgot to take pictures, but you can see the same process in this post about my coffee table.)
After a few moments (which was equal to how long it took me to stain the whole table top) go back and wipe the surface again with a dry rag to absorb any excess stain. Allow to dry for a couple of hours and re-coat if needed. I did two coats of stain.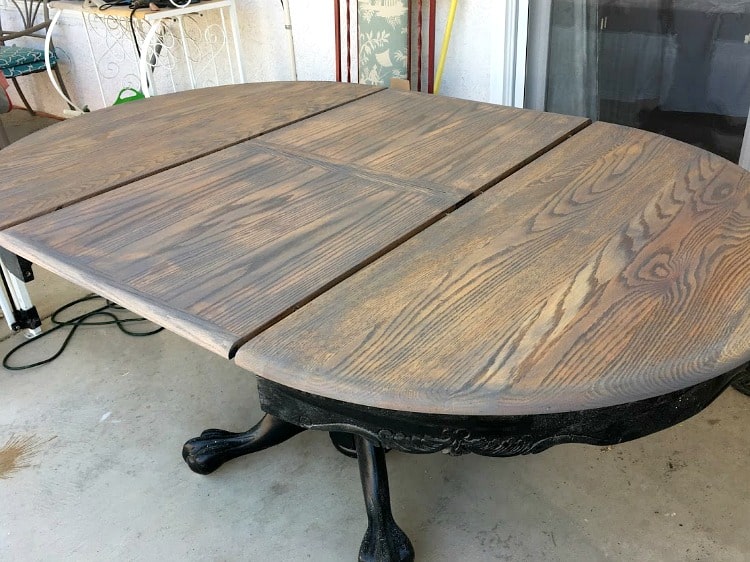
Let me point out a couple of things about this picture. First, my patio is in shambles. I'm so embarrassed that I didn't look around and clean up a little before taking pictures but oh well, that's real life for ya. Second, the table top doesn't look all that great yet. It really needs a top coat to condition the wood and bring out the pretty colors in the stain.
After the stain is completely dry (I left mine over night), it's time to apply a sealer or top coat. For this I used Polycrylic. I like Polycrylic because it's waterbased, which means easier cleanup and less fumes, and it doesn't yellow over time like Polyurethane does. I also like a satin finish (rather than glossy) since I'm going for a weathered barn wood look, not shiny and new.
I used my synthetic bristle brush to paint on a light coat of poly all over the table top. It's better to do several light coats than one or two heavy coats.
After 8 hours, I lightly sanded the first coat of poly using my 220 grit sandpaper. Then I applied another coat in the same way as before. I ended up putting on a total of three coats since this is our kitchen table and it gets a lot of daily wear and tear. We are not a coaster-using family so our table top needs to be pretty forgiving.
Farmhouse Table Step 3: Painting the Base
Now that my table top has a new lease on life, it's time to finish the base to match the farmhouse style of the top. Now we're in territory that I understand. I pulled out my trusty stash of chalk paint and relaxed into a job that I know well and enjoy.
The only challenge was climbing around under the table. I can't tell you how many times I bumped my head and ended up with fresh paint in my hair. But that's a normal occupational hazard, I guess.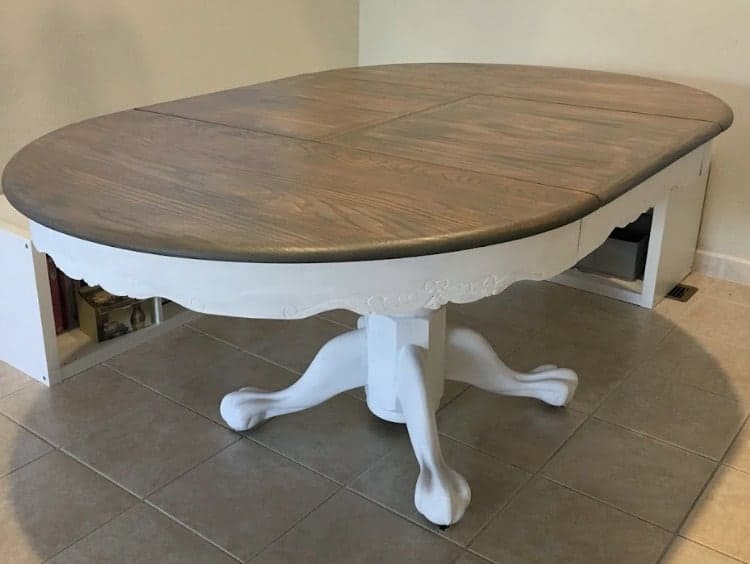
The great thing about chalk paint is you don't have to use much finesse. I slapped on about three coats (because, black paint) and let those dry well. Then I sanded down the areas that naturally get the most wear and tear, to bring out the farmhouse style a bit.
Finally it was time for a quick coat of creme wax on top of the white paint, and voila, new table! If you've never used chalk paint before, the wax finish is important to bring out a little shine and protect the paint.
You simply dab a rag into the wax and rub it on all over the chalk paint. Then once the wax is dry, come back with a clean rag and buff until you get a satiny finish.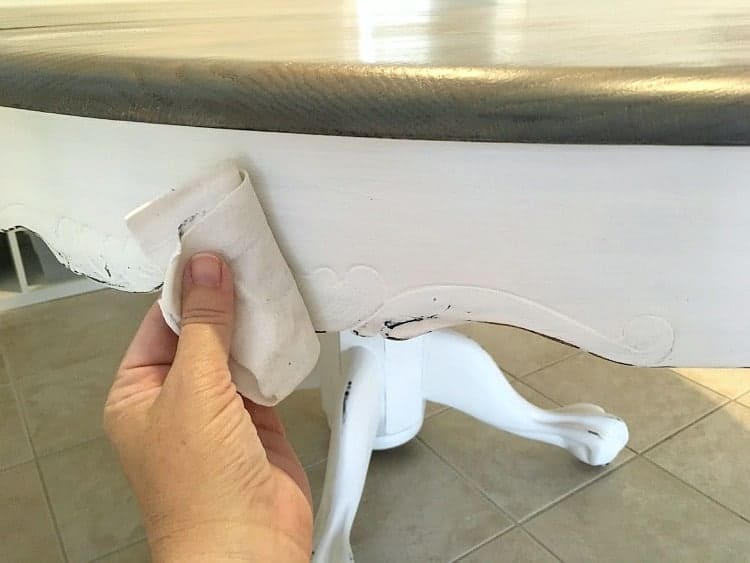
Now the base and the top are protected, and this beautiful farmhouse table is ready to use.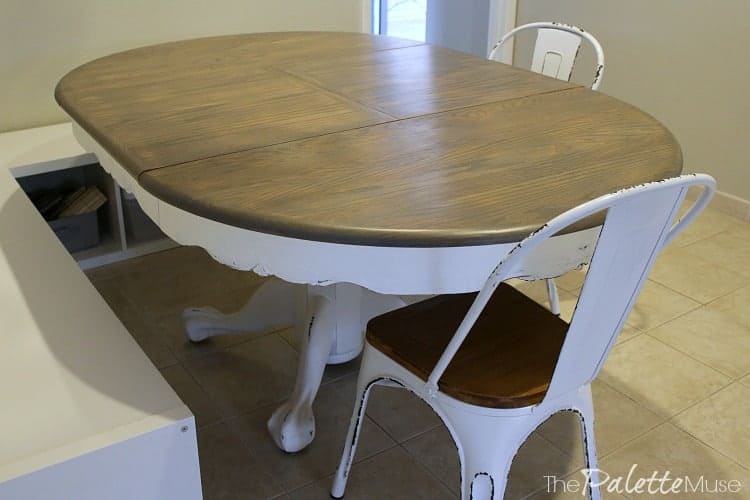 I think I might have turned into a coaster nazi though, now that I've done all that work!

Next up, bench seats!


Wendy says
Wow I am so impressed how well this turned out. I am going to refinish my dining room table next and found this extreeeeeemely helpful! I thought that gray stain would be more gray but I love that it isn't...just a subtle hint. I would love to know what kind of stripper you used? I have been reading reviews and haven't decided yet on what to use. Great job and I can't wait to see what you do next!
Meredith says
I'm so glad this was helpful! You can make the stain more gray by adding more coats but I liked the variation. There's a link to the stripper I used, but I'll go back and edit it to include the name in case you're not the only curious one...
Susan Cooper/findingourwaynow.com says
I love the new look of that table. I have a table that would look nice with this kind of treatment.
I too have been having fun repurposing some of my old outdoor furniture. It's a fun and rewarding thing to do. 🙂
Meredith says
Thanks Susan! There's just something satisfying about rescuing a piece of furniture and giving it new life!
Keri Kulhanek says
I love the way your table turned out. It looks so much better now! I also turn to paint frequently, but have only tried chalk paint once. I painted my kitchen cabinets with it. It didnt hold up to my crazy household well at all! In hindsight, I should have known better. Cant wait to see what you do next week!
Meredith says
Thanks Keri! I've heard that about chalk paint and kitchen cabinets. I hope it does better in this table!
Anita C. Lee says
And now for something completely different...WOW! That is truly like a whole new table. Looks great!!
Meredith says
Thanks! At least it was worth all the work!
kikiinteriors says
WOW!! This looks like a new table - it's amazing! Love what you have done to give this table new life!
Meredith says
Thank you! It was even a surprise to me! I had my doubts along the way...
Jeri Walker (@JeriWB) says
Nice! I've only used an orbital sander a couple of times, and it was for a fairly small project. Kudos to you for getting all the layers off, even if you had to resort to using a stripper.
Meredith says
Fun fact, auto correct would really prefer me to be talking about stripers right now. 😉
Emy says
I love how the table turned out! It looks amazing with your chairs!!
Meredith says
Thanks Emy! (I was afraid I'd need new chairs after this!)
fourseasonliz says
It gorgeous!! But I am tired just reading about all the steps and all the sanding! But the results are really amazing!
Meredith says
Yeah, the sanding was no joke! But everything else was pretty easy, even though there were a lot of steps. It was totally worth it in the end though!
Maria - Dapper House Designs says
It looks like a completely different table! I love how the wood top turned out and love how you distressed it. Looking forward to seeing your finished space!
Johanna says
Wow! I love the result!! It's absolutely beautiful!
Meredith says
Thank you Johanna! ?
carlye daugird says
1) it looks amazing and So You! Love it.
2) I have to say I really love your digressions.
3) You rock! That was a lot of hard work. I love how u put all u got into ur work.
Meredith says
Lol thanks friend! The digressions are half the fun, right?
Carole at Garden Up Green says
Meredith this is fantastic - I'm a huge fan of natural wood and Love Love that you took the time to restore this table to it's natural beauty and still incorporate your ambition for a little paint texture. The chairs are also awesome so glad I stopped over to check this out... You have the gift to restore wood..
Meredith says
Thank you Carole! I had my doubts along the way but I'm so glad I didn't give up!
Erin @ Lemons, Lavender, & Laundry says
This turned out beautifully!!! The white with the wood tones works perfectly in this space.
Meredith says
Thanks Erin! I'm loving the white paint and gray stain look right now.
Sheena says
I love how your table turned out. I used paint stripper a few years ago on a project. I hated the process but in the end it looked great. It was for a piece of furniture that had painted so many times it had to be stripped down to the wood to make it look good again. I can't wait to see your reveal.
Meredith says
Thanks Sheena! Yes, there are times when the stripper is really the best tool. At least for someone as impatient as me!
Melissa says
This is stunning!!! I can imagine how much work it was. Sanding is rough work! But it was so worth it. And I've also had paint in my hair for a few weeks now! Your table is beautiful and I can't wait to see what else you do!
Meredith says
Thanks Melissa! Paint in the hair is part of our uniform, right?
Emily Mulder says
I tried to enter a comment before, but somehow it didn't. For the future, in case you're interested;-) When I was a kid/teen, my family had a furniture refinishing business. My dad was interested in getting away from using strippers, but we refinished a LOT of old painted (lots and lots of layers) furniture. We discovered that scraping it off with a blade or piece of glass worked much more quickly, and more cleanly. So... I have scraped paint and varnish off a lot of furniture! With a little sweat it works much quicker than a chemical stripper and takes you to the fresh wood. Then all you need to do is sand (and we never used a sander - just sandpaper). That is my go-to to remove any old finish now, as it works so well!
Meredith says
That's really good to know Emily! I should really put my kids to work next time with the sandpaper! Good life skills, right?
sweetparrishplace1970 says
This table makeover is great inspiration for me, because I want to do something like this on my dining table soon. Would you mind if I share one photo with a link back to this post in a favorites round up I am writing? Possible use of the photoin a collage too.
Meredith says
Thanks Nicki! Sure, I'd be happy for you to share, thanks for asking!
gopack78 says
I love the stain color of this table. I have a beautiful mahogany Duncan Phyfe Dining Room Table but would like to make it less formal. Can you please share any wisdom on how you might re-style it?
Blessings.
Danielle says
I've been following your tutorial to refinish a 1940s Rway table that I picked up at a barn sale for $25! I'm wondering how your table has held up? I decided to use poly on the legs as well instead of the wax.
I'm also wondering if you stained or painted under the lip of the table? I painted it and now I'm worried I should have stained it..
Meredith says
I've been so happy with how ours has held up! We eat almost every meal at it so it gets a lot of traffic but it's still just as beautiful as the day I finished it. Any spills wipe right off and it's easy to keep nice and clean.
I probably would have recommended staining under the lip of the table, but really it's a personal preference thing. I'm sure no one but you will even notice how that part looks. I say be proud of yourself for doing it and don't worry about what you would have done different!