Wait! Don’t take that broken glass coffee table to the dump just yet. I’ve got an easy fix for you that just might rescue your table and save you the expense of buying new furniture.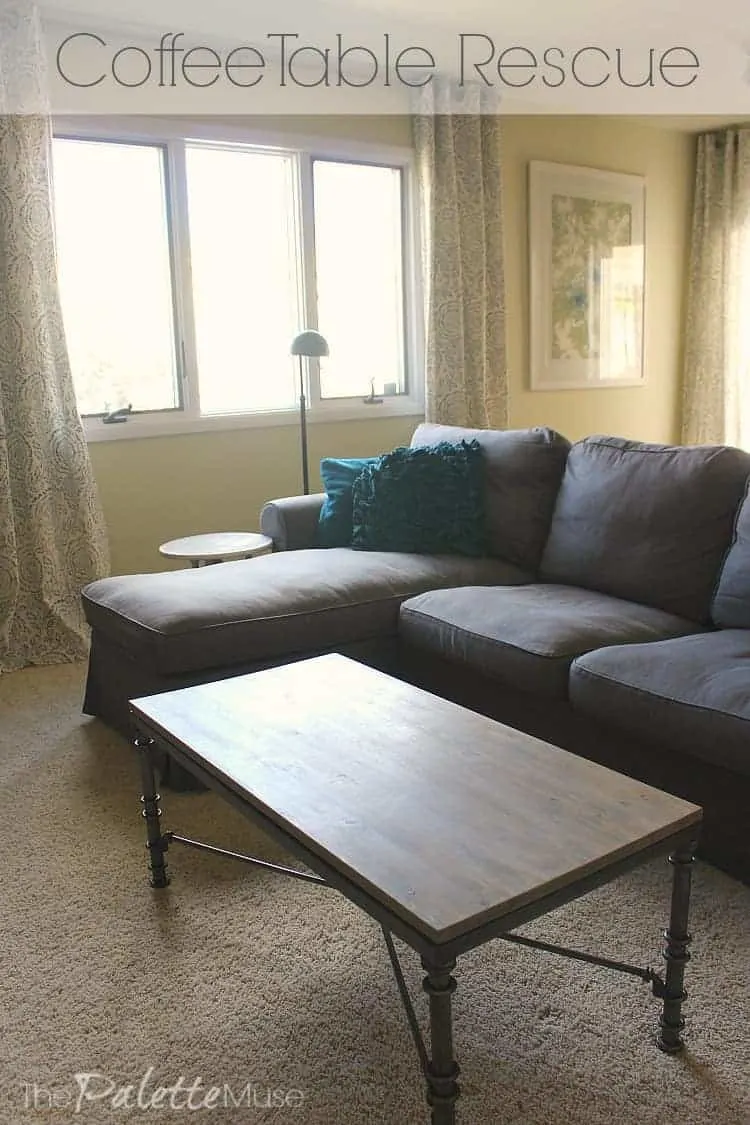
~This post contains affiliate links. If you make a purchase, I will receive a tiny bit of the profit at no extra cost to you. Thanks for your support!~
Coffee Table Tragedy
I loved my glass coffee table. It wasn’t expensive (thank you Craigslist!) and it wasn’t anything fancy, but it fit the little space in front of my sectional just perfectly. Until the day it broke. Well, actually, the day my husband sat on it and broke it.
To tell you the truth, I’m surprised it lasted as long as it did with two kids who like to climb on everything. I guess the kids weigh less than the husband. Or maybe it had just had more than it could take that day and finally snapped in two. Much like my patience at homework/dinner/bedtime.
Anyway, due to the body part that did the damage, we lovingly called the broken glass “The Butt Crack” and taped it up for a few days so no one would get hurt, while I tried to figure out what to do. I went back to Craigslist but didn’t really find anything I liked. We thought about building one out of pallets, but that seemed like a lot of work. We even thought about going without a coffee table, but then all the remotes, magazines, and empty snack containers would just end up on the floor.
So I did what I always do when I need inspiration: I spent an evening wandering the aisles of Lowe’s.
As I was looking in the molding and wood trim area, I found these great “Project Panels” that came in different sizes. (I’m sorry I couldn’t find them online to give you a link, but you can probably find something similar in the store, or if you have a local woodworking shop.) This is what I needed! They have finished edges, unlike plywood, and are ready to be stained or painted. (I’m all about not having to spend a lot of time prepping!) The right size panel for us cost only about $18, so the price was right, too!
Make Your Own Table Top!
We happened to find a panel with the same width as our table, and then simply cut the board length down to size, using a Circular Saw.
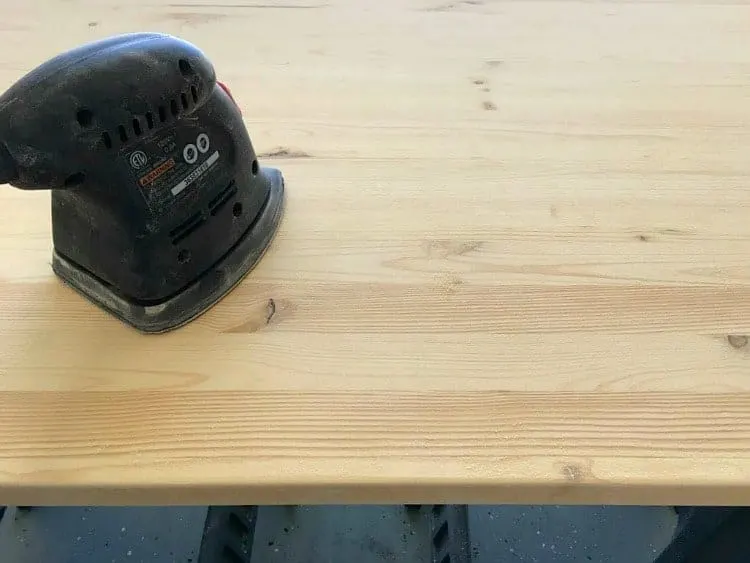
Then I used a palm sander to ease the edges of the wood a little. (I know I said no prepping, but nothing’s ever that easy!)
Finally, I applied one coat of Minwax Classic Gray stain, and followed it with a couple coats of furniture wax
.
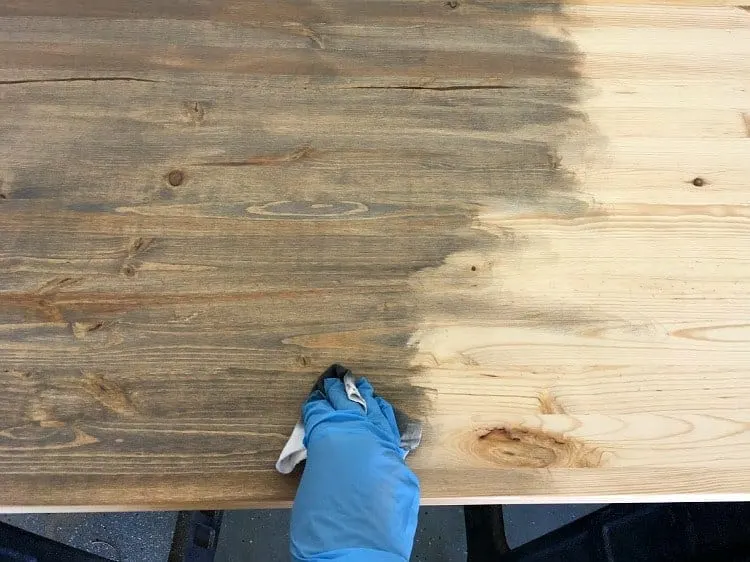
Tip: I wanted a rustic look, so I didn’t want to use Poly on top of the stain, but I’ve since realized that wasn’t the smartest move for a table top. We have to be careful to set our drinks on coasters, which is just not going to work for very long in our super-casual household. I’ll probably go back and add a polyacrylic finish later.
Our table top was ready and it looked great! (I think it looks even better than the glass ever did.)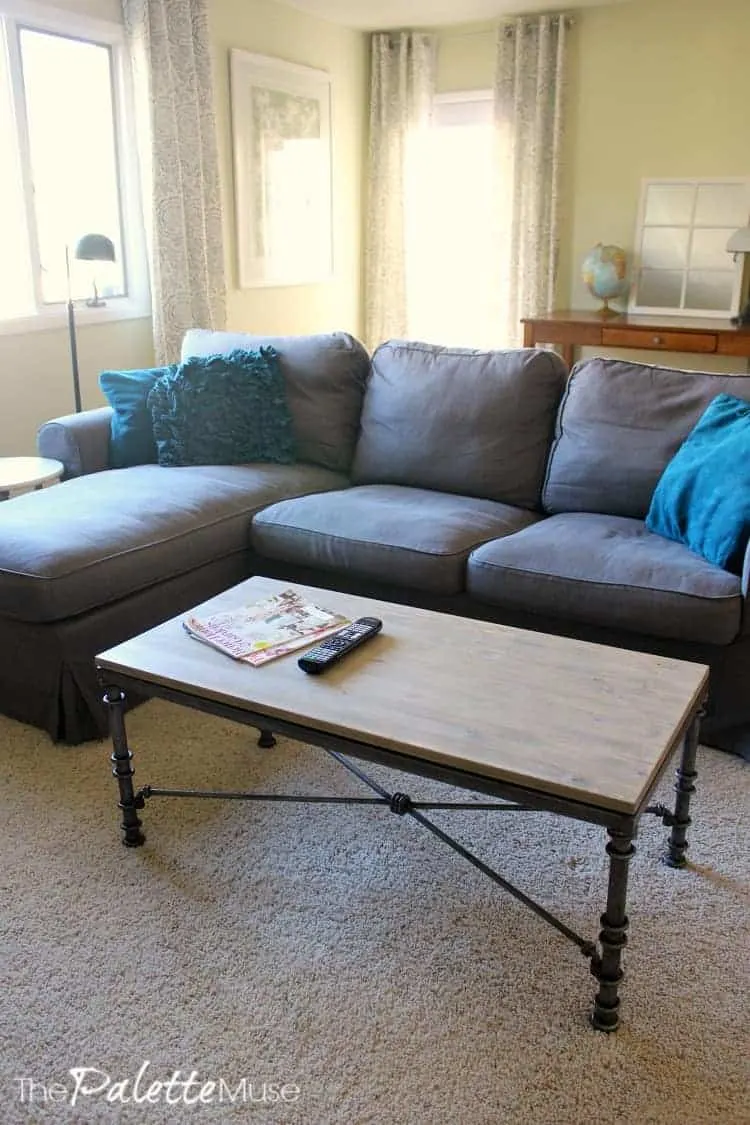
But then I realized we had one more small problem.
The glass top had been sitting right on top of the metal frame, with only small felt pads to keep it in place. I think the weight of the glass and its low profile made it slip-proof, but not so with the lightweight wood panel.
I solved this problem by buying a set of small plastic furniture bumpers and installing them on the bottom side of the table top, just inside the corners of the frame.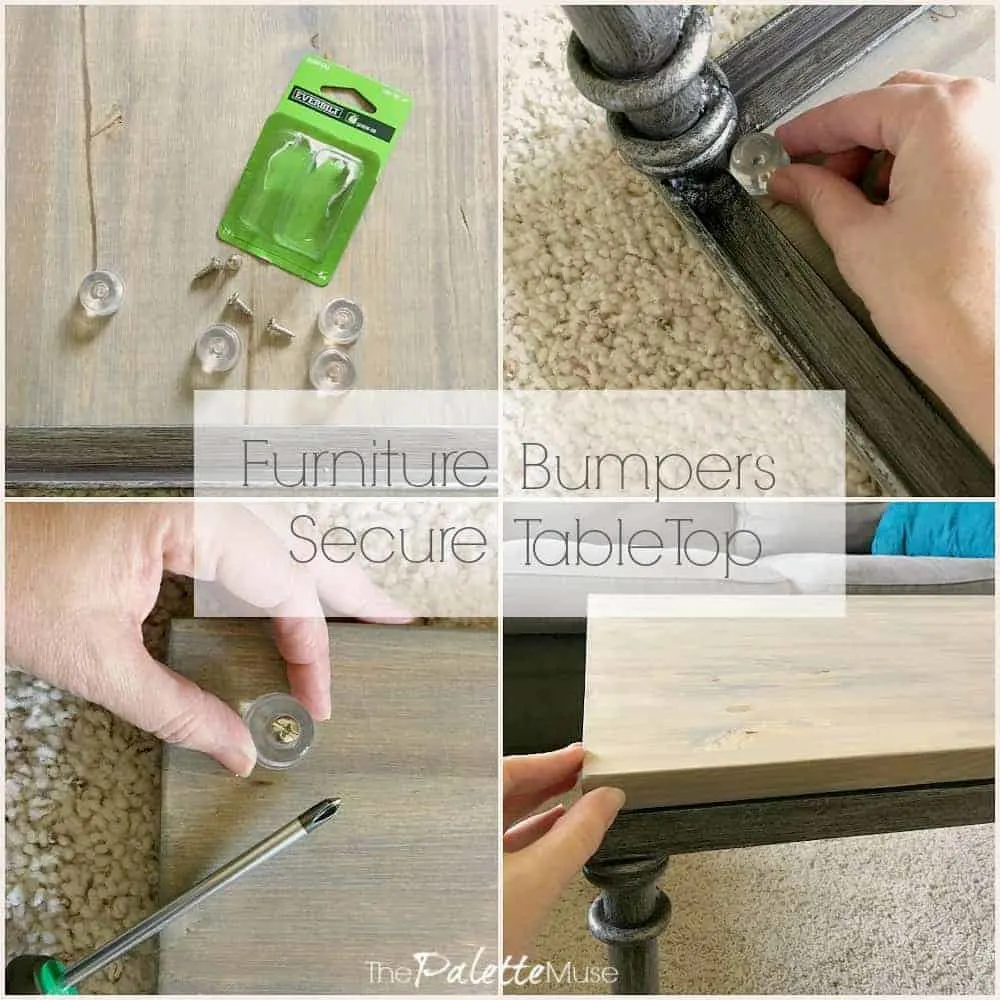 Now, when someone puts their feet on the front edge of the table, they don’t slide the table top off the back side of the table. #partyfail
Our new table was inexpensive, easy, and mostly used items and tools we already had on hand. That’s my definition of a great DIY project! Plus its rustic gray stain and matte finish adds the perfect farmhouse touch to our den.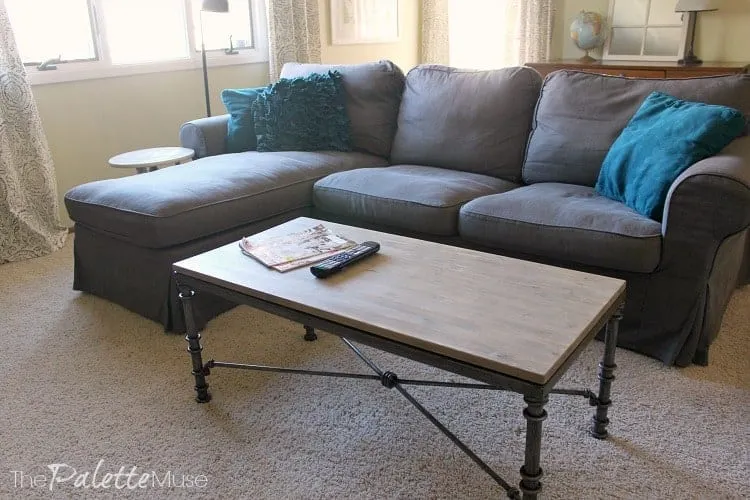
So come on over and put your feet up! I’ll make you a cup of coffee and we’ll brainstorm which of your furniture pieces to try this fun project on…

Jeri Walker (@JeriWB)
Wednesday 15th of March 2017
Such a great idea and so practical. Lesson learned on not sitting on a glass top table though ;)
Carole West, Garden Up Green
Tuesday 7th of March 2017
It looks fantastic Meredith and you can still use just a couple thin coats of poly while restoring that same look. I did that on a kitchen island counter and Love it. Sometimes if you went light enough with that dark stain the grain of the wood pops even more. Love your couch too - nice cozy space!
Meredith
Wednesday 8th of March 2017
Thanks Carole! That's great to know. I will definitely give that a try!
Susan Cooper/findingourwaynow.com
Monday 6th of March 2017
That is so cool Meredith. Now I just need a old coffee table to do a makeover. ???
Meredith
Wednesday 8th of March 2017
Thanks, Susan. You never know when you'll find just the right piece of furniture to try this on. Hopefully it won't be because yours broke!
Natalie
Monday 6th of March 2017
Oh I love it!! It looks so awesome and I love your storytelling! I'm so excited to know about that wood at Lowe's too! Less prep is my style too ?
Meredith
Wednesday 8th of March 2017
Lol, thanks Natalie! Let's hear it for less prep!