Hi, and welcome back to the second half of Linocut Block Printing! I hope you've had fun drawing and carving your block. Check out Part 1 if you need help with that part of the process. Today we pick up where we left off...
Linocut Block Printing Part 2: Proofing & Printing
This is the fun part! Oh wait, did I say that about the last part? I guess to me, it's all fun. This is where you get to see your project take shape on paper, and in color.
As always, first gather your supplies.
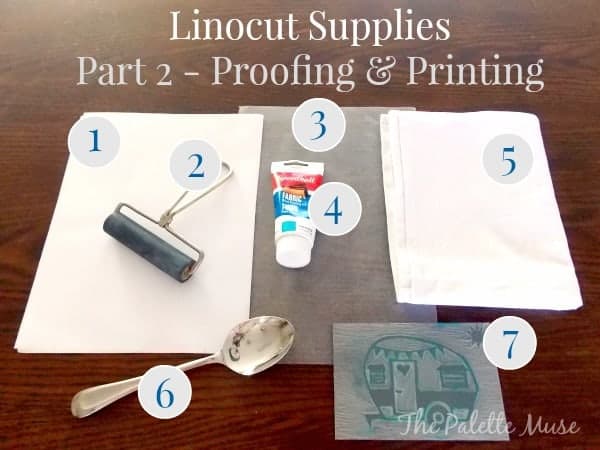
To print your design, you'll need:
Clean pieces of paper (this can be regular copy paper)
A roller (specially made for printing ink)
A palette (here I just used wax paper, but a glass or metal plate would be ideal)
Ink (I like Speedball)
The paper (or material) you'll be printing on.
A large smooth spoon (or if you are really into printmaking you would use a baren, the tool specifically for the purpose of rubbing the back of the paper onto the inked block)
Your block!
Plan on buying the roller and ink at your local art or hobby store. I probably should have mentioned these in Part 1, when you were buying supplies!
Proofing
Before printing on your final piece of paper or material, you need to give it a trial run. This is called "pulling a proof." You may sometimes see fine art prints labeled and signed as "Artist's Proof." This just means that these pieces are part of the development of the final process, and usually each one is unique.
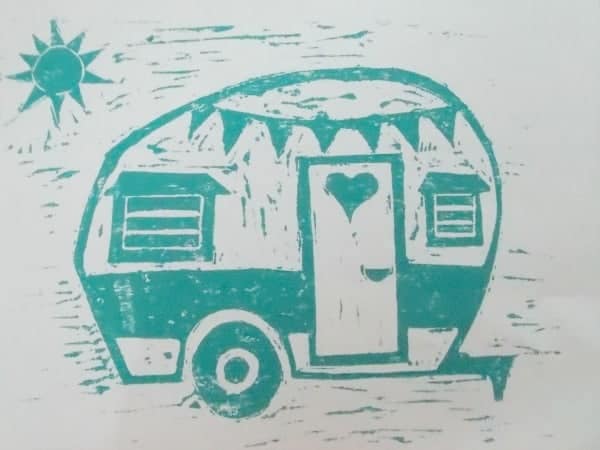
In our case, the proof helps us see where there are areas that need adjustment. My block needed a lot of adjustment! Sometimes with woodblock or linocut printing, the extra marks that show up are part of the charm and style of the design. But in this case, I was going for something a little more graphic, with less movement, so I needed those little extra lines gone.
I simply washed the block, and brought out my carving tools again. Looking at my proof for reference, I carved out more of the background areas that were showing through. It was fairly simple to see on the block which areas needed to be reduced, since these are the pieces that retain a little of the ink on them.
Once that was done, I pulled another proof. When you are satisfied with the outcome of the proofs, it's time to make the final print. Here is the process for printing, which is the same process for proofing.
Printing
The printing process takes a little bit of time, and a good amount of space. Be sure you have a whole table top to devote to this project, and preferably not the table that your kids will be eating dinner on in 20 minutes!
First, cover your area and lay out your supplies. Closest to you should be the area where you will be printing. At arms length is where you will set your palette, or ink plate. I was in a hurry here, so I just used wax paper (which I don't recommend). If you are looking for a good ink plate, look no further than your own kitchen. A baking sheet or large, completely flat plate will work. I got a large microwave oven turntable plate from my local thrift store that is perfect for this purpose. To keep your family completely safe from hazardous inks and materials, plan on relegating the plate to the arts & crafts supplies, rather than using for food later.
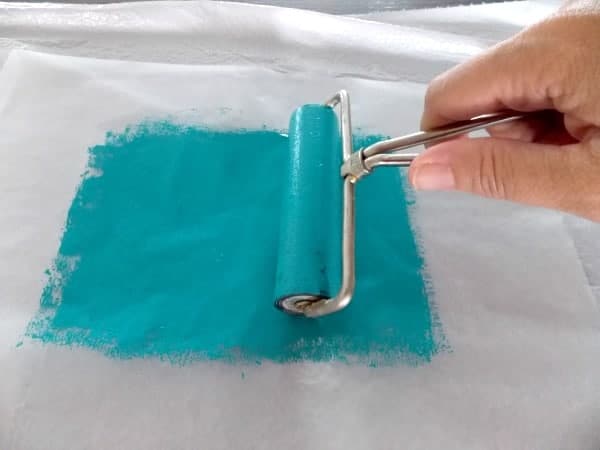
Squeeze a small dollop of ink onto the plate. Use the roller to spread the ink out in every direction until it evenly coats the plate and the roller. It may take a little practice to get a good even coat, but this is essential to a good print.
Be sure your block is clean and completely dry, then use the roller to roll the ink onto your block. Make sure you have even, thin coverage.
Lay a clean sheet of paper on the table, and set your block face up on top. This keeps any stray ink that may have gotten rolled or dropped onto the table from getting on your final product.
Lay the actual piece of printing paper or material face down on top of your block.
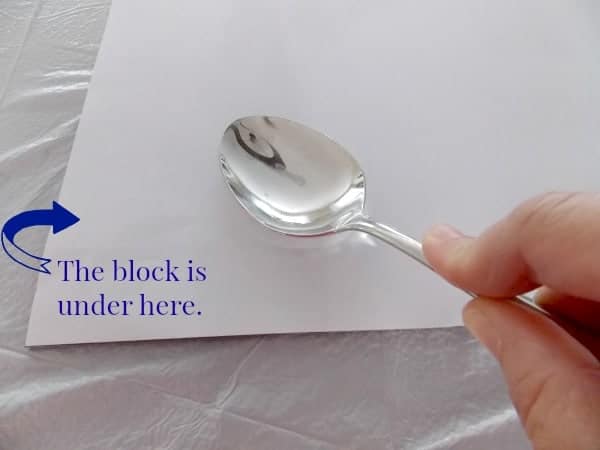
Use the back of your spoon (or baren) to rub gently and evenly across the back of the paper or material. This presses the ink from the block into the paper.
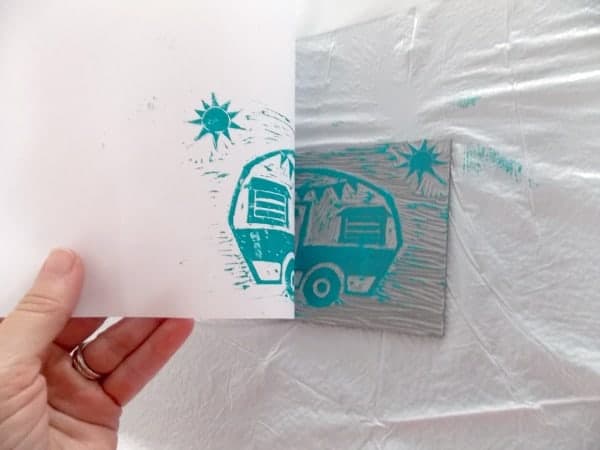
Carefully pull the paper up from one corner of the block to the other. Lay paper flat to dry.
Congratulate yourself on your new piece of art. Or, decide your block needs more work, and call this piece a proof. Then go back, fix your block, and start the printing process over again.
I think I mentioned in Part 1 that printmaking is a very process-heavy art form. Some people love this about it, and others can't stand how much work goes into it. The good thing about it is that you can print from that block over and over again, in any color combination you can think up. That makes it great for handmade cards, textiles, wall stenciling, or any other craft that relies on repetition.
I hope you enjoyed this tutorial, and I'd love to hear from you (and see pictures!) if you make your own prints.
I don't know where you find the time Meredith but I enjoy the results. I feel sufficiently schooled in the art of lino-cutting to be able to resurrect my high school memories and ponder the outcome.
I sent your link to my daughter and she plans to do this with my grandson. I also think that a point you made is about proofing is something that also applies to business.
That is super cool. I am going to try this myself. As for me, you need to add more about how someone like me, can do things like this without making such a mess. I know you covered it, but trust me, I will make a mess.
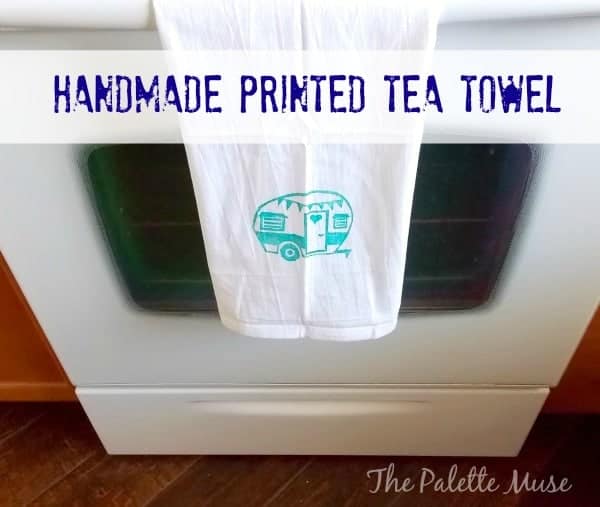
So cool. I just love how your antique camper came out. It's pretty awesome that you can make a set of dishtowels one in each color for every day of the week. Neat idea!
That is just way too cool. It would be even neater to put the towel inside its matching trailer. This is also exactly the type of thing I have patience for when I can find the time to get into it. The idea wheels are definitely turning...
Hi Meredith; thanks for sharing the process. It sounds like you had lots of fun. wonder if you thought about doing this as a video? i love crafting and wish i could do more things like this. take care, max
Thanks Max, I have thought about doing a video, but that's so intimidating to me! It seems like a whole realm of tech stuff that I'd have to learn. Maybe someday...
Hi Meredith - I love that printed tea towel - what a neat way to personalize your kitchen (or bathroom) linens. We're going to be freshening up our bathroom over winter and I am going to use your linocut printing to add butterflies to my towels.
Lenie
You have a way with art and this is such an incredible way of teaching us to also be able to DIO (do it ourselves). I tend to struggle with art of this form but with your guidance I believe I can do this as well, especially with the kids.
I remember making blocks like this in school and haven't made one in a really long time. This looks like a fun project and I love how your towel came out. Thanks for sharing on Merry Monday.
Hi From Australia!! I hope you are healthy & happy at this time of uncertainty. I have already carved out my block (A4 size) for the women's shed I run. Then wanted to find out the best way to try the printing process which I had a little bit of an idea of (as I am a 60's bub). So this came up on Pinterest & was actually one that had information, a lot had nothing or were useless as it was just a photo people had pinned. Grrrr!!
Anyhow, now I have read what you have supplied here, I feel a bit more confident to run some "proofs" When I have done it, I will try to send a picture or two.
[…] blades! I think this is a very cool piece of art in itself, but we’re only halfway there. Join me next week as I show you how to print from your block onto the finished […]
[…] when I posted a two-part tutorial on block printing? I realized about halfway through writing the second part of the tutorial that most of my regular readers are not going to take the time to learn that particular skill. (If […]


Anita says
This is SO cute! If I had an Apache trailer, I'd have to have some tea towels like this!!
Meredith says
I think you might need some anyway... 🙂
Anita says
You're probably right. Do they come in red?
Tim says
I don't know where you find the time Meredith but I enjoy the results. I feel sufficiently schooled in the art of lino-cutting to be able to resurrect my high school memories and ponder the outcome.
Meredith says
Good! I'm all about resurrecting high school memories. 🙂
jacquiegum says
This is so very pretty! Looks like a lot of work...but the fun kind where the result makes it all worth it. These would be great gifts!
Meredith says
Thank you Jacquie! You're right, it's the fun kind of work. This is what I do when I should really be doing laundry. Or dishes. 🙂
Arleen says
I sent your link to my daughter and she plans to do this with my grandson. I also think that a point you made is about proofing is something that also applies to business.
Meredith says
Thanks for sharing Arleen; I hope your daughter has fun. And you're right, proofing is absolutely essential in business!
William Rusho says
That is super cool. I am going to try this myself. As for me, you need to add more about how someone like me, can do things like this without making such a mess. I know you covered it, but trust me, I will make a mess.
Meredith says
Making the mess is half the fun! Cleaning it up? Not so much...
bindu saju says
Thank you. The mystery about the linocut printing is revealed. All I have to do is go and buy the stuff. Sigh!!! Wish it was a bit more easy...
Meredith says
I know, some of these projects take a little more work and supplies. Oh well, it's worth it!
Susan Cooper/findingourwaynow.com says
So cool. I just love how your antique camper came out. It's pretty awesome that you can make a set of dishtowels one in each color for every day of the week. Neat idea!
Meredith says
Thanks Susan, I like the idea of making one for every day of the week!
Susan Cooper/findingourwaynow.com says
I love that idea. I just wish I had more time to create all the stuff I want. This would be one of them for sure. 🙂
Donna Janke says
I doubt I have the patience to tackle this, but I like the result and the process is fascinating.
Meredith says
Yes Donna, I knew it wouldn't be for everyone, but you never know! 🙂
Jeri Walker-Bickett (@JeriWB) says
That is just way too cool. It would be even neater to put the towel inside its matching trailer. This is also exactly the type of thing I have patience for when I can find the time to get into it. The idea wheels are definitely turning...
Meredith says
I agree! Now I just need to get the matching trailer...
Maxwell Ivey says
Hi Meredith; thanks for sharing the process. It sounds like you had lots of fun. wonder if you thought about doing this as a video? i love crafting and wish i could do more things like this. take care, max
Meredith says
Thanks Max, I have thought about doing a video, but that's so intimidating to me! It seems like a whole realm of tech stuff that I'd have to learn. Maybe someday...
Beth Niebuhr says
What fun. I need to find a little time to try it.
Meredith says
Yes, this one was a little more time consuming that most of my other projects. Sure was fun, though!
lenie5860 says
Hi Meredith - I love that printed tea towel - what a neat way to personalize your kitchen (or bathroom) linens. We're going to be freshening up our bathroom over winter and I am going to use your linocut printing to add butterflies to my towels.
Lenie
Meredith says
Lenie, that will be so cute! I'd love to see a picture when you're done. Let me know if you have any questions about the process...
Mina Joshi says
Wow so creative. A could way of making personalised cards. I can also see these being used to decorate rooms.
Meredith says
Thanks Mina! You're right, this would be a great way to make cards or decorations. Hmmm, the creative wheels are turning...
Welli says
You have a way with art and this is such an incredible way of teaching us to also be able to DIO (do it ourselves). I tend to struggle with art of this form but with your guidance I believe I can do this as well, especially with the kids.
Meredith says
Thanks Welli! I bet your kids will love it.
Erlene says
I remember making blocks like this in school and haven't made one in a really long time. This looks like a fun project and I love how your towel came out. Thanks for sharing on Merry Monday.
Meredith says
Thanks Erlene! I always love Merry Monday!
Regina says
Hi From Australia!! I hope you are healthy & happy at this time of uncertainty. I have already carved out my block (A4 size) for the women's shed I run. Then wanted to find out the best way to try the printing process which I had a little bit of an idea of (as I am a 60's bub). So this came up on Pinterest & was actually one that had information, a lot had nothing or were useless as it was just a photo people had pinned. Grrrr!!
Anyhow, now I have read what you have supplied here, I feel a bit more confident to run some "proofs" When I have done it, I will try to send a picture or two.