...And The World's Longest Kitchen Cabinet Painting Tutorial!
It's finally done! I've finished painting my kitchen cabinets and to celebrate, I'm sharing the entire process with you! I've learned a lot along the way, made a few mistakes, and in the end, am thrilled with the results. This makeover has completely transformed the look of my kitchen, and since the kitchen is open to the living room, it's even changed the feel of the whole area.
Here's a quick reminder of what the kitchen looked like before...
And here is the new improved (and very bright) kitchen!
My husband jokes that we could signal outer space from our kitchen, with the way the light bounces around. I choose to take that as a compliment. To me, who does not love to cook, and really really does not love doing dishes, the only thing worse than these tasks is having to do them in a dark and dreary space. Now, I don't even mind cooking in my new kitchen, although I do still mind dishes a little bit.
Here are a few quick facts about this makeover, before I get to the tutorial:
- The whole project cost me about $160. I bought paint, primer, new rollers, and sandpaper. I already had brushes and most of the other items for preparing the surfaces. I bought shelf brackets (at Hobby Lobby) and a new shelf (at Lowes). The new light fixture is actually an old one that used to hang over my dining table. I still loved the knobs and hinges, so I kept all the hardware, and saved hundreds of dollars. All appliances and countertops are the same, although I'd love to change them out some day as part of "Kitchen Remodel 2.0".
- It took about 3 weeks from start to finish, working an average of 2-3 hours a day on weekdays and almost none on weekends. This may sound backwards to some of you DIY-ers, but as a work-at-home mom, I was surprised at how many distractions (don't tell my kids I called them a distraction!) popped up to get in the way. So I just did the best I could and worked whenever I could get away without traumatizing the family. You could probably achieve the same results working only on the weekends for longer chunks of time. And if you really applied yourself, you could probably be done with a project like this in about a week or two, working full time on it.
- There is only one way to get a professional-looking finish when painting your kitchen cabinets: do it the way the professionals do! Anyone who tells you there is a hack, trick, or special product to cut corners is trying to sell you something. Speaking of which, I'm not selling anything. This is not a sponsored post, meaning all the products in the post are ones I've found, tried, and evaluated on my own, so my opinions are unbiased and solely based on my own experience.
~ This post contains affiliate links, which means if you make a purchase I may make a small commission, at no additional cost to you. Thanks for supporting The Palette Muse! ~
Alright, let's get down to business. How do you paint your kitchen cabinets the right way? Read on...
When I started this project I had visions of naming it something like "The Lazy Girl's Guide to Painting Cabinets" or "The Secret to Easy Cabinet Painting." Sadly, as I started researching and working, I quickly came to see that there would be no easy way out for me. And you can be sure that if there was an easy way out, I would find it! (I'm not known for my diligent work ethic.) But laziness has its advantages, and in this case I was motivated by a burning desire to never have to do this work again. To get it right the first time became my mantra, and I hope my experience helps you if you are similarly motivated to try a project like this. 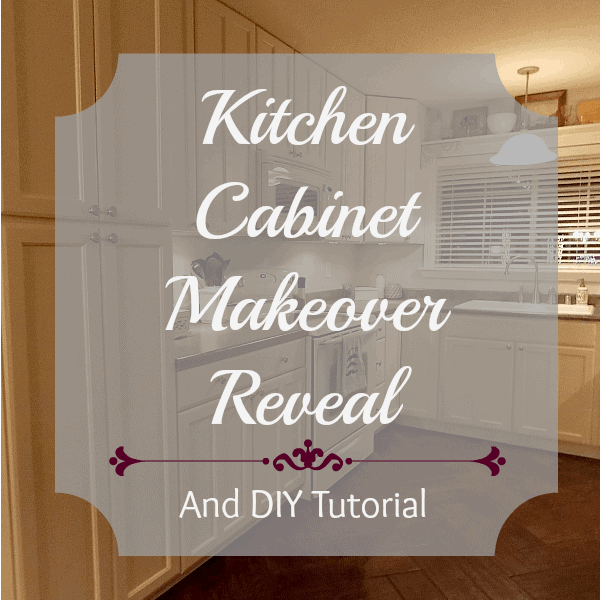
Phase One: Organize Your Project
- Pick paint colors. I chose Valspar's "Totten's Inlet" in Satin for the Cabinets and "Gravity" in Flat for the walls.
- Decide what kind of paint to use. I knew I wanted a self leveling paint with a long drying time, (more about why in a minute) and chose Benjamin Moore Advance. It's an Alkyd paint, which is like an oil paint suspended in water, so it's got all the advantages of oil, with none of the messy clean up. Along with the paint, I used a mohair roller and synthetic brushes.
- Define your workspace. Ha! This one is a joke. This project will take over your whole house. Just be prepared. But really, you can make your life easier by breaking this project down into two pieces: the boxes, or frames, and the doors and drawer fronts. Also, consider the weather. If you are planning on working in your garage, keep in mind that the temperature needs to be at least 50 degrees for the paint to dry properly. Any colder than that and you'll be inside painting cabinet doors on every horizontal surface in your house!
- Collect your supplies. It's inevitable, but nothing is more frustrating than having to make a run to the hardware store in the middle of a project because you ran out of sandpaper. I know this from much experience.
Kitchen Cabinet Painting Supply List:
- Sandpaper: 100, 200, 320 grit
- Sanding Block
- Orbital Palm Sander and replacement sanding pads
- Paint
- Primer (tinted close to paint color)
- Small Mohair Roller and Handle
- Synthetic Bristle Brush (I actually like the cheap foam brushes)
- Paint Trays (I cover mine with foil, so I don't have to clean it every day!)
- Microfiber Cloths
- Rubbing Alcohol
- Drop Cloth or Floor Coverings
- Blue Painters Tape
- Krud Kutter
- Screwdriver for removing hinges and knobs
- Caulk or Wood Filler
Click page 2 or 3 below to keep reading...


rachel621 says
Beautiful! The new cabinets really make the floor stand out as a statement. You did a great job and should be very proud! Its nice that you could re-use the hardware as that did save a bundle.
Meredith says
Thank you Rachel! This was definitely a cost-effective project, as long as I don't think too much about what my time is worth! 🙂
Tim says
That looks awesome and I rarely use that word but Wow...your cabinets look fresh and modern and very good job, well done, and Merry Christmas.
Meredith says
Thank you Tim, and Merry Christmas to you too!
jacquiegum says
Absolutely stunning! I am SO impressed! I love that you reveal that the only way to do a job like this is to do it the right way...no short-cuts! I can't help but notice that the flooring looks like it has so much more depth!
Meredith says
Thank you Jacquie! I'm so glad it looks better with the flooring. That may be a strange motivator for a project like this, but in the end I'm so glad it worked out!
velitta prather says
Thank you so much for your step by step honest report. I am about to tackle mine. Hopefully they will turn out as beautiful as yours
normaleverydaylifeblog says
Love it! Looks awesome!! It sounds like a ton of work, but it paid off in the end!
Meredith says
Thank you! Yes, I have to admit it was a lot of work, but totally worth it. I'm sure there are quicker easier ways, but this way I know it will last...
tuhinmechuhin says
Glad to visit your blog after a long gap. By the photos you have shared here, the new design definitely looks bright and smooth. I like this idea to make the kitchen brighter.
Meredith says
Thank you Tuhin! It's nice to see you here again.
lenie5860 says
Meredith, is it ok to gush? I love the new look, it is so bright and clean. When you started out I wondered why since your old kitchen looked so nice but this is fantastic. Kudos to you. Am so glad it was completed in time for Christmas - have a great one. By the way, I have printed off this entire post so I can use your instructions for my next (ugh) painting project.
Meredith says
Ha! Yes, I'll take gushing any day! Thank you so much, and I hope it's helpful to you when you get ready to paint. And Merry Christmas to you too!
Ken Dowell says
The kitchen looks great but I have to say that going into all that detail about what was involved is not inspiring me to plan a similar project. Had you oversimplified I might have been on my way to the hardware store.
Meredith says
Oh no Ken, I'm sorry to have scared you off! Perhaps I should have kept to my original "lazy girl" idea. 🙂
Catarina Alexon says
What an improvment! Well done. Bet you are happy not only about your new kitchen but about what you have achieved. And you should be.
Meredith says
Thank you Catarina! It does feel good to be done!
William Rusho says
Cabinets look great, I like your DIY blogs I learn a lot from them.
Meredith says
Thanks William!
Anita says
GORGEOUS!!! Can't wait to see the transformation.
Meredith says
Thanks! Next time you come by, it will be a little cleaner than last time. 🙂
Jeri Walker-Bickett (@JeriWB) says
Your kitchen looks really great. Now I'm starting to feel like mine needs a facelift, but won't be in the house long enough to justify all that effort. Thanks so for such a thorough tutorial. No doubt I will access it someday when the need arises. I've priced kitchen cabinets before, and have often told myself I would rather take the time to paint old ones by doing the right prep work than put a bunch of money into new ones. BTW I am finally starting to sand my pine furniture so I can paint it, so in a roundabout way your posts are inspiring me 🙂
Meredith says
Thanks Jeri! Yes, if you aren't going to be in the house long, it's really not worth the effort. But the principles apply to painting just about any kind of furniture, so good luck on yours! Let me know how it turns out...
Cheryl Therrien (@grandmasdiaries) says
I love what you have done! I took a long look comparing photos and you really did do an amazing job. Kudos to you! I can see why you are enjoying the new space.
Meredith says
Thank you Cheryl! I always think Before and After pictures are so much fun to look at too!
Susan Cooper/findingourwaynow.com says
Wow, indeed! Your cabinets came out beautiful. I love the contrast of the dark floors with the white cabinets. It looks great and you are all done just in time for Christmas. I bet that is a big weight off your shoulders. Congrats on a job well done!
Meredith says
Thanks Susan! Yes, it feels so good to have them done and ready to show off for Christmas!
Donna Janke says
Gorgeous. I love the new cabinet colour. It's amazing how it changes the kitchen. Good job.
Meredith says
Thank you Donna! Funny what a different color can do to a room, huh?
Leora says
Oh, how wonderful - you got it done, and you wrote a great tutorial, too! I will be happy to get my kitchen door painted. Maybe I will aim for just that. Appreciate all the detailed tips.
Meredith says
Thanks Leora! Yes, I think it's a great idea to start with a realistic-sized project. Even painting a door can make a big difference.
Lorraine Marie Reguly says
Meredith, as someone who is no stranger to home renos, I have to admit that you did a bang-up job! Your "new" kitchen is gorgeous! I love the before and after pictures, too. 🙂
Last summer, we re-did my mom's kitchen. I took before and after pics as well, and posted them on Facebook and Google+. I hired help, though, as there were four large appliances (stove, washer, dryer, fridge) that had to be moved, as we also installed a new floor.
The amazing thing was that the whole kitchen was cleaned, primed, and painted in one day. Oh, the floor was put in that same day, once the painting was complete. Three guys and a total cost of $800 for material and labour made it possible to achieve this lofty goal. It was tough, and took five people a total of 12.5 hours, but the end result was worth it. The kitchen had not been touched in about 30 years, and so this was quite the accomplishment!
That's what careful planning can do. Yep, I orchestrated this whole event for my mom, for her birthday. "Best gift ever!" she said.
You can find some pics at https://plus.google.com/102208945593617109562/posts/DgavMno9ZPX if you are interested in seeing my gift to her. 🙂
Of course, her house is over 100 years old and so is not nearly as nice as yours.
Merry Christmas and Happy New Year!
Meredith says
Wow, I think I like your version better! 🙂 Isn't it funny how you feel better about doing a big project like that when you share it with someone? And you're so right about the careful planning. That can make or break a whole project. Loved the pics! And Merry Christmas & Happy New Year back to you too!
Eve Koivula says
I totally see why you wanted them painted. You're kitchen looks awesome now Meredith!
Meredith says
Thank You Eve! Yes, I'm so much happier with my white cabinets.
Arleen says
The cabinets came out fantastic. I am thinking of refinishing my kitchen table. I thought there was something that melts the varnish instead of going through the work that you did to sand. You have given me inspiration.
Meredith says
Thanks Arleen! Yes, there are a few "chemical sanders" available out there. You can probably ask at your local paint or hardware store. I'm kind of leery of chemical stuff and preferred the mechanical sanding myself, but it sure did make a mess! 🙂
Krystyna Lagowski (@klagowski) says
That's stunning! Would you come over and do my kitchen now? : )) It's amazing what a bit of elbow grease and a coat of paint can do. Amazing how affordable it was for you. I'm so impressed and hopefully will get a little inspired ...
Meredith says
Hahahahaha! That's just what my mom said, but her kitchen is at least twice the size of mine! I think I'll be enjoying NOT painting for a while...
andleeb says
You did it and with perfection. Its looking amazing and brighter. I hope after some time you will come up with some new change in kitchen that will help you happy with dishes too. It is really a nice guiding post that can help many.
Thank you for great share. All the decorating stuff that you have kept on top of window is looking nice.
My kitchen and its cabinets are white and I love them as they always give me a soothing and brighter look.
Meredith says
Thank you Anna! Yes, if I come up with something to make me enjoy doing dishes, you can be sure I will share it with the world!
heraldmarty says
I am SO impressed Meredith! I rent and as much as I really do love my little home, the one and only "rule" my landlord has is no DIY projects - I can't even hang pictures so I 'prop' them. Still, I do enjoy watching others and learning so this was a great tutorial!
Meredith says
Thank you Marty! Bummer about the "No DIY" rule. Or maybe that's kind of a relief? 🙂 I think my husband would like to implement that rule in our house.
thetraveloguer says
The kitchen looks gorgeous Meredith, so fresh and airy! i think it was totally worth the effort you put in, well done! 🙂
Meredith says
Thank you so much! I'm glad to hear that! 🙂
Jason @ TheButlerJournal.com says
OMG. The cabinets look excellent.
Meredith says
Thank you Jason!
Jill Moorer says
Love it! Great job!
Meredith says
Thanks Jill! 🙂
displacedyinzer says
Your painting really really brightened the room. Love it!
Meredith says
Thank you! It's amazing what a new color will do for a room.
MomHomeGuide says
Hi! Visiting from Bloggertunities. Your cabinets look great!
Meredith says
Thanks for stopping by!
Leia @ Eat It & Say Yum says
Wow, they look great! I love white cabinets. Amazing what a difference the paint makes.
Meredith says
Thanks Leia! It feels like I got a whole new kitchen, just from a couple coats of paint!
Dianne Lewis says
Thanks for the smallest details. Most don't take the time or take for granted we know, I for one needs every detail spelled out.
Meredith says
Thanks Dianne! I was afraid it was overkill, but it's hard to find detailed tutorials, so I figured I'd put mine out there. Hope it's helpful!
Betsy says
My first thought was "with 160.00 she won't be touching those glorious floors" and how fabulous it all works together. I'm lazy. What are your thoughts on liquid sanders?
Meredith says
Thank you Betsy! I've never used liquid sanders. I'm a bit averse to chemicals, so I stuck with the mechanical sanding. I know some people love them, but I knew I could do it with sanding, and didn't want to try something new on such a big project! Maybe next time I tackle a smaller furniture project I'll try out a liquid sander and do a post on that... 🙂
Mary Eason says
Gorgeous! Fabulous job! Great re-do! Blah, blah, blah. I loved each and every sentence of your tutorial Meredith. For anyone wanting to re-do their kitchen this way yours is the best tutorial I have seen. My sister bought an OLD trailer with a terrible kitchen. We used one of the Rustoleum cabinet restoration kits. I loved the deglosser that came with it. Sanding these cabinet doors there wouldn't have been anything left. Like you, we numbered the doors to the cabinets, but when taking the hinges off, we placed them right inside the cabinet itself. That is what this post was about... to suggest putting the door hardware in the cabinet. We didn't want to try and readjust doors.
Also, I happened on to your blog by accident and I'm very glad I did. I'll be back.
Meredith says
Thank you Mary! It's so nice to meet you. That is such a simple, brilliant solution to the problem I had with the hinges! (Mental head slap) I think I'll go back and add that to the tutorial for anyone reading this in the future... 🙂
Vicki says
Best tutorial ever! But I'm confused about the paint choices...you chose a Valspar paint in Satin for the cabinets but then you also chose Benjamin Moore Advance.
Is the Ben Moore paint the primer? Did you tint it the color of the Valspar paint? Then you top-coated with the Valspar paint? I have painted my kitchen cabinet 3 times now, still not happy with the outcome. I'm going to do it once more and use your tutorial. I am starting to get nicks and chips of paint off the cabinets, which now show the under-color, which is frustrating. With the Valspar and Ben Moore paints, what is their durability? I'm starting to think I need a marine-paint, like for boats! Help!!!
Meredith says
Hi Vicki, sorry for the confusion over the paint! I picked the color from the Valspar line, but I had it made up in the BM Advance paint, in a satin finish. Valspar does not have this type of self-leveling, slow drying paint, and I knew that BM Advance was perfect for the job, but I already had the color in mind from looking through my Valspar paint swatches. I simply gave the BM guy the paint swatch and he mixed it for me in that color. (Most paint places do have the color recipes of their competitors.) So bottom line - go with Benjamin Moore Advance, both for the primer and the paint. You will not need a separate top coat. Secondly, it sounds like you'll need to do a better job sanding before you paint again. The nicks and chips are probably due to the paint or primer not adhering to the underlying substance. And if that's the case, even marine paint won't do any better. You can solve this by sanding more aggressively. In fact, if you're willing to do the work, it wouldn't hurt to completely sand off the previous paint coats, down to the bare wood. Good luck and let me know how it goes!
Vicki says
Thank You! I am willing to do whatever it takes to get the right finish and to get it to last, so sanding, sanding and more sanding it is. Appreciate all the advice and interest. I'll let you know how I get on...
Diane Elliott says
Someone above mentioned using using Marine Paint. Interesting because I have found that automotive paint works better on my boat.
Question regarding kitchen cabinet finish. I want to use a clear finish on my cabinets. What do you recommend?
Caroline B says
This looks like a completely different kitchen. Wow!
Meredith says
Thank you Caroline!
Renea says
Gorgeous! If only I can get up the courage to paint over the wood.... Good job.
Meredith says
Thanks Renea! You can do it! (That was the hardest part for me too.)
Susan says
What a great job! Thanks so much for sharing. I too love BM's Advance paint. One question - Do you do a final sanding or polishing of some sort? I feel like my cabinets need something to even even out the surface where some areas are slightly more shiny than others. Very minor but noticeable to me. I used the semi-gloss finish.
Meredith says
Hi Susan, thanks! I've had that problem on past projects with glossy paint (this one was very low sheen so I haven't noticed any inconsistencies) and I finally realized that the problem was not enough coats of paint. Rather than finishing with a polishing or poly of some sort, I would recommend one more light coat of paint. That has worked well for me on furniture painting projects. Let me know how it goes...
Valerie Ruhlig says
So glad to find your tutorial. This is a project that I have planned for this summer. The house I purchased 2 years ago was a for-closure and some company came in and painted everything in the house with a sprayer! Including the cabinets. They didn't sand, painted the doors while they were still on (so when you open the door you see the old paint color on the frames...yuck), the coverage wasn't good, Anyway! I keep seeing that BM Advance is the best paint for this project and I'm so glad I can get it near by. I only had one question for you. Do you remember about how much paint you had to buy? I'm sure my kitchen will probably not take the same amount but it will be be a reference to go by. Thanks so much!
Meredith says
Hi Valerie, thanks for stopping by! Sounds like you've got quite a project on your hands. I used just under a gallon for my kitchen, and I counted 26 cabinet doors, so hopefully that gives you a reference. Be sure to use the primer too, otherwise you'll go through a lot more paint. Good luck! Let me know how it goes...
Marzette says
Hi I am getting ready to paint brand new unfinished cabinets. Is there anything special I need to do. They have never been installed
Meredith says
Hi Marzette! That should actually make it easier for you. You still need to do all the steps listed in the tutorial, but it may be easier to take everything apart before it's installed. When you're doing your initial sanding, you won't be removing any previous stain or color, but it's still a good idea to sand, just so you're sure you have a nice smooth foundation. And primer is very important too on unfinished wood, to give the paint an even finish. Good luck and let me know if you have any questions along the way...
Kathie says
I love your tutorial! I am going to paint my cabinets this spring/summer - good advise about the paint type - non- leveling - that makes scents. Just wondering about the back side of the cabinet door - did you paint that first then paint the front side? I didn't see what order you might have done that in. Thanks!!
Meredith says
Thanks Kathie! You can do the front and back in any order you choose, but I recommend starting on the backs first. That way you can iron out your technique on the places that won't be seen as much. (I felt like it took me one or two doors to figure out what I was doing!) Also, that gives the backs longer to cure before reattaching them. Best of luck to you on your project! Don't hesitate to ask if you have questions along the way...
Ginie says
Hi! Thank you for the thorough tutorial. I'm in the middle of painting my oak cabinets white, so this has helped me a lot. Although, I have an issue.
I'm not sure I'll get an answer but I thought I'd give it a try. I have a question about caulking. Did it came apart now that you're finished with the kitchen? I was about to caulk between primed cabinets and my husband says he would not do it in my place as the wood is moving and all the caulk will rip.
Meredith says
That's a great question Ginie. Are your cabinets new? When they're brand new, they will still go through some "curing" but if you've had them a while, they shouldn't move too much anymore. Caulk is ideal because it has a little "give" in it and can take some expanding and contracting without ripping. Mine hasn't moved a bit and the caulk really helps with the overall clean look. Let me know what you decide, I'd love to hear back from you!
Ginie says
Hi! Thank you for the reply! The cabinets are old. They were in great shape, although some screws were loose and I asked hubby to tighten them, thus bringing the boxes together.... Still I'm afraid of caulking, I don't want it to crack after I'm done with painting. Hoping to enjoy the updated kitchen for years to come not redoing them again soon... So, I don't know what to do. 🙂
Meredith says
I totally understand. Here's what I would do as a compromise. Since you're going to have to put on a coat of primer and two coats of paint, do the primer and first coat, then stand back and see how it looks. If it looks OK to you, just skip the caulk. If you see the gaps, you can still put the caulk on before the final coat. Also, keep in mind that painted cabinets are always fixable. If you ever get a scratch or rip, you can just sand down that area and touch it up again.
Ginie says
Thank so much! That's a great idea! I'll see what they look like after one coat of paint then I decide. 🙂
Ginie says
Hi Meredith, I thought I share my before after with you! I ended up caulking the gaps and so far they seem nice. I've been enjoying the "new" kitchen for a month now and I love it. Still need to add that crown moulding to finish it but the vast part of the job is done. 🙂 Thank you again for this great tutorial!!!
https://instagram.com/p/3mz00xuRQo/?taken-by=ikinganagy
Meredith says
Ginie, I'd love to see your pics, but the link isn't working. Will you tag me (@thepalettemuse) on the IG post? I'm so glad you're happy with your results!
Ginie says
I've just tagged you. I hope you can see the pic. Thanks!
Meredith says
Hi Ginie, for some reason I can't see the tag. What's your IG handle?
Ginie says
Hi, 🙁
I don't know why you can't see it... My IG handle is @ikinganagy
Meredith says
Oh I see, your account is listed as private. I bet that is why I couldn't click on the link.
Carmen Whittaker says
Did you encountered any problems with greasy spots on the cabinets and how did you deal with that problem.
Meredith says
Hi Carmen, are you referring to greasy spots before painting? If so, yes, my cabinets had their fair share of grease on them! That's what the Krud Kutter is for. I couldn't believe how it cleaned them. Then a good coat of primer made sure that the paint had an even and clean surface to stick to. If you're referring to grease spots after, they clean up easily with soap and water. Let me know if that doesn't answer your question...
Jessica says
Thanks for the great tutorial! I have had my kitchen cabinet doors and drawers removed for a few months (there is something to say about open concept cabinets!), paint and supplies purchased but lost all ambition to do the work.
We purchased new shaker style doors that are already primed and new hardware - except hinges. I decided to paint the ones we have and reuse them.
I did not consider caulking like you did but that is a great idea! Adding caulk to my shopping list and the tube you posted is so easy to use for those hesitant about caulking use this tube! It gives you easy control
Also, I noticed your under cabinet lights; another great idea! Would you mind sharing a link to the lights?
Thanks again for the great tutorial and inspiring me to get moving on this project!!
Meredith says
Thanks Jessica! I'm so glad to help you get back on track, it will be so worth it when you're done! I can't share a link to the lights I used because they're pretty old, but let me do a little research and find another good option. (In fact, I'm about to update mine so I need to find them for myself anyway.) I'll be back soon with some more info...
Jessica says
Thanks so much! I appreciate the reply and look forward to info on the lights. I will share pics of our before and after too if interested. Although it may be a little while...
Sonia says
Great Job on the transformation. I'm almost done with my Mom's kitchen and it's definitely a labor of love. Your right when you say there are no shortcut. I've found the prep to be the most time consuming and the most important. My Mom's cabinets were custom made back in the 70's and very dark. I had to do two coats of primer and then two coats of ASCP followed by lacquer and dark wax topped of with a final coat of lacquer. I love the look but my kitchen has too many cabinets to use chalk paint. I'll be using BM Advantage. Lots of great ideas!! Thanks
Meredith says
Thanks Sonia! I love ASCP, but there are definitely a lot of steps to that process. Best of luck to you with your makeover!
Simone says
Beautiful cabinets. Which Valspar color did you use?
Meredith says
Thanks Simone! It's called Totten's Inlet. I love it because it's warm and deep.
Christal says
Meredith, thanks for this great article. I am getting ready to tackle painting my kitchen too. Turning them from that 80's/90's "honey oak" to white. Did you paint the INSIDE of the cabinets? Or just the front frames and doors? I would prefer NOT to paint the inside boxes, but am wondering how to paint the inside of the frames and get clean lines there, so it won't look sloppy when you open the doors. Any thoughts?
Meredith says
Hi Christal! No I decided not to paint the insides of the frames because mine were clean and in good shape, with light colored wood. I just painted the fronts and backs of the doors. I did mask off the insides so I could get a sharp clean paint line on the front without bleeding into the cabinet. I was really happy with this decision. It saved a lot of time and paint. Simply put painters tape along the inside edge of the frame, then roll or brush the paint on the outside. (I believe there's a picture of this in the tutorial, but if not I'll add one here.) Good luck on your project!
Alison says
Looks beautiful! Btw, I looove your floors!!!!
Meredith says
Thank you Alison!
IndianaBound says
Yours is the best cabinet painting tutorial I've seen! I agree that all the preparation pays off. I painted my cabinets 18 years ago (including insides) and did TONS of sanding. At that time the best paint available for the job was oil based so the paint has yellowed a little and I used 4 inch foam rollers.. Still, all the prep was worth as my cabinets are still good after all these years. Only recently have I had to do a little touching up to shelf edges. We'll be moving soon to another house that needs a kitchen redo so more cabinet painting is in my future! This time I'll use the paint you recommend. (I don't want oil fumes but I do want the easier clean up!). One question: Why did you choose mohair rollers rather than foam?
Meredith says
Thank you! Yep, you gotta get pretty friendly with the sander! I used mohair because I've had problems in past furniture painting projects with air bubbles from the foam rollers. I think you could use foam (especially if that's what you're used to), but just be careful to load it correctly with paint. One thing though, the mohair was not expensive, just $4 for 2 four inch rollers. I think that was about the same as the foam rollers, and I just loved how they rolled the paint on. Like butter!
Dee says
I am a little last on this project, but you did a fantastic job. Your tutorial was the best I have seen and believe me, I have been contemplating this for about a year. One question, can you use a paint sprayer for this project. I recently purchased one for another project and loved the ease of it.
Thank you for the before and after pics. Love your kitchen, I am jealous.
Meredith says
Thank you Dee! Yes, you could use a sprayer if you're comfortable with them. Personally, I love the feel of a brush in my hands, but there were several times along the way that I had to admit that a sprayer would be faster. You just have to be so careful not to over-spray. If you get too much paint on, and then stand the door up to dry, you'll get drips. The self-leveling paint is great for getting an even finish with no marks, but it takes longer to dry, so it's better if you have lots of horizontal space to lay your doors on while painting and drying. It could definitely be done this way though. Good luck with yours!