Phase Three: Cabinet Doors and Drawer Fronts
- Now's the time to set up shop in your garage, if you have one. Otherwise you can do the doors on your kitchen table, but I would definitely suggest sanding outside if possible.
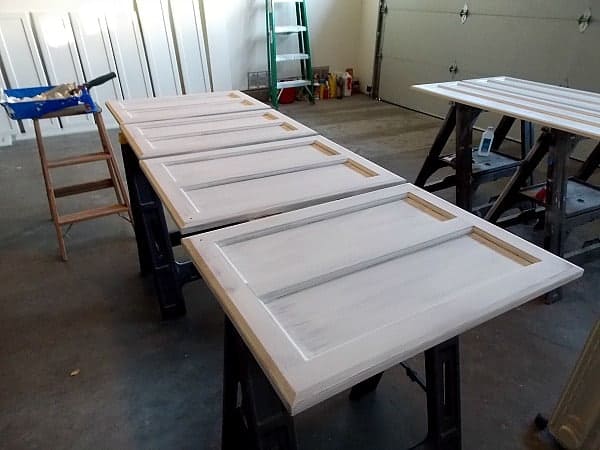
You can make more work space by laying boards across sawhorses and setting several doors on top. - Remove the knobs and hinges from the cabinet doors. (I collected all my hinges, screws, and knobs in a big bag, since they were all identical. Come to realize later that the hinges were all adjustable and had been fine tuned to hang the doors at the right levels. So when I re-hung them I had to go back and readjust all of them. I'm still not convinced there was a better way, though. To label each hinge would have been just as time consuming as adjusting them all at the end.) Move the number label into the hole where the hinge was so it doesn't get separated from the door, making the whole labeling step a moot point.
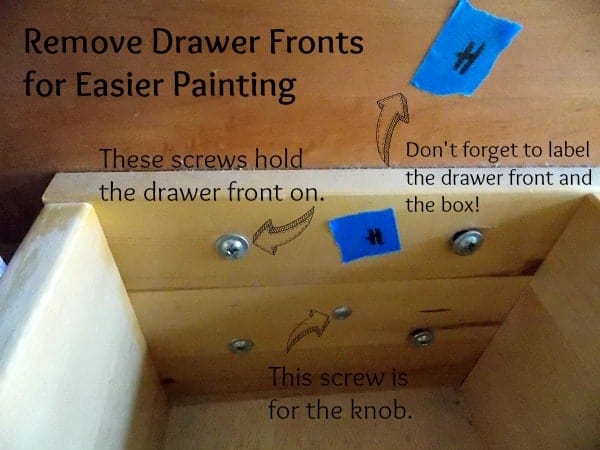
- Remove the knobs from the drawer fronts. I removed the drawer fronts too, and replaced the drawer frames back in the kitchen. You may not be able to remove the drawer fronts, but you can just work around them.
- If you've removed your baseboards, include them in all the steps below.
- Clean each surface with Krud Kutter. You do not want to be grinding all that cooking residue into the wood when you sand!
- Sand everything with 100 grit sandpaper. In phase two above, I recommended hand-sanding the frames with a block, but for the doors I recommend an orbital palm sander. There is just so much surface area that it would take forever to do every inch by hand. And if you're outside or in your garage, you don't need to worry so much about the mess it will make.

- Repeat steps 7-15 from Phase 2 on the doors. See below for a tutorial on Drip-Free, Mess-Free Cabinet Doors.
- Once the paint is fully cured, for at least a day or more, you can replace your drawer fronts, baseboards, and doors. If you have adjustable hinges like mine, I recommend replacing the doors in sequence so you can adjust them together as you're hanging them. Be sure to attach felt pads to the inside corners of the doors, so that no painted surface comes in contact with another painted surface. If this happens before the paint is fully cured, they will glue together and strip off the paint when you open the door. More trauma!
- Finally, replace all the knobs and kitchen staging items, and stand back and be impressed with yourself. You did it!
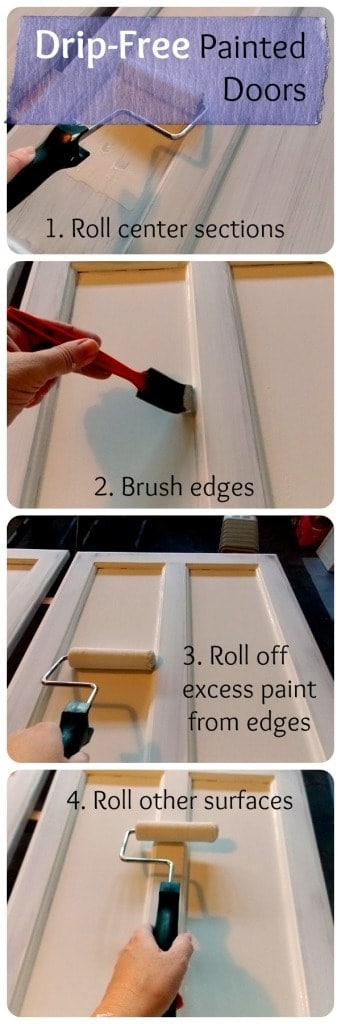
Drip-Free, Mess-Free Cabinet Doors
The best way to avoid drips on your painted surfaces is to avoid gravity altogether. But since gravity is one of the things that makes life on earth possible, avoiding it is probably beyond the scope of this project. Instead, we're going to work with it, not against it. Ideally, I would have liked to paint all my cabinet doors on a horizontal surface and leave them there to dry, but since I don't have that kind of space, the best I could do was paint them horizontally, let them dry for a little bit, then stand them up vertically to finish drying. 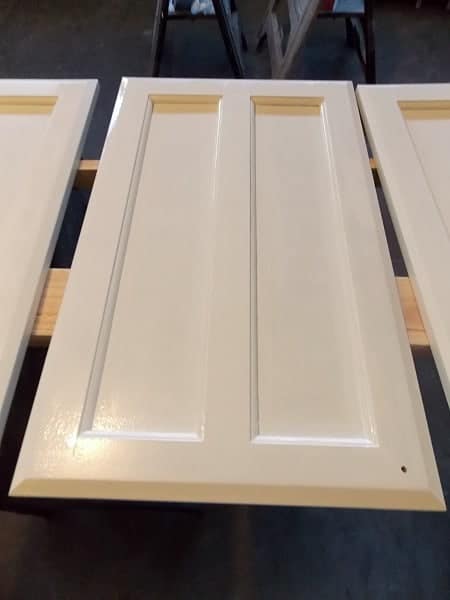 I did the backs and the bottom edge first, which gave them enough time to dry to the touch before flipping them over and doing the front. Doing the bottom edge first also gives it time to dry before you stand the door up. Make sure you have space to lean all the doors against the wall, and not touching each other. No matter how dry the paint feels to you, if you put two uncured paint surfaces together they will leave marks and strip paint.
The other secret to avoiding drips is to not overload your brush or roller with paint. If you use the right amount of paint, it will adhere to the surface, rather than dripping off it. That's easy enough to do on the flat surfaces, but when you get to the junctions, you can end up with extra paint pooling in the corners. I like to take my used roller (with no extra paint added) to go back over the areas I did with a brush, just to pick up any extra paint. It's best to start with the lowest surface and work your way up to the highest.
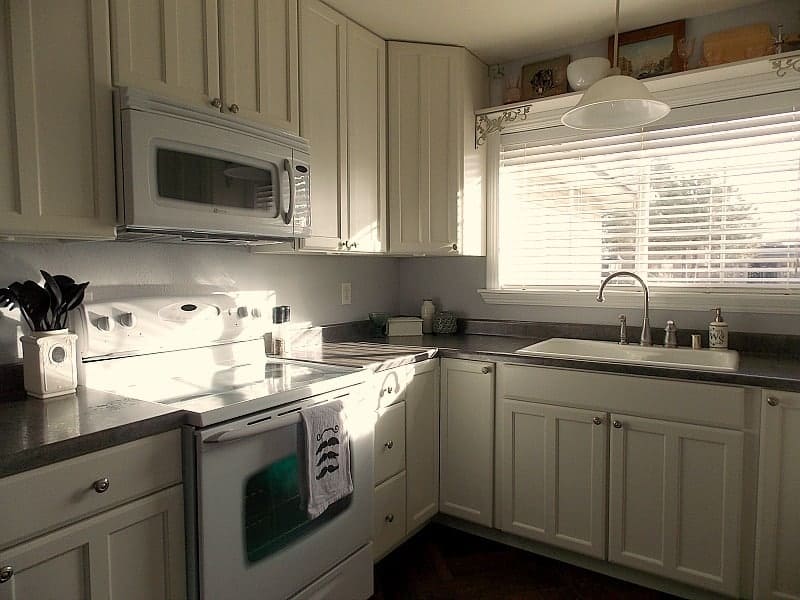
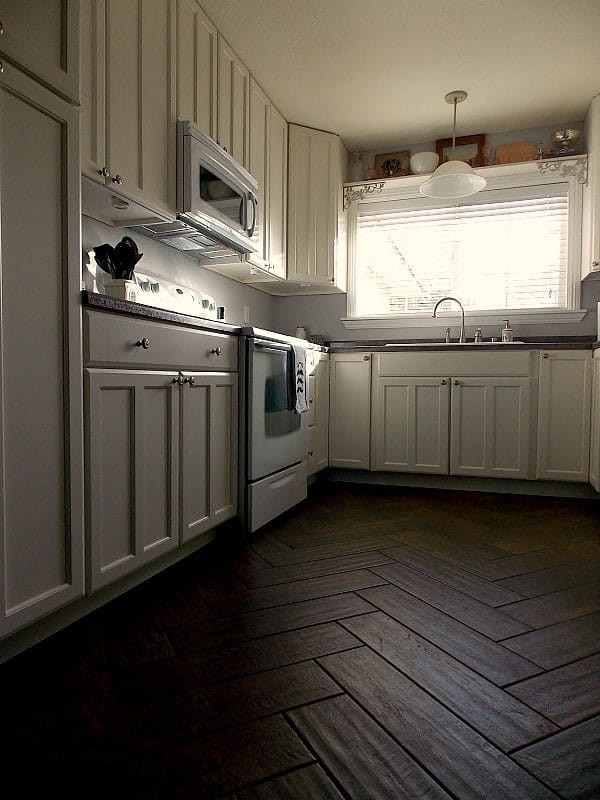
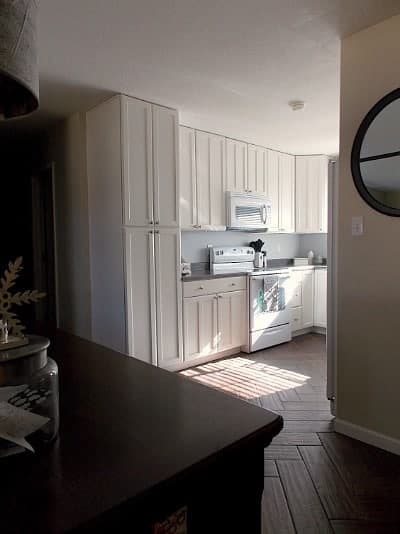
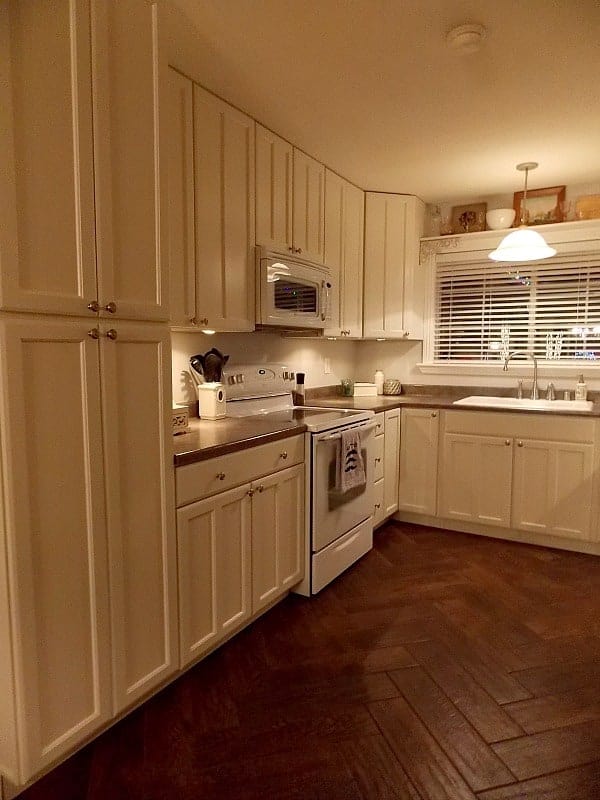
That's all there is to it! Easy, right? Did I miss anything? If so, leave me a question in the comments and I'll be sure to answer it. In the meantime, check out a few more "After" pics...


Thanks for hanging in there with me through this project. I'd love to hear what you think, especially if you have any questions about painting your own cabinets!
Want to paint your cabinets without sanding first? You can totally do that! Just be sure to read this post on the best way to paint cabinets with no sanding.
And once again, so you don't have to scroll back to the beginning, here is your...
Kitchen Cabinet Painting Supply List:
- Sandpaper: 100, 200, 320 grit
- Sanding Block
- Orbital Palm Sander and replacement sanding pads
- Paint
- Primer (tinted close to paint color)
- Small Mohair Roller and Handle
- Synthetic Bristle Brush (I actually like the cheap foam brushes)
- Paint Trays (I cover mine with foil, so I don't have to clean it every day!)
- Microfiber Cloths
- Rubbing Alcohol
- Drop Cloth or Floor Coverings
- Blue Painters Tape
- Krud Kutter
- Screwdriver for removing hinges and knobs
- Caulk or Wood Filler


Tammy Loro says
LOVE, LOVE, LOVE the new space!!!! This is THE most detailed, informative article I've read and I am SO appreciative!! I think I can do this now!!
Meredith says
Thanks Tammy, I'm so glad! Best of luck on your project and let me know if you have questions along the way!
Amanda says
Do you mind me asking what brand and type of flooring you have in your kitchen? I am thinking of painting my cabinets white and I LOVE the combo! Thank you =)
Meredith says
I don't mind a bit! Here's the link to the exact product I used: http://www.homedepot.com/p/MARAZZI-Montagna-Saddle-6-in-x-24-in-Glazed-Porcelain-Floor-and-Wall-Tile-14-53-sq-ft-case-ULG56241P/203600174
I paired it with a dark grout and small grout lines for a more natural look.
Thanks and good luck!
Cheri says
Thanks for this great tutorial! I will be painting my cabinets soon and I've spent hours on Pinterest reading everyone's tutorials. Your kitchen looks amazing! I'm so glad to see that you still have your white appliances. In almost every tutorial I have read the appliances have been replaced with stainless, which are beautiful, but I have white and since a couple of them are only a year old, I'm planning to keep them. Good job! 🙂
Meredith says
Thank you Cheri! I was in the same boat with my appliances so I decided to keep them, and I ended up really loving the whole white effect. Plus I read in a design magazine just last month that white appliances are becoming more popular again, so you're on trend!
Anne Bacon says
Hi!
I wonder if your cabinets are made of real wood? I am not able to see the pictures. I have melamine cabinets and I wonder if it would work.
Meredith says
Hi Anne, I'm not sure if this method would work on melamine, but I think I've seen other bloggers do some version of it. You might try searching for their tutorials. Good luck!
An Ne says
I do not see what equipment cabinets are made but I wonder if this fonctionnerais on my cabinets melamine?
Bobbie Jolly says
You did a great job with instsructions. It looks beautiful. Here is my question. You said you used Benjamin Moore Alkyd and then you said valspar. Which one id you use? I am interested in painting the kitchen cabinets.
Meredith says
Hi Bobbie, what I meant by that is I picked a color out of the Valspar line, but then I went to Ben Moore and had them use that color formula in their paint. Does that make sense? (Most brands of paint have access to other brands' color formulas.)
Michelle says
It looks like you did not paint the interior or the shelves inside the cabinets. Is that a correct assumption? Did you paint underneath the cabinets?
Meredith says
That's correct. I did not paint the inside shelves. My cabinets were fairly new and the interiors were in great shape, and had light-colored wood already, so I didn't need to paint them. I did, however, paint the underside of the top cabinets, so that shorter people (like me!) wouldn't see a different color looking from below.
Gary Baer says
I like your kitchen cabinet makeover !
In a couple of weeks I am going to do the same thing to the kitchen cabinets in my house trailer. With less than 1/2 of the cabinets that you had to refinish, It will probably be a lot easier for me to handle .
The only thing that worries me is that I purchased the proper paint. I have Valspar Optimus in a semi-gloss(that is what the people at the hardware store told me to use .You used an alkyd base . I hate to waste this paint and buy more paint ,but I think that it might be wise ,for me to have a decent job in the end ?
Meredith says
Hi Gary, I apologize for taking so long to respond! Have you already decided about your paint? I don't know anything about the Optimus line, but I do love Valspar paint. Their products are very good. I went with Ben Moore in this case because I wanted a self-leveling paint. Without the self-leveling aspect, you might get a few more brush marks, but that won't be the end of the world. And the alkyd means that the finish will be a little more durable than with latex. So those are the two things to consider, but I know what you mean about hating to waste the paint. I'd love to hear how it works out for you!
Pat says
There is one thing I would like to offer on saving old hardware. If the hardware, like the hinges, are painted with latex paint you can boil it off, not completely, but it will soften it enough to brush it off with a still brush. I used a hard surface pan, covered the hinges with water and boiled them until the paint was soft enough to peel. This too a while so don't give up, you may need to add a little hot water to keep the hinges covered. Then I held them with a hot mitt and brush with a stiff brush. It did a good job, but I worked at it with the brush and even used a wooden toothpick for some of the tight spots. Anyway, that's what saved me a lot of money as well.
Meredith says
That's a great money saving idea Pat! Also, the Krud Kutter that I mention here for cleaning the cabinets will help take off old latex paint, so you can use that too if the boiling doesn't completely work.
Vikki Ryan says
I absolutely love, love, love your kitchen Meredith. Thank you so much for sharing your in depth instructions...this is a project on our to do list and I will definitely be sharing your post with my hubby.
Meredith says
Thank you Vikki! I'm so glad it's helpful, and I hope your hubby doesn't resent me too much for the new item on his honey-do list! 🙂
Jolena says
Visiting from Remodelaholic. How has your paint job held up? Considering this for an upcoming project and interested in the long-term effect.
Meredith says
It's held up great! Full disclosure: I've since moved from the house, but before we moved we lived with the new kitchen for a little over a year. The paint held up great. I did have to do some minor touch ups in high traffic areas, but only for tiny little nicks in the paint that took less than a minute to fix.
Shelly Ayers says
I'm curious myself about how well the paint it holding up. I use my kitchen constantly and want to make sure that it stays on really well.
Meredith says
Hi Shelly, check out my reply to the comment above yours. I loved this paint!
Keri says
Looks amazing and really helpful info! I want to paint my kitchen cabinets white but have heard that it's common for them to yellow after a few years. Did you take any steps to prevent yellowing? Thank you!
Meredith says
Hi Keri, from my understanding, the yellowing comes from using the wrong type of polyurethane as a finishing coat. This method uses no additional finishing coat, and Benjamin Moore paint should hold it's color indefinitely, so it shouldn't be a problem. Just don't coat it with anything and you should be fine.
Cheryl says
Hi I happened upon your post when researching painting kitchen cabinets. I'm really nervous/hesitant about DIY vs. professionally having painted. After, reading your post I do feel better. Just a couple questions- what primer did you use? Did you need to have it tinted since cabinets appear white and primer is white? Also, most articles I've read do not recommend rollers versus brushing on paint, so I'm confused about that also. Can you elaborate on your choice of roller versus brush, please. When painting large cabinet boxes any recommendations to avoid start/stop marks? For example- large pantry cabinet side. Thanks!!
Meredith says
Hi Cheryl! I apologize for taking so long to reply. For some reason your comment didn't come through to me till now. Here are some answers for you... I used the Benjamin Moore Advance primer, with no tint since I was painting with white. I like the roller for even, fast paint application. With this type of paint and a mohair roller, you don't get that bumpy surface that is usually the reason people don't use rollers. Also, this paint will minimize your stop/start marks. (Very good question, by the way!) The paint takes a little longer to dry, which means your earlier brush strokes won't be dry yet by the time you brush or roll on the new ones, which is what causes that problem. Just try to do a large area all in one sitting, and you'll be fine with this paint. Good luck!
Janet says
Looks great! But no top coat needed?
Meredith says
Thanks Janet! No top coat needed! This paint is durable enough that you don't need to cover it with anything.
Kay says
Did you use the mohair roller for the primer too?
Cheryl says
Great question- I wondered about that also!
Meredith says
That is a great question! Yes, you should use the mohair roller for both. You'll need a smooth finish on both the primer and the paint, if the end result is to be smooth.
Holly says
Do you have an update on your cabinets? I am wanting to paint my cabinets, but debating on what technique to use. I found one that required no sanding and hers have held up for over a year!
Is there a reason you don't suggest a poly top coat?
Meredith says
Hi Holly, I do have a couple of updates for you. This post gives you the update on these same cabinets after a year: https://thepalettemuse.com/painted-kitchen-cabinets-one-year-later/ and this post is a whole new method that I used for my new house's cabinets: https://thepalettemuse.com/best-way-paint-kitchen-cabinets/
I like the new method much better, and it's MUCH easier to accomplish. I haven't written the update post on those yet, but in a couple of weeks it will have been a year since doing that project too and it's held up beautifully.
Neither method requires a top coat and I recommend NOT using one, so you get a true paint color. Both types of paint are durable and colorfast without top coats. Good luck, and I'm happy to answer more questions!
Sondra Sorensen says
Absolutely beautiful! I'm in the very beginning stages of my kitchen makeover. I am curious to know what you think about Valspar Cabinet Paint from Lowe's?
joel says
Hello I am painting a set of cabinets for a customer right now and i played with that valspar cabinet stuff and it was no good. very liquefied and didn't cover or stick well i stopped after one and peeled it off after it dried. after looking online the reviews for it were same as mine. Valspar in general is a crap product. I agree with this post about the Benjamin Moore Advance paint. That's a very high quality paint with coverage and self leveling ability. That's the exact paint i am currently using too. Also Sherwin Williams has a product called SW Pro-Classic that's comparable to the BM Advance so either of those are great choices. Yes they are expensive. Yes they will last longer in every aspect of painting than a cheaper low quality valspar paint will. So in the end you get what you pay for with paint. Don't try and cut corners especially with the amount of work it takes to do this type of job. Quality work lasts just as quality paint lasts. Hope that helps and good luck!!!
Meredith says
Hi Sondra, I'm glad Joel had a good answer about the Valspar because I don't have any experience with it. I've seen the SW Pro-classic a few times, and haven't been impressed personally. But that may be because the people using it didn't prepare their cabinets correctly. If you're looking for another option, I have an updated post here about my second kitchen that I've painted: https://thepalettemuse.com/best-way-paint-kitchen-cabinets/
I would definitely recommend the new method over this one, especially if you're not into doing a lot of sanding and prep work!
joel says
Very impressive to do this yourself!! I run my home improvement business and i just finished painting a set of kitchen cabinets for a customer. This is not an easy thing to do. It requires skill and a lot of patience. I loved the part about professional results only come from professional labor, putting in the work will always get you the right outcome. I personally sprayed the doors and drawer fronts, but i have a quality spray gun necessary for this type of job. Awesome work. I know plenty of people who wouldn't have the guts to try this them self.
Meredith says
Thanks Joel! And thanks for answering Sondra's question too. I would love to try a sprayer some time, but I know the learning curve would be a little more than I'd want to take on for a project like this.
Mona says
Hi you have done a great job! I was just wondering, after sanding them once in the beginning why do you need to sand after primer and then after first coat of paint?
Meredith says
Hi Mona, sanding between coats is what gives the paint a really smooth finish. If you want to cut down on sanding, try this newer method that I've found: https://thepalettemuse.com/best-way-paint-kitchen-cabinets/
Mary says
Lovely rehab. How has the paint held up over the years?
Meredith says
Thank you Mary! We've since moved out of the house, so I can't really answer that. I did redo the cabinets in my new house, and wrote about them here: https://thepalettemuse.com/best-way-paint-kitchen-cabinets/ and I did an updated post about how they've held up here: https://thepalettemuse.com/painted-kitchen-cabinet-faqs-theyre-holding/
Laurie Gattis says
Your tutorial is hands down THE BEST!!! I've been contemplating this project for a few years, yes, years 😉 After researching the do's and don't ad nauseam, I'm now in the thick of it and keep going back to your post as I run into those inevitable snags we run into when doing a project for the 1st time. And your advice and tutorials are spot on! Honestly, if I had just printed this out from the get go and followed to the T, there would have been no snags! So, thank you for taking the time to walk through this so thoroughly, because in a project like this, those little details will make or break your project! So this morning I'm heading to the store for that Mohair roller you recommended 😉 because I've just discovered cutting corners on this project isn't an option if you want a professional finish.
Meredith says
Thank you Laurie! You're so right, it really is all about the details. I know your project will turn out great since you are obviously taking the time to do things right. It will be worth it in the end!
tami Luttrell says
I know this was forever ago, but what primer did you use? Advance Primer? Is Zinsser shellac-based compatible? I want to make sure there is no bleed through.
Thank you
Meredith says
Hi Tami, when I did these cabinets I used the Ben Moore Advance primer and it worked great. But I've since started using the Zinsser shellac primer, called BIN. It covers everything! It smells a bit worse and cleanup is a bit tougher, but I'm always impressed at how it prevents bleed through. You can read more about that here if you're interested: https://thepalettemuse.com/what-you-need-to-know-before-painting-cabinets/