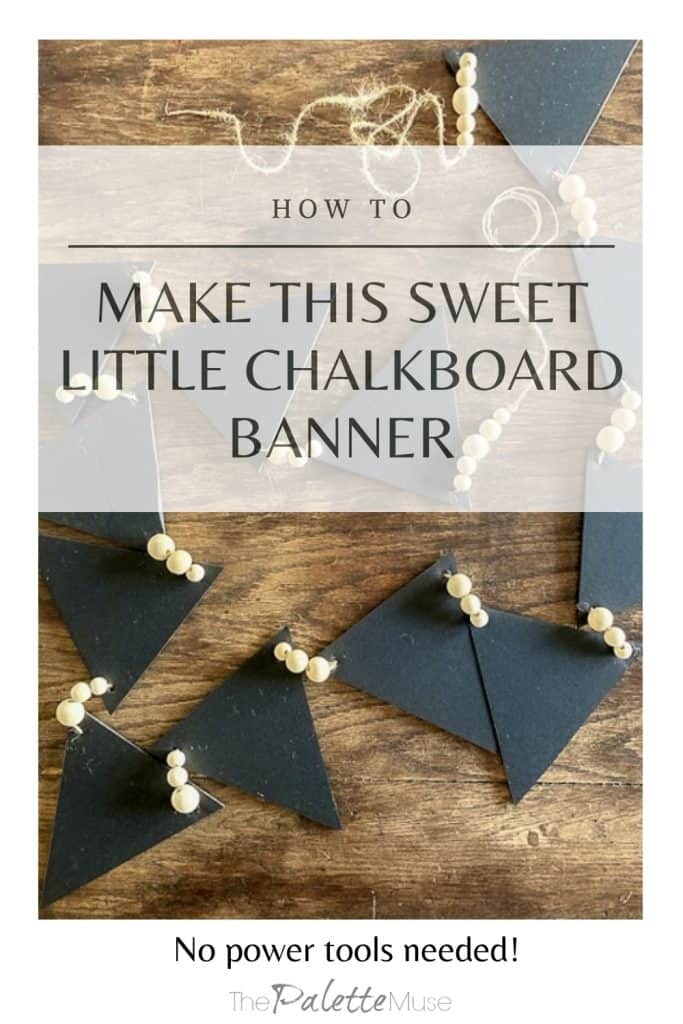
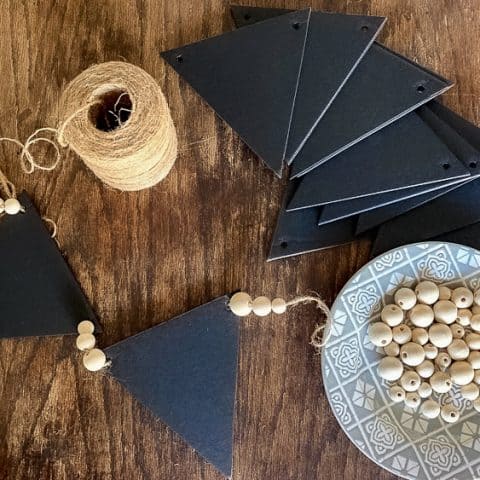
A faux chalkboard banner, made from black foam board and wood beads, is the perfect way to add a little design flair to your space. Find out how easy it is to make your own - no power tools required!
This post contains affiliate links. If you make a purchase, I may receive a small commission at no additional cost to you.
You may have noticed I love chalkboards. There's just something wonderfully analog and unrestricted about writing your thoughts in chalk on a black board. I also love banners and wood beads, so marrying the two into something useful seemed like the next logical project.
I've been thinking for a while about making a chalkboard banner. I looked all over for thin boards that I could paint with chalkboard paint. I needed something lightweight and easy to cut, but everything I looked at seemed complicated and, well, like overkill.
Never fear, Hobby Lobby to the rescue!
As I was wandering the aisles of my favorite craft store, I stumbled upon a rack of foam core, meant for matting and presentations. I thought it would make a perfect replacement for actual chalkboard in my banner. So I brought a piece home, tried cutting and writing on it, and it worked like a charm!
Here's how to make your own faux chalkboard banner, with just a few lightweight crafty supplies.
How to Make a Faux Chalkboard Banner
You'll need a few specific supplies for your banner, all available at a craft store or online.
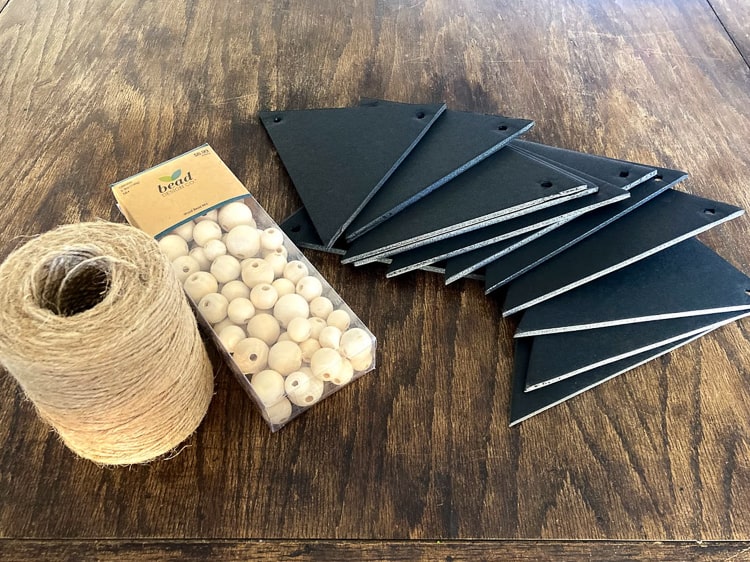
Banner Materials
- Black Foam Core - I bought a poster board sized piece and it was more than enough for two or three banners.
- X-Acto knife or other sharp craft knife
- Cutting board - I love my fiskars cutting mat for these types of projects.
- Hole punch
- Wood Beads or Macrame Beads
- Twine - make sure it's thin enough to thread through the beads
- Chalk or chalk marker
Starting Your Banner
First, you'll need to mark and cut your foam board. This is a LOT easier than cutting actual boards, and a lot more lightweight. Perfect for this project!
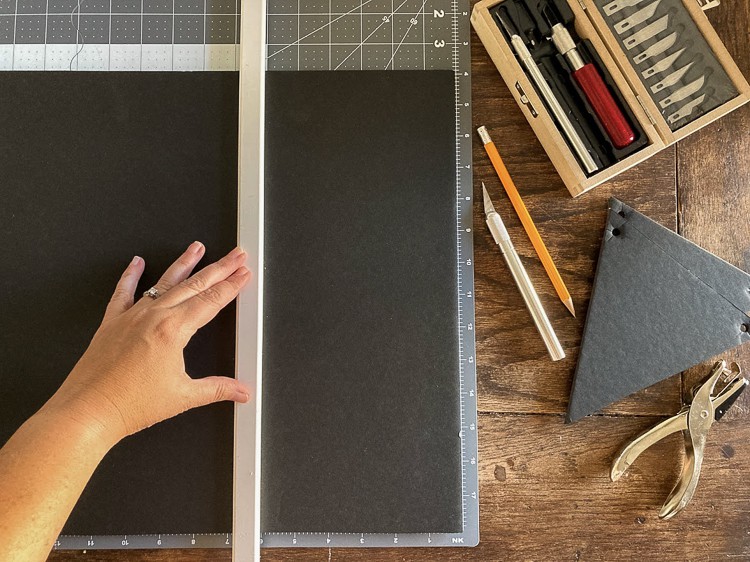
Place a mark 6 inches from one edge of the foam board, on a shorter side. Using a straight edge, cut a straight line with your X-acto knife the length of the board. (If you don't have a yardstick, you can use a piece of molding, like me.)
This is where a cutting mat is really important, because you'll need to use a fair amount of downward pressure to cut all the way through the board. If you don't have a cutting mat, you can use a kitchen cutting board, but make sure you reposition it as needed.
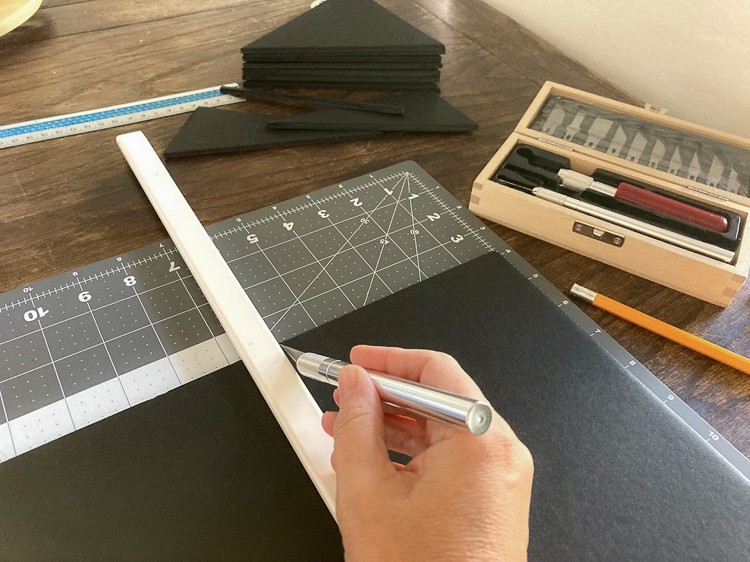
Now you'll mark the strip you just cut. Place a mark at 6", 12" and 18" along one edge. On the opposite edge, mark at 3", 9", 15" and 21".
Using a ruler as a straight edge, cut from the mark on one edge to the other. It will look like a big zig zag.
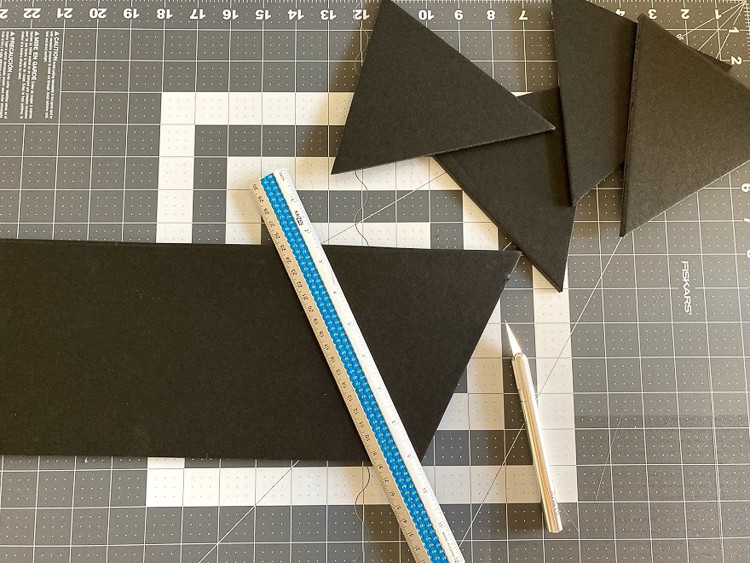
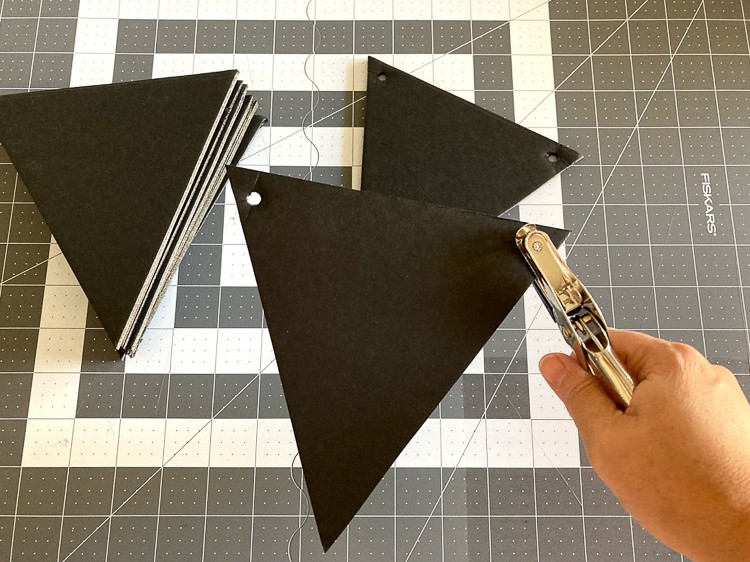
Discard the end pieces and stack your triangle pieces off to one side. Repeat this process as many times as it takes to get enough triangles for how many letters you want on your banner. I did 12.
Using your hole puncher, carefully punch holes in the top two corners of each triangle, about ¼" from the top edge.
Working with Foam Core
One quick note about foam core board: It's pretty sturdy, but can be bent and crushed with direct pressure. So be careful when you are cutting and punching holes in it, that you don't leave dents in it.
Foam core is not quite as erasable as actual chalkboard, but it can still be done. If you plan on erasing and rewriting your banner for different occasions, season your boards before writing on them. Simply rub a piece of chalk all over each board and erase with a dry paper towel or chalk eraser. Now you can write on them and erase as many times as you like.
Black poster board would probably work also, but it won't look quite as much like a 3-D piece of chalkboard as the foam core does.
Putting Together your Banner
Now it's time for the fun part - beading your banner! First, here's a quick tip:
Dip the end of your twine into about an inch of ModPodge or glue. Use your fingers to smooth glue toward the end of the twine.
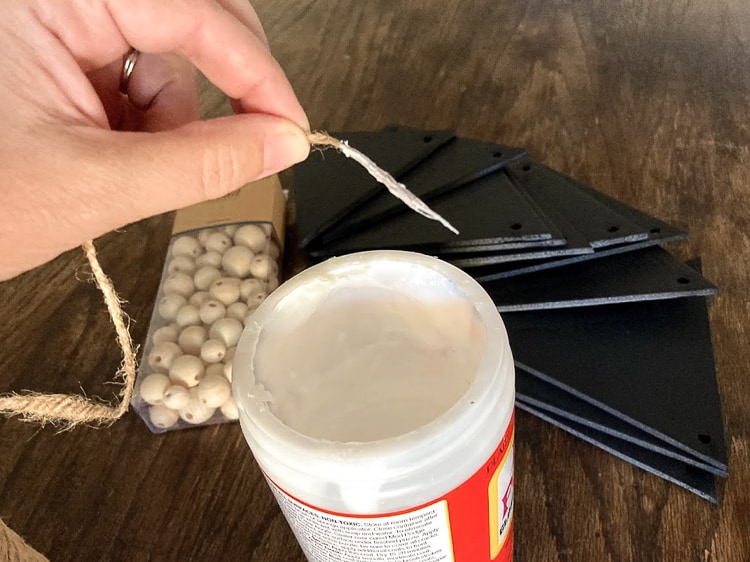
Let dry. (Maybe I should have put this tip earlier, so it could be drying while you cut out your boards.) This will create a "needle" to make threading your wood beads easier.
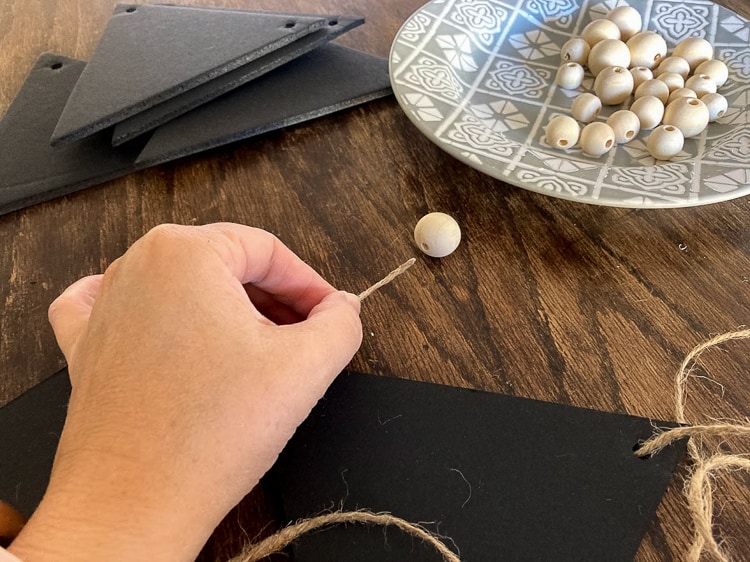
Thread about 5 or 6 beads onto your twine, in assorted sizes. Now, put the twine through the front of a triangle, toward the back, and then back out the front again.
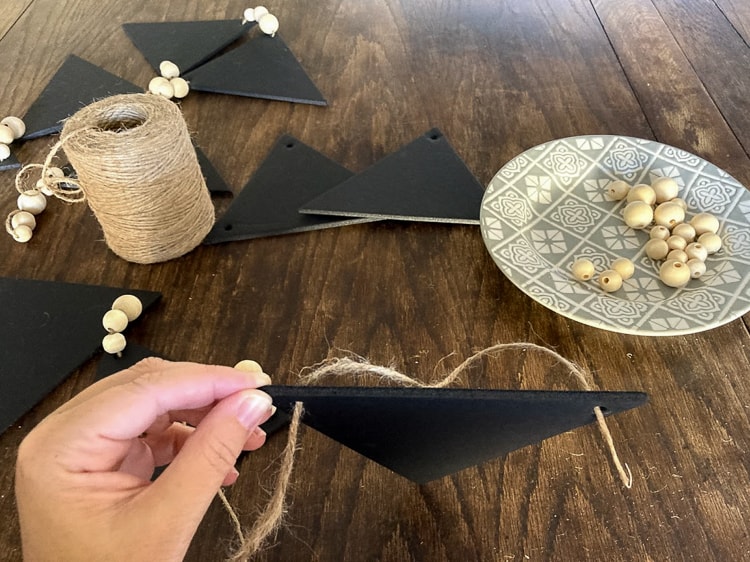
Continue alternating a few beads between each triangle, until all the triangles are attached, and finish with a few beads. Leave at least a foot of twine on each end of the banner, and cut off the excess.
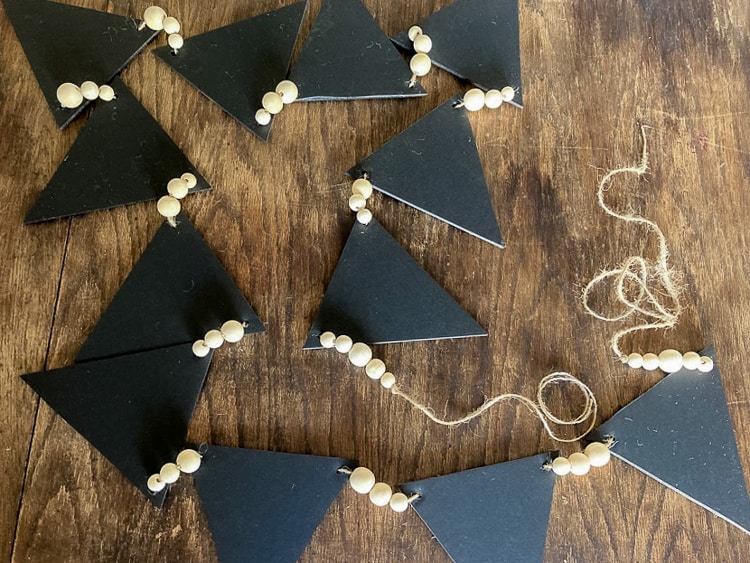
You can tie a knot on the outside of each ending bead, but unless your beads are very loose on the twine, this step isn't really necessary.
Now your banner is ready to decorate!
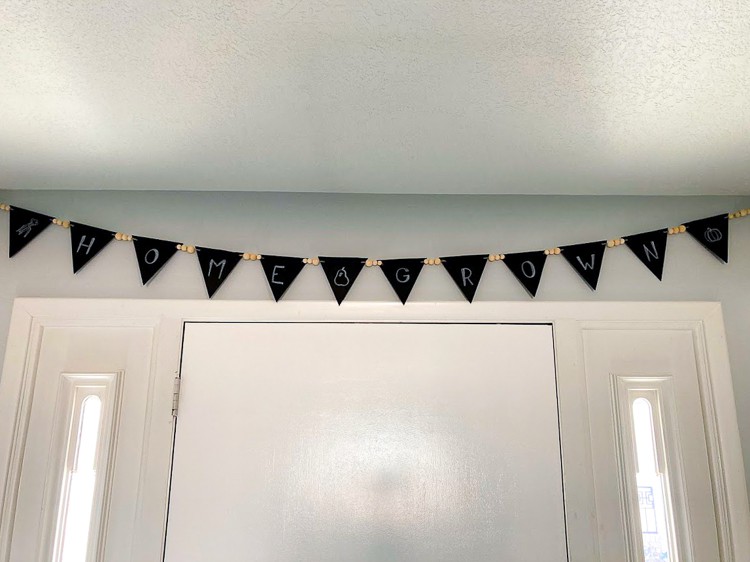
Use a piece of chalk or a chalkboard marker to write or draw whatever you'd like on your banner.
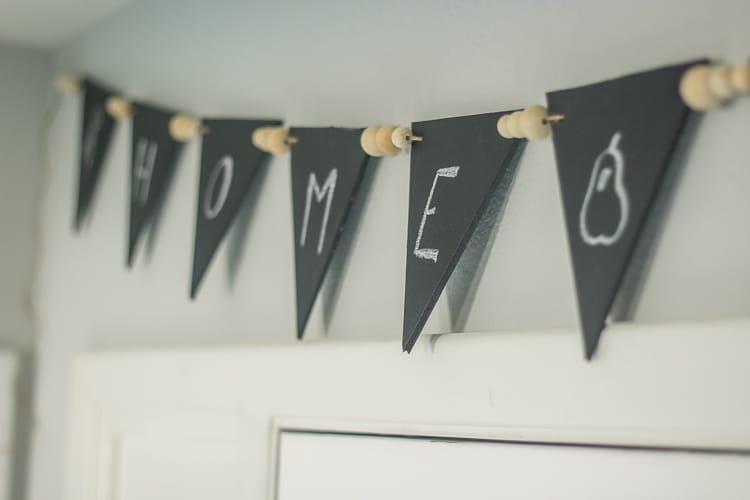
I decided mine should say "Home Grown" because I'm hanging it over our front door. It's halfway a welcome to visitors, and halfway a reminder to us before we leave of where we've come from.
I also think banner this would make an adorable baby shower decoration, or holiday decor. The possibilities are endless!
Bonus - you could write a different saying on the front and back, and just switch them around between occasions.
What will you decorate with your chalkboard banner?
Read on for a printable version of this tutorial...
Chalkboard and Wood Bead Banner
A faux chalkboard banner, made from black foam board and wood beads, is the perfect way to add a little design flair to your space. Find out how easy it is to make your own – no power tools required!
Instructions
- Mark and cut a 6 inch strip of foam core board, using your X-Acto knife and cutting mat.
- Mark every 6 inches along one edge of the strip. On the other edge, mark at 3", 9", 15" etc. (In other words, mark every 6 inches, starting at 3 inches.)
- Use the X-Acto knife to cut from edge to edge, ending at each mark. Carefully separate the triangles, and stack them so they are all pointing the same direction.
- Use the hole punch to make two holes in the upper outer corners of each triangle.
- Dip about 1 inch of the end of twine into ModPodge or glue. Smooth to a point with your fingers. Let dry.
- Using the dried glued end of the twine, thread a few beads onto the twine.
- Thread one triangle onto the twine, with the twine going from front to back, and then back to front.
- Repeat adding a few beads, then a triangle, until the banner is as long as you like.
- Tie a double knot after the last bead, and leave at least a foot of loose twine on the ends before cutting the rest.
- Now you can write or draw on your chalkboards and hang up your banner!
Notes
Be sure your twine is thin enough to go through the holes on your wooden beads! Macrame beads also work well because they are sized for yarn.
Recommended Products
As an Amazon Associate and member of other affiliate programs, I earn from qualifying purchases.


Leave a Reply