Personalize these etched glass bottles to make your own custom shampoo bottles and upgrade your shower. Perfect for handmade gift giving!
When I remodeled my bathroom, I solved all sorts of design and function problems. But then I noticed I had a created a new problem. Now that my shower was so pretty and helped me greet every day in a zen state, my tacky random plastic shampoo and conditioner bottles stood out like a sore thumb.
They really harshed my design vibe but I had a hard time finding a better solution. So I decided to make one, and I enjoyed my previous glass etching projects so much, I decided that's what I wanted to do with this project.
When I shared with my husband my brilliant idea to make custom glass shampoo and conditioner bottles for the shower, he rolled his eyes. But I told him he doesn't get a say because he doesn't need either shampoo or conditioner.
So if you're with me and you do want prettier, and even custom, shampoo bottles for your shower, here is an easy way to make your own.

This post contains affiliate links. If you make a purchase, I may receive a small commission at no additional cost to you.
How to Make Your Own Etched Glass Bottles
Materials
You'll need a few simple supplies for this project:
- Glass Bottles (or any glass container that you want to personalize)
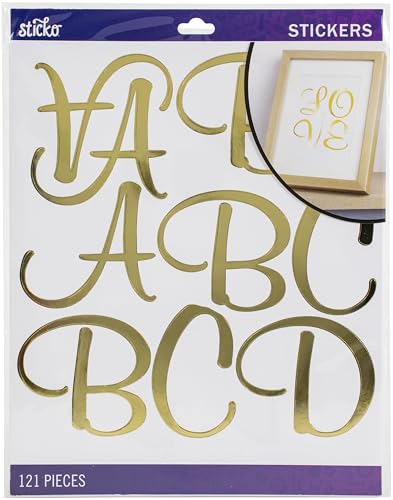
- Letter Stickers (be sure to use the kind that peel away from the background sheet, since we'll actually be using that part instead of the letter)
- Etching Medium
- Paintbrush

You also may want to use gloves, and you'll definitely want to protect your work area. Etching medium is mildly corrosive, so try not to get it on anything other than the glass.
I like Armour Etch (linked above) because it washes off with plain water and is easy to clean out of my brushes.
Etching Process
Etching glass sounds intimidating but it's really not. The etching medium does the work, and the hardest part is getting it into the places you want it, and not into the places you don't.
For this project, we'll use a stencil made out of the negative space of letter stickers. I'm creating one with "S" for shampoo and one with "C" for conditioner, but you could always use your initials, or come up with a completely different design.

This would be a fun project to get really creative with your Cricut machine!

First, peel off the letter sticker and set it aside. Then use the outside edges (negative space) of the sticker as your stencil. Affix the sticker to a clean glass jar and smooth it down with your fingers so it seals all the edges.

Be sure to include any parts that define the interior of the letter, like the two inside pieces of this S.

Once your sticker is in place, brush on a thick layer of etching medium within the lines of the stencil. Follow the manufacturer's directions on drying time. Armour Etch recommends leaving it on for 1-3 minutes.

After the etching cream has set, rinse off under running water. If you want your etching to be clearer, you can repeat the process.

Remove the sticker and you're done! Now you can fill your bottle with shampoo or conditioner, or whatever you like. Or give it away as a house warming gift, wedding gift, or for any other special occasion.
I finally got the esthetic I was looking for in my shower!

Note: be sure to follow manufacturer's guidelines about safety, since etching medium can be harmful if used improperly. This is definitely NOT a kids' craft project!


Etched Glass Shampoo Bottles
Make your own custom etched glass bottles. I used mine in my pretty new shower niche, but they'd also be perfect for personalized gifts!
Tools
- Paintbrush
- Gloves
Instructions
- Affix the sticker to the glass bottle, using the negative space (outline) only. Include any pieces that define the interior lines of the letter.
- Smooth the sticker down so the edges don't lift up.
- Paint on a thick layer of etching medium.
- Allow it to sit for 1-3 minutes.
- Rinse off under running water.
- Remove sticker.
Notes
Follow all manufacturer guidelines for safety. Etching medium can be harmful if used improperly. Not for children.
Recommended Products
As an Amazon Associate and member of other affiliate programs, I earn from qualifying purchases.


Leave a Reply