Looking to elevate your coffee ritual? You can make this super simple French press cozy in no time, with almost no sewing skills!
I'm obsessed with my French press. It makes better coffee than any of my other coffee makers, and I love the hands-on process. The only thing I don't love is trying to keep the coffee warm long enough for me to enjoy the second cup.
Fortunately there's a pretty easy way to solve this problem. And when I say "pretty easy" I mean it's both pretty and easy. The best of both worlds!
This post contains affiliate links. If you make a purchase, I may receive a small commission at no additional cost to you.
I needed a coffee cozy, just like the covers that you can get for your tea pot. But I didn't want to put a lot of time into making one, and I didn't even know how to get started. So I wrapped a tea towel around my press one day, and got this idea from the loop on the end of my tea towel.
(Turns out, a lot of people make fancier versions of these for sale on Etsy, but by the time I realized that, I was deep into this project.)
If you're like me, and want to make your own, here's how to make a simple French press coffee cozy.

Simple French Press Cozy Tutorial
This project is so easy, you don't even need to be able to sew a straight line. In fact, the only sewing at all will be to attach matching buttons.
The secret ingredient is craft felt. It needs no hemming or stitching, but it's thick enough to help insulate your French press. Plus it comes in all kinds of adorable designs!

You can find craft felt at your local craft store. I found mine at Hobby Lobby, displayed like scrapbooking paper in large racks. It was about $2.50 for a 12"x18" sheet, and $1 for the smaller sheets. If you can't find it at your local store, you can find basic patterns and a huge variety of colors online as well.
To go with your felt sheet, you'll need three buttons and some elastic ribbon in coordinating colors. I found my ribbon in the area with all the fancy trims and tassles. You'll also need scissors, a needle, and matching thread.
Once you gather your pretty things, you'll simply measure your French press, cut the felt into a strip, attach buttons on one side, and the elastic on the other side. It's super simple, and can be customized for any size press.
In fact, this process would work great for any cylindrical object that you want to insulate, like a coffee cup, travel mug, pitcher or vase. As long as it has straight sides, this will make a sleek tube to fasten around anything.
Here are the step by step instructions:
Measure Your French Press and Mark Your Felt
First, measure the height of your French press, from the base of the glass to just under the lip of the spout.

Then, using a flexible tape like those for sewing, measure the diameter of the press.
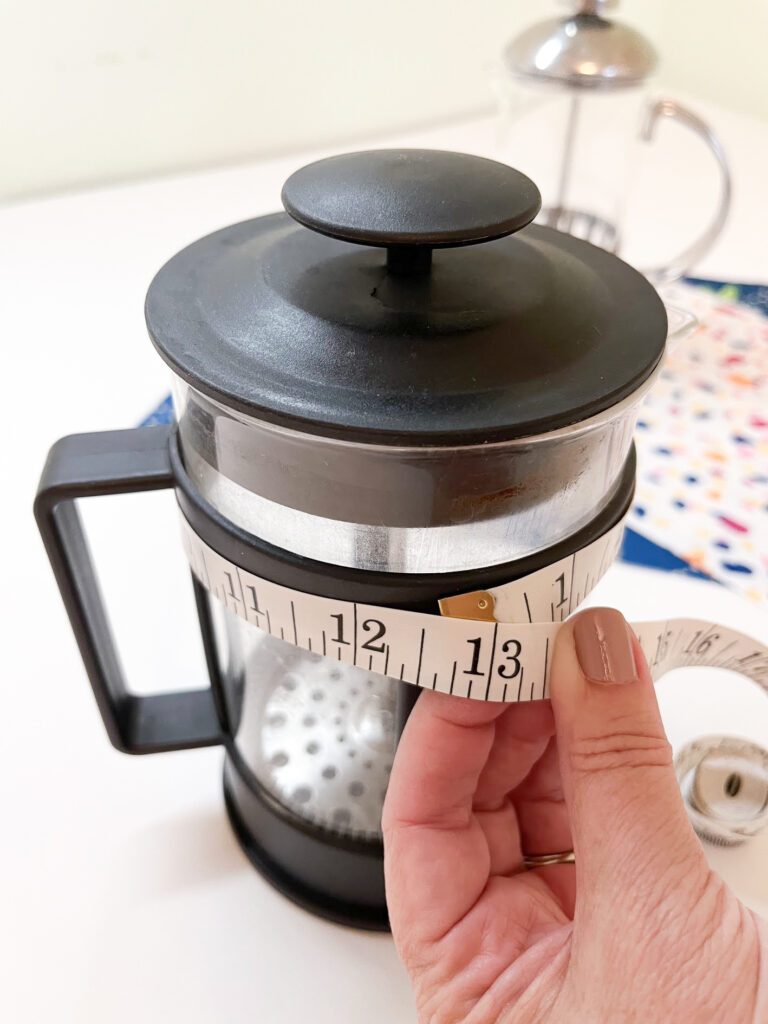
These will be the measurements for the long and short sides of your felt.
Felt Tip: when you're choosing felt, keep in mind which way the fabric will be wrapping around your French press. If your fabric has illustrations on it, be sure they will stand up in the right direction once you've cut the fabric to the size of your press.
Cut the Felt to Size
Next, mark your measurements on the back of your felt and cut out. You can use a ruler as a straight edge to give yourself a nice clean line to follow.

Check your cut piece of felt by wrapping it around your press. Make sure it's wide enough to wrap almost completely around without overlapping itself on any of the handles, and check that it's tall enough to cover the whole area of glass where the most heat escapes.

Add Cute Buttons
Now decide where you want your buttons to go, along one end of the felt. There should be three buttons equally spaced, and about an inch from the edge.
Here comes the hardest part. Are you ready? Sew the three buttons on. There I said it.
(If you can't tell, I hate to sew.)

Once you've wrestled through sewing your buttons on, you'll need to align loops of elastic on the connecting edge of the felt.
Add Elastic Loops to Fasten
This can be a little tricky to get your elastic the right length - long enough to make it around the button, but short enough that it holds securely. It's like finding the right hair tie for your hair, not too tight and not too loose.
The elastic could be sewed on, but given my disinclination to sew anything I don't have to, I opted for threading the elastic through the felt and tying it in a square knot on the back of the felt.
Basically, you'll cut two tiny slits in the felt, kind of like the holes in a button. First, hold the edge of the felt up to the other button edge and mark corresponding dots that match the centers of the buttons on the opposite edge.
Then mark two ¼" lines like an equal symbol with the lines pointing to the buttons.

To cut, fold across your equal signs and make a tiny cut straight across the fold on each line.
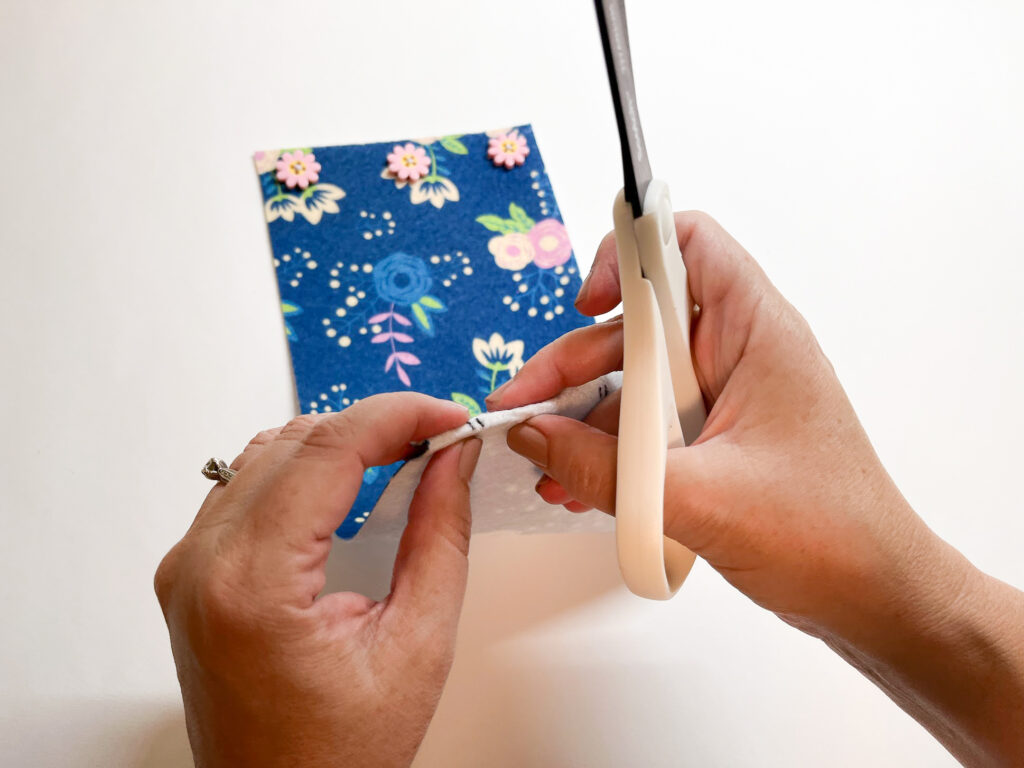
Now you can thread a segment of elastic through the two holes and tie in a square knot on the back of the felt. I recommend doing one and then trying to fasten it to its corresponding button. That way you can adjust your loop size before doing the other two.

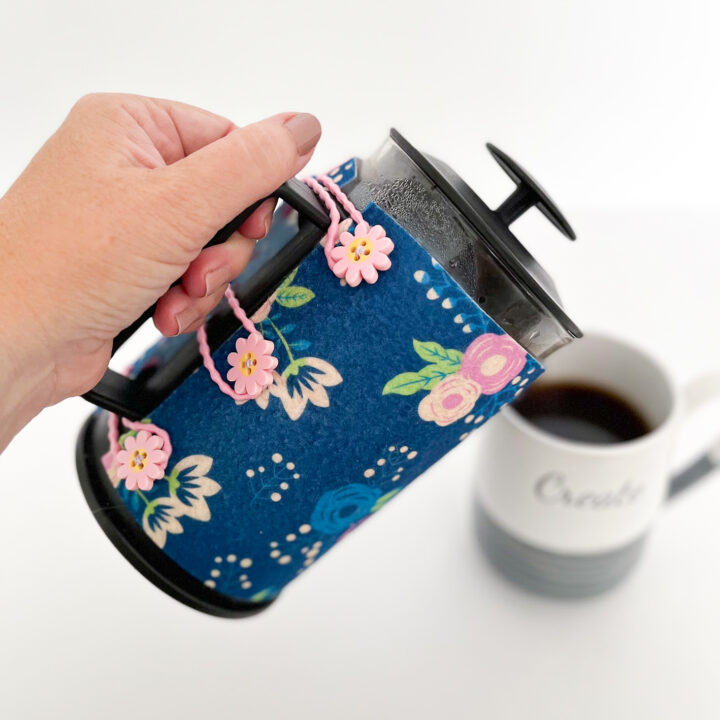
Finish tying your loops and now you can attach your adorable cozy to your French press. Instant upgrade!

Option: If you can't find elastic trim, you could add another row of three buttons on the other side and connect them with elastic hair ties.
A Custom French Press Cozy for not a Latte Money
I enjoyed this project so much, I made a cozy for my standard size press and a coordinating cozy for my smaller press. Now I can serve both regular and decaf coffee at the same time!
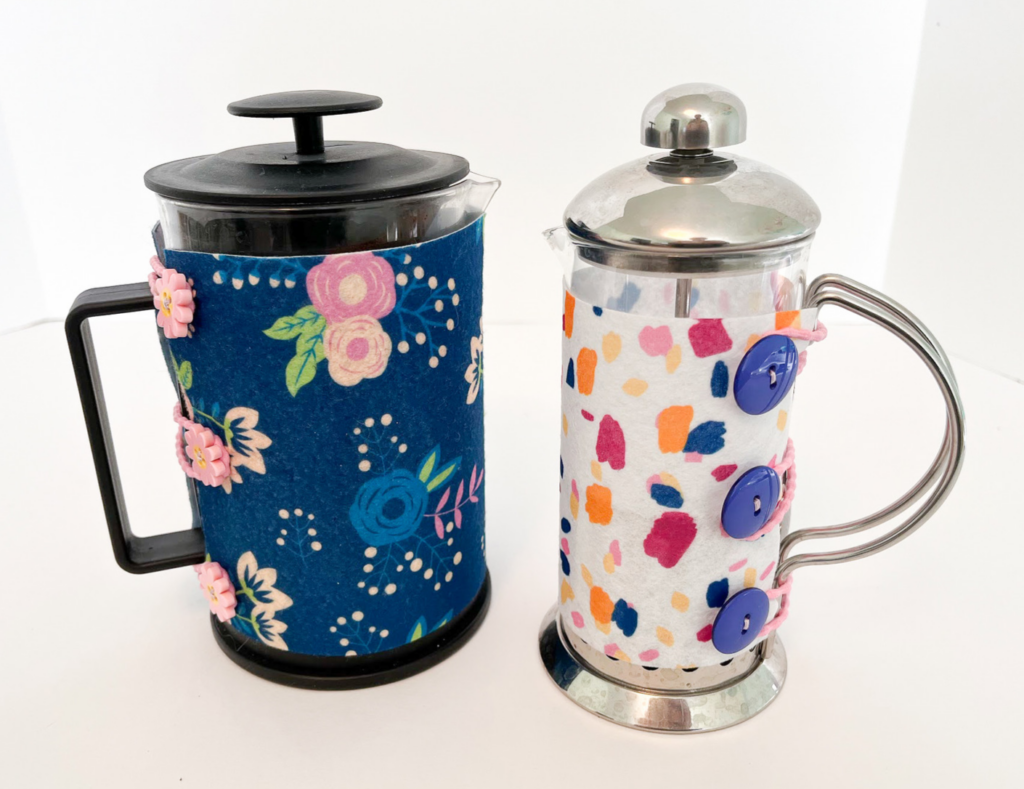
Altogether, I think I spent about $5 for my standard size cozy, and $3 for my smaller one. And the whole double project took me about 30 minutes (with 20 of those going to sewing on the buttons).
This would be a great project for a handmade gift, if you know people who love their French presses as much as I do. You could even find felt in colors that match your friends' homes or favorite team. The possibilities are endless.
Now go get cozy, and let me know if you make one of these!
French Press Cozy
Keep your coffee warm with this adorable French press cozy - a super simple and inexpensive craft to upgrade your coffee experience.
Materials
Instructions
- Measure the height and width of the glass portion of your French press with a flexible tape measure.
- Mark these measurements on the back of a piece of craft felt. Cut along markings to get a large rectangle.
- Sew three buttons along one short edge of the rectangle.
- On the opposite edge, cut corresponding double slits.
- For each pair of slits, thread a piece of elastic string through and tie in a double knot on the back of the felt.
- Now you can use the elastic to fasten around the buttons, to hold your French press cozy in place.
Notes
When picking patterned felt, check to see that the pattern will lie in the right direction once you cut out your measurements and wrap it around the French press!
Recommended Products
As an Amazon Associate and member of other affiliate programs, I earn from qualifying purchases.


Leave a Reply