Handmade gifts make the holiday gift giving season more fun and meaningful. Here's how to make two different Deco Foil gifts with the same basic process!
Today I'm sharing not just one craft tutorial, but two! If this blog were anything but free, that would be a great deal. As it is, I guess that just means more reading for you. So grab a cup of coffee and let's get started!
This post contains affiliate links. If you make a purchase, I may receive a small commission at no additional cost to you.
What is Deco Foil?
I've recently fallen in love with a new (to me) product called Deco Foil from ThermoWeb. You may be familiar with ThermoWeb if you do any kind of paper crafting because you probably use at least one of their adhesives: Zots, mounting squares, tape runners, etc.
When ThermoWeb asked if I'd be interested in using their foil to make a couple of projects, I jumped at the chance to try out something new. So here you have the results of my experiments, a set of iridescent snowflake cards, and a fun tea towel with a modern wreath design.
I just loved the metallic finish of the foil and am impressed with how easy it is to use, as well as how many options it gives me for embellishing all sorts of projects!
Snowflake Cards

What you'll need:
- Blank Notecards or card stock paper
- Watercolors in blue, green, and purple
- A large watercolor brush
- Deco Foil liquid adhesive
- Deco Foil Iridescent Foil
- Deco Foil Silver Stars Foil
- Toothpick
Snowflake Card Process:
This is really a two part process. The first part is painting the background on the cards, and the second is applying the foil. Each step is fairly quick and easy, but remember to allow for drying times in between steps.
- Open a few cards and lay them flat. Load your brush with a little water and blue paint.
2. Spread the paint evenly over the whole front of the card.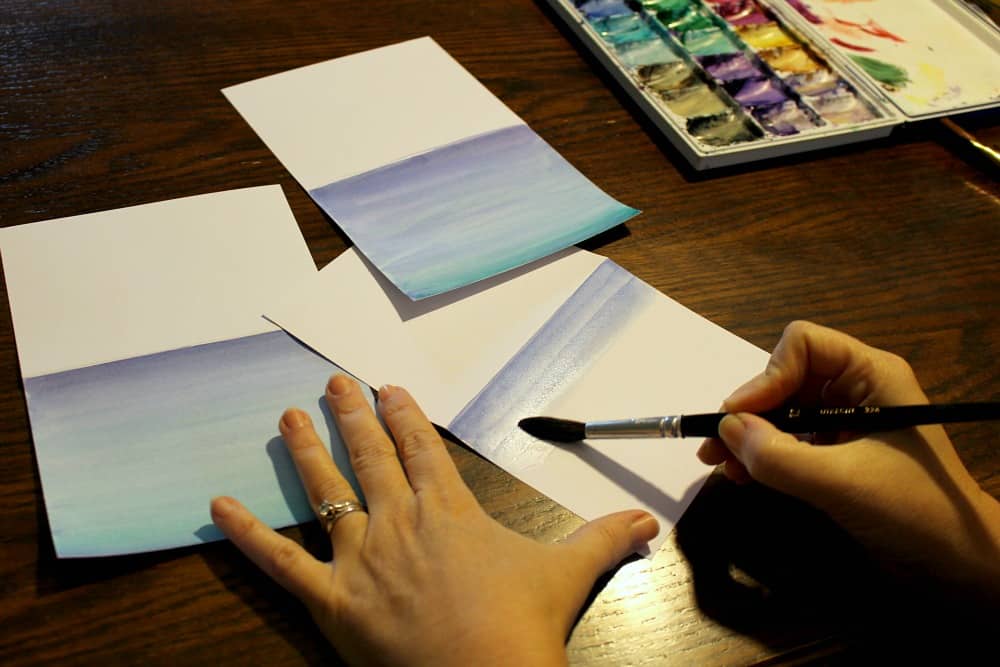
3. Go back and add a little green to the bottom edge of the card, and a little purple to the top edge, just to give it a little dimension.  Of course, the additional colors are optional. I also think this would be a really pretty project if you used a dark blue over the whole card. Just a thought, maybe I'll try that next time...
4. Allow the cards to dry completely.
5. Once they are mostly dry, you may notice them buckling a little, especially if you used a lot of water. Simply stack them under a heavy book for a few hours to straighten them out.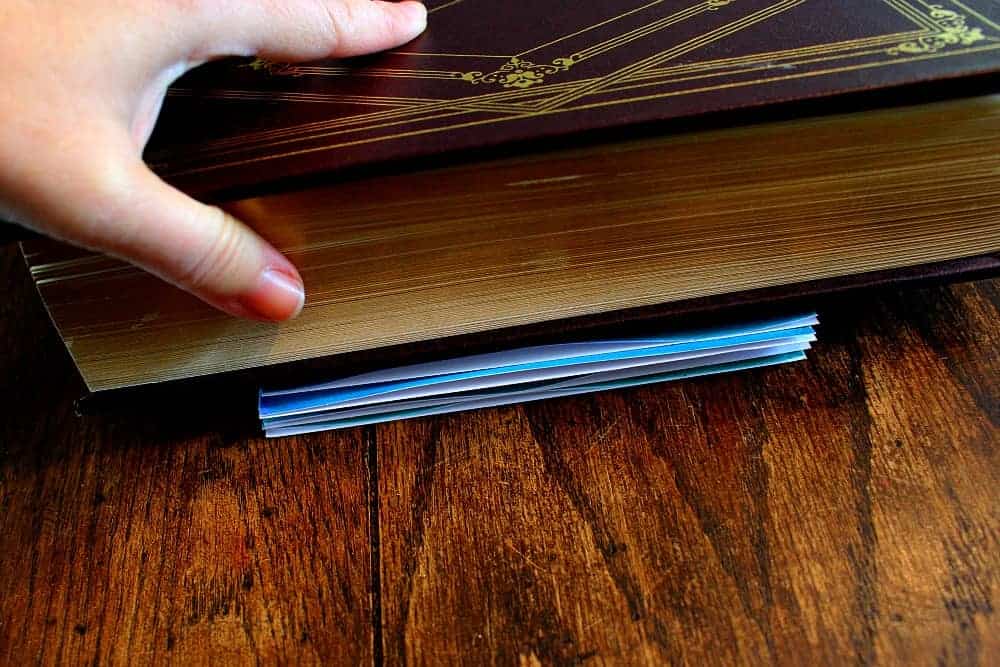
6. After the cards are completely dry, you can add the Deco Foil adhesive. Use the tip on the bottle to draw it on in snowflake patterns. I've included a few here for inspiration, or you can also use stencils as a guide.  Remember, snowflakes have 6 sides and points!
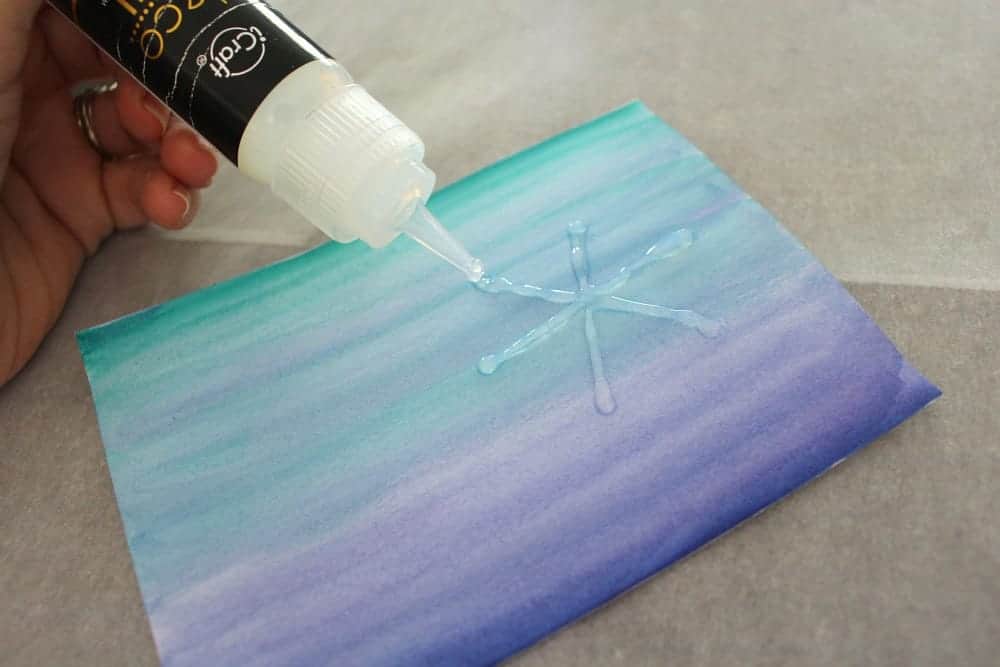
7. Use a toothpick to drag through the glue and create feathery effects and more precise details. Add more snowflakes all over and a few random dots to represent smaller snowflakes.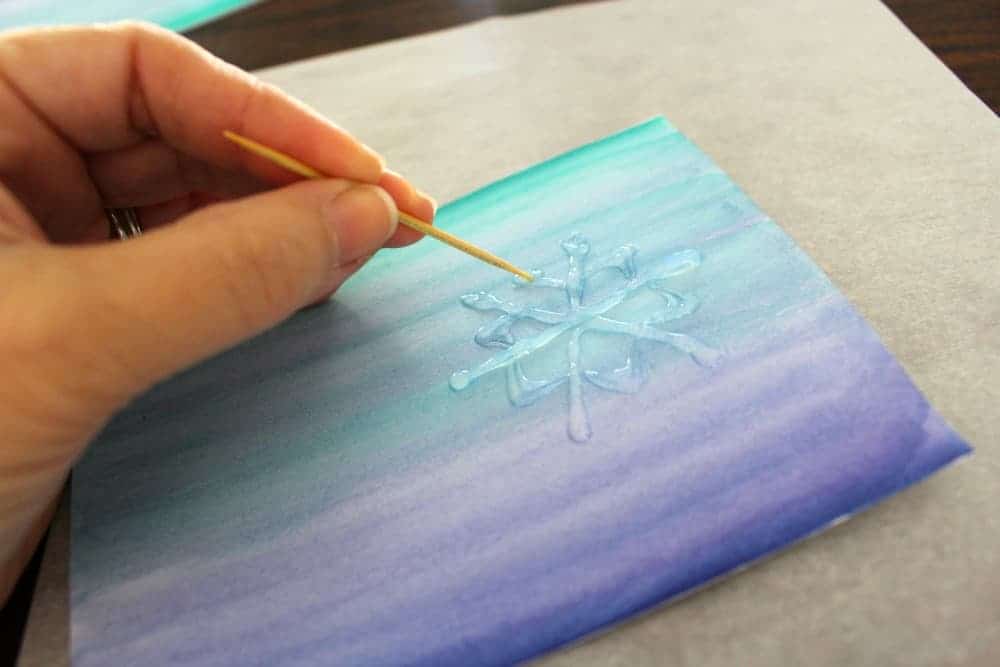
8. Allow the glue to dry at least an hour. Once dry, it should feel firm but tacky to the touch.
9. For the larger snowflakes, use the iridescent foil. Lay the foil on top of the glue, shiny colorful side up, and use your finger to rub the foil onto the glue, like a transfer rubbing.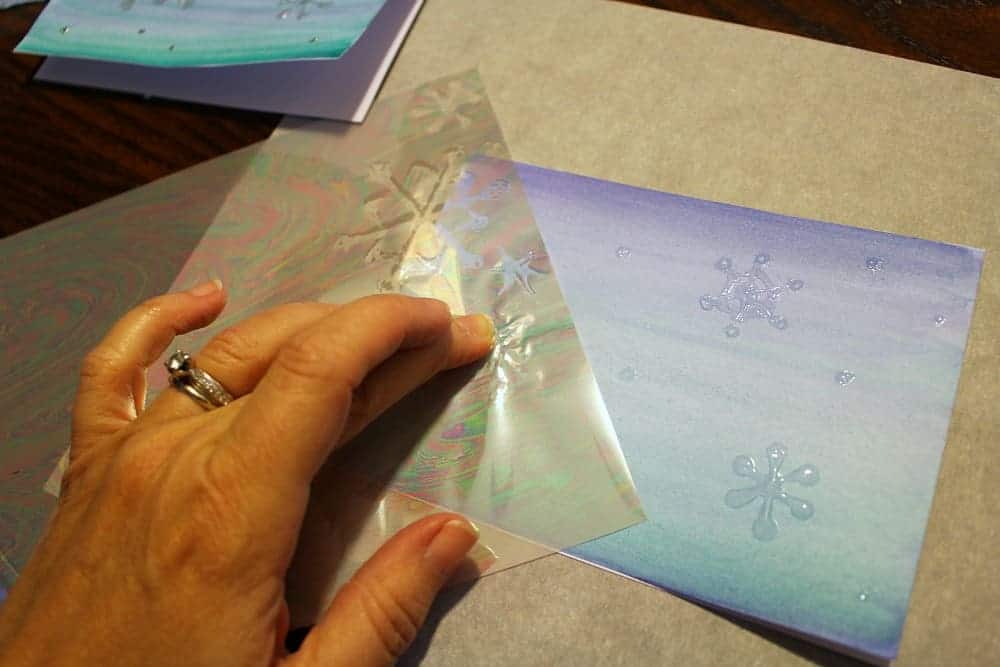
10. Gently peel up the foil sheet, and you'll see the foil has adhered to the glue. If any parts haven't stuck, simply repeat step 9.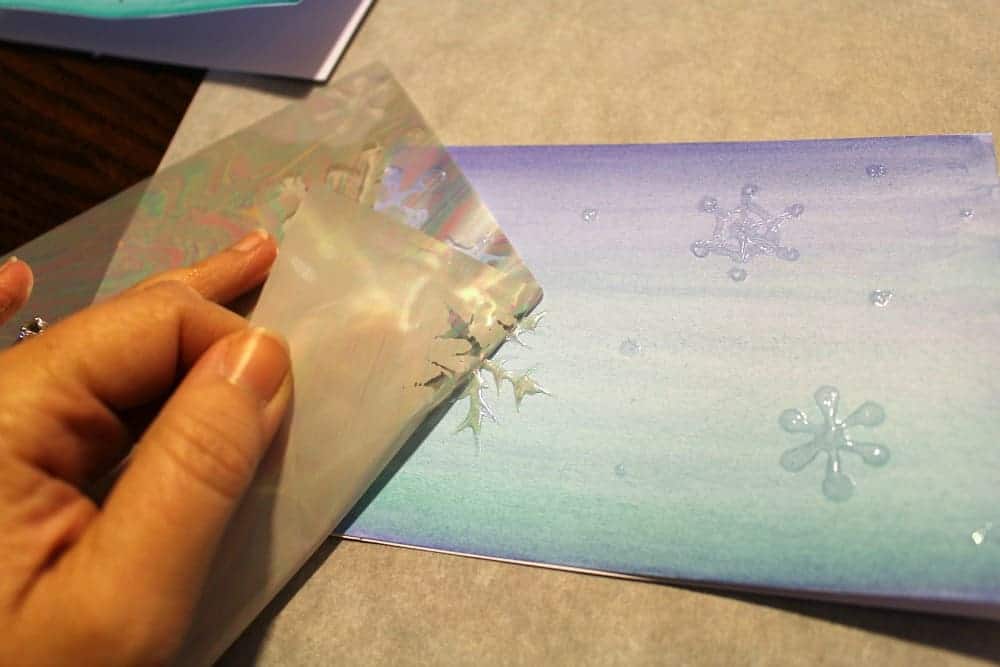
11. Use the silver stars foil on the smaller dots.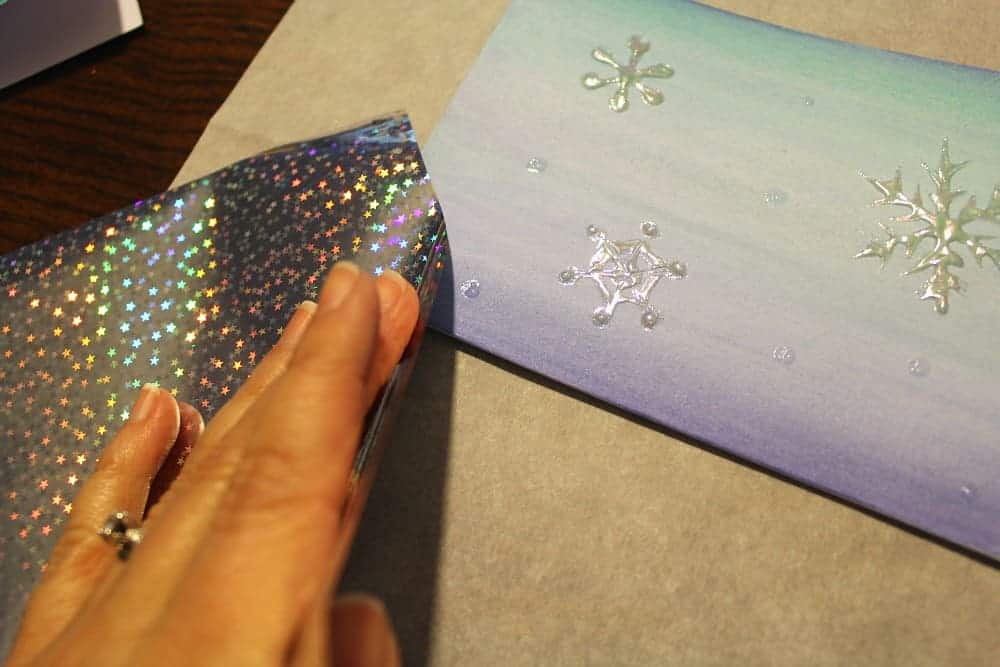
12. Just like that, your snowflakes are now shiny and shimmery!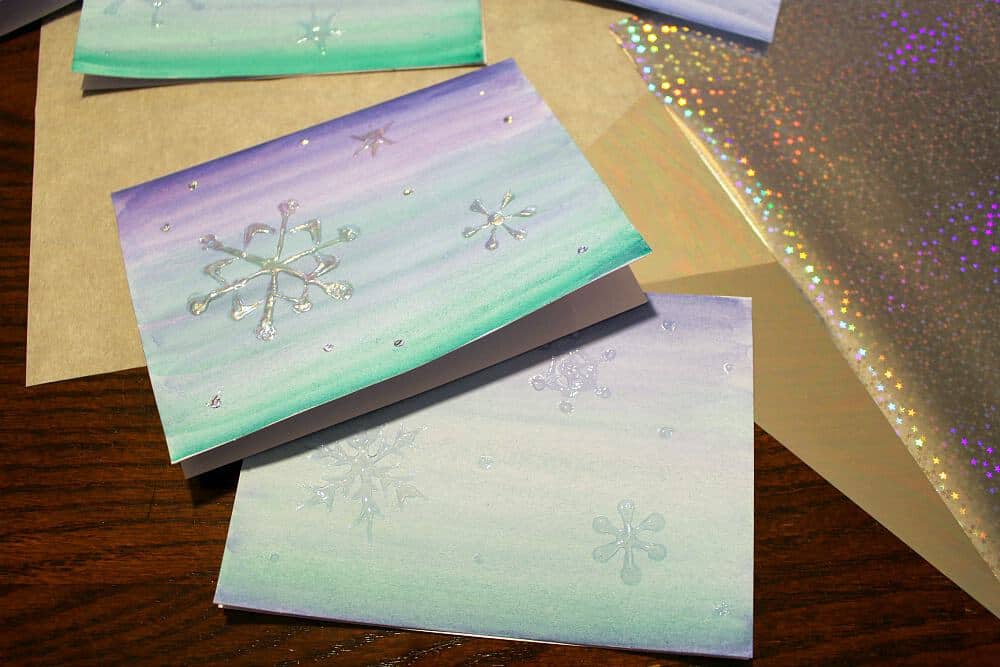
(The top card has foil, compared to the bottom card.)
If a 12 step process is a little daunting, read on because our next project is even easier than the first one!
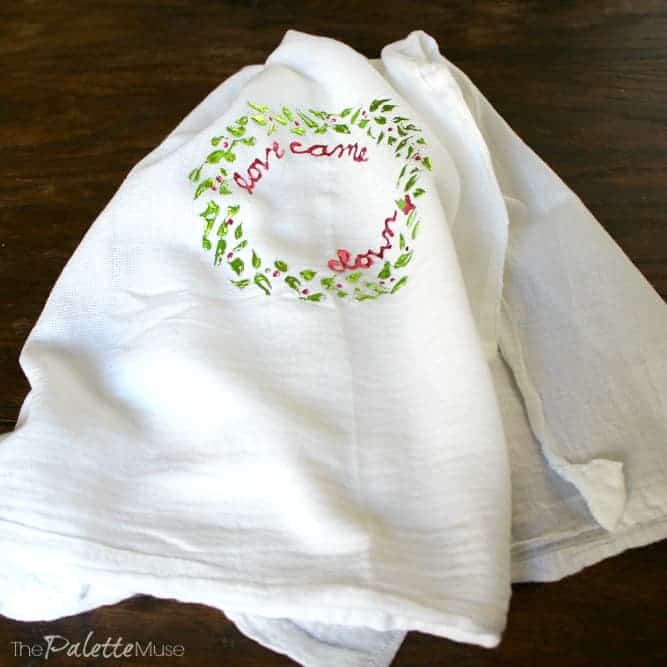
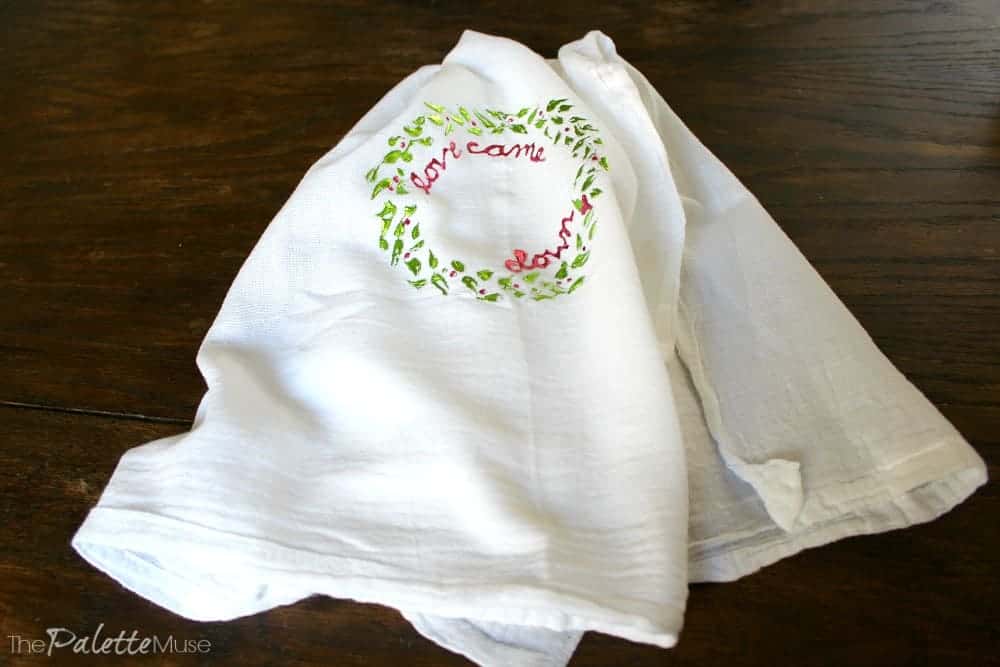
Modern Wreath Tea Towel
You'll need:
- Cotton Floursack Tea Towel
- Deco Foil Liquid Adhesive
- Two colors of Deco Foil. I used Lime and Pink Melon
- Toothpick
- Optional: Large embroidery hoop for keeping the fabric flat
Tea Towel Process:
If you're using an embroidery hoop, stretch your fabric on it, so that the front of the tea towel is on the inside of the hoop, resting flat on the table. If you don't have a hoop, simply lay the fabric flat on the table and weight the corners with a heavy book or two, just so it doesn't move around while you're working.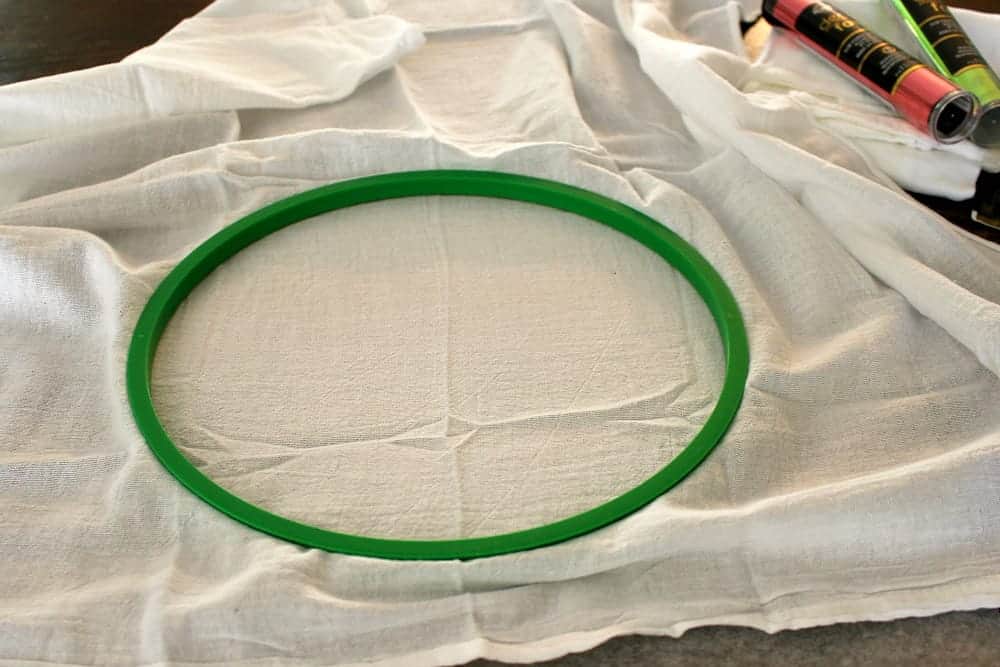
Use the liquid adhesive to draw dots in a circular pattern, about 4-5 inches wide. Add about three dot's width randomly all the way around the circle.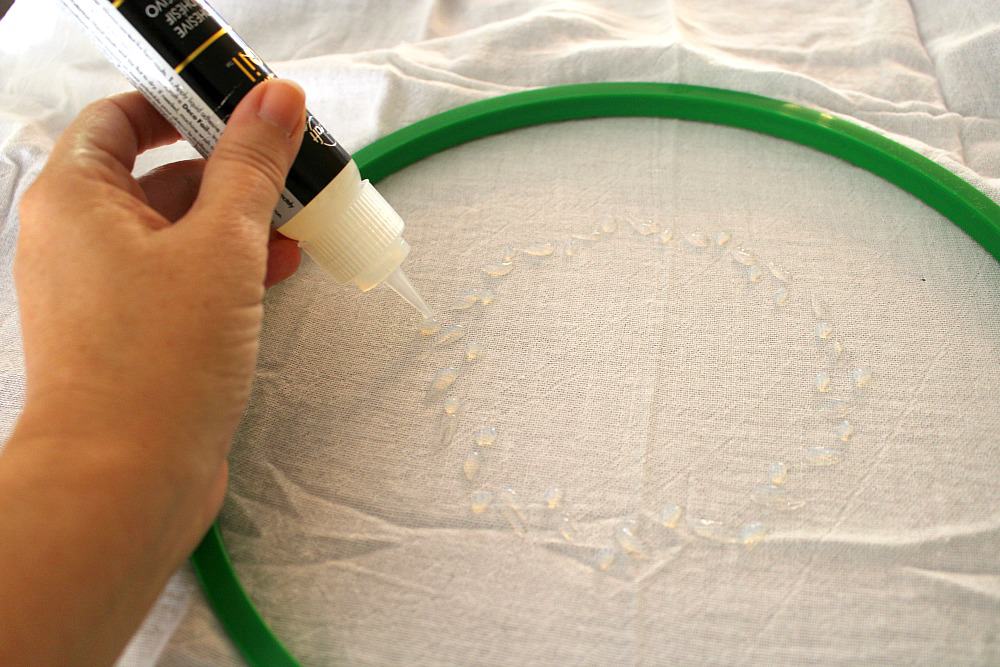
Using a toothpick, drag through the dots in random directions until each resembles a small pointed leaf.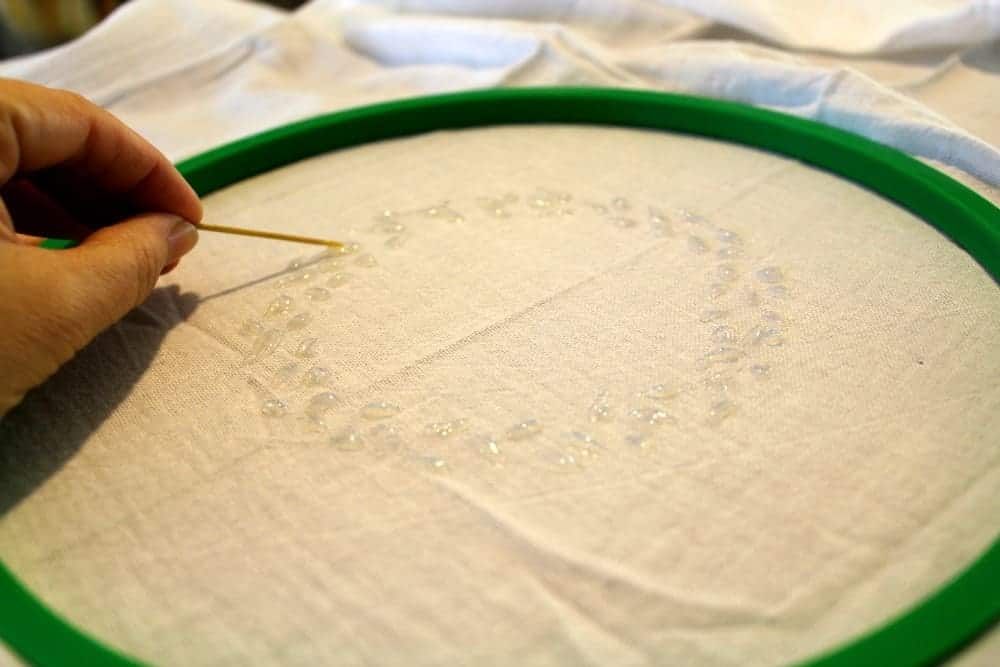
Allow the glue to dry for at least an hour. Once dry, it should feel firm but tacky to the touch.
Apply the lime foil, as in steps 9 and 10 of the greeting cards above.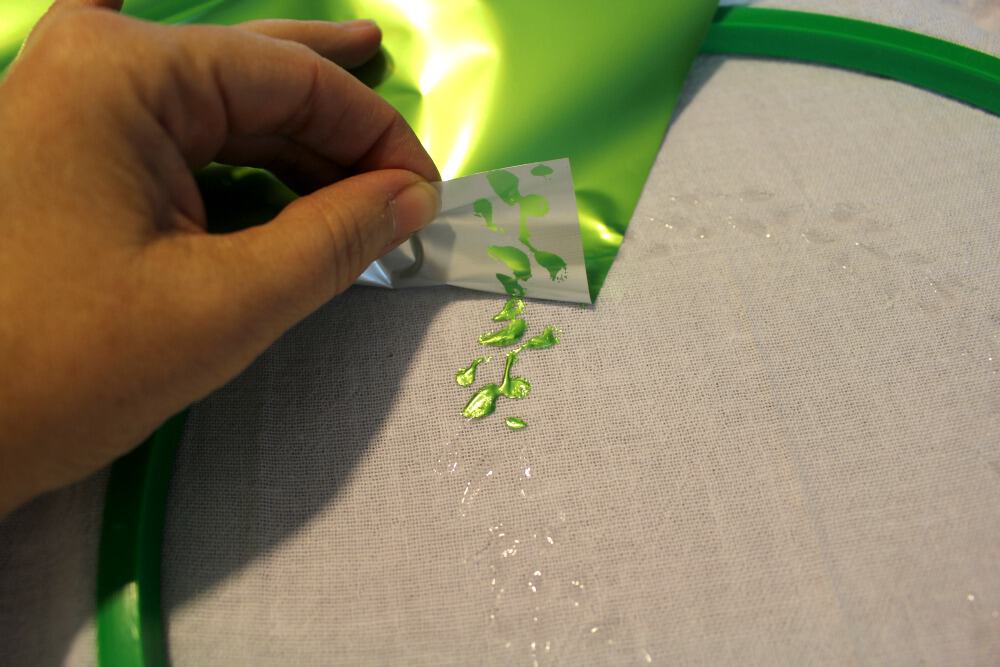
Use the liquid adhesive to once again place small dots every inch or so around the wreath. (These will be the berries.) Then add the words "Love came down" (or any other words or decorations you like) in cursive inside the wreath. I also decided to tuck a little heart into the wreath as well.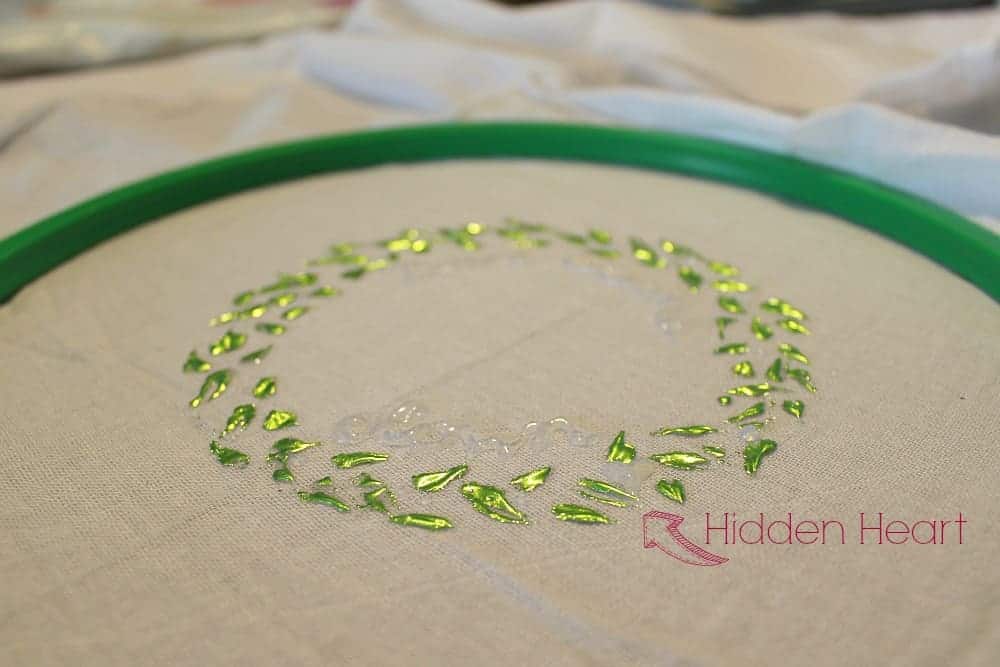
Again, allow the glue to dry completely.
Apply the pink foil to all the remaining uncovered glue spots.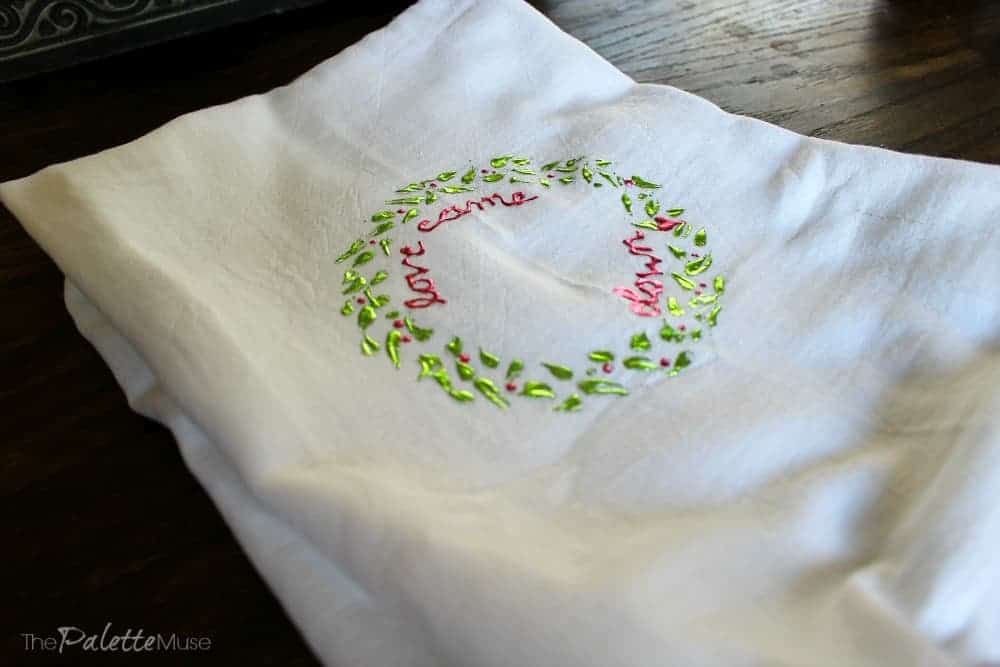
And there you have it! An adorable, and useful, tea towel in fun and funky metallic colors. The amazing thing about this foil is that it's completely washable! This is a tea towel you can actually use.
The Deco Foil line is a fun and creative way to add vibrant color, brilliant shine and a metallic or satin finish to any project.
Give it a try and if you need more inspiration, check out their blog for more great projects. The possibilities are endless!


rachel621 says
These are beautiful! Cannot believe there is a sparkly product I haven't worked with yet, haha! I have used metal leaf but this look so much easier.
Meredith says
Thanks Rachel! This stuff really is so easy and fun to work with, and I love the way it almost looks like liquid metal. I'm hooked!
jacquiegum says
These are so pretty. And quite the ambitious project! But your efforts sure paid off in a big way:)
Meredith says
Thanks Jacquie! It's funny, I don't realize how involved some projects are until I sit down to write about them. Guess that's because I love doing each step so much that I don't realize how much work they are!
Mary-The Boondocks Blog says
These are very pretty Meridith and so unique. I've never seen it done before. Belated Thanksgiving wishes to you.
Meredith says
Thank you Mary, and to you too!
Anita C. Lee says
I need to learn how to do this. I love sparkly things! I'd like to try mixed media, doing watercolor paintings with subtle and very limited metallic touches. Wish me luck!
Meredith says
You don't need luck, you got this! Let me know when you want to borrow some to try it out...
Jeri Walker (@JeriWB) says
The deco foil is a great idea and could be put to many uses. I'll have to file this one away for a definite one to try someday.
Meredith says
Thanks Jeri, this one definitely got me thinking of all the ways to use such a fun product!