What do a chair, a drop cloth, and chalk paint have in common? Nothing, until a DIY-er gets ahold of them!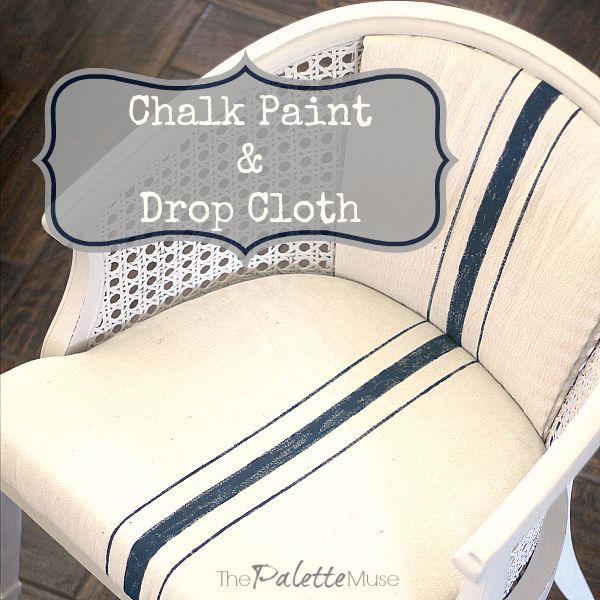
Often when I'm thrift shopping, I hear a little voice in my head, telling me to buy this or that fabulous mess and take it home for a little TLC. In this case, the voice wasn't in my head, it was over an actual loudspeaker. I was standing in my local Habitat for Humanity ReStore, contemplating this dusty orange velvet arm chair.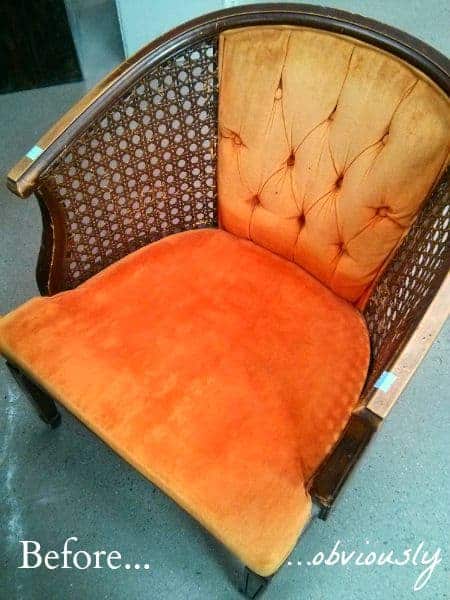
I was debating whether it was worth the $10 price tag, considering the huge amount of work that I would have to put into it. (And considering I have no where to put it in my house, once it's rehabbed.) As I was thinking this over a voice from heaven, or more likely an announcement from the store's speakers, proclaimed that all furniture was 40% off today. I don't know if the manager saw me there debating with myself, and thought, "Finally! I bet I can get this girl to take that awful chair off my hands," or whether it was an actual sale that day. Either way, my decision was made. Big Orange was coming home with me.
She needed a lot of work, and I didn't have any idea what I wanted to transform her into, so she languished in a corner of my office for a few weeks. I finally decided she needed some chalk paint and faux grain-sack upholstery, and got down to work.
I picked up a small drop cloth from Lowe's, new foam for the seat cushion, and DecoArt graciously provided the Americana Decor Chalky Finish paint and the So Soft fabric paint. (Thanks, DecoArt!)
First up - a good bath and body scrub. This chair was not coming apart without a fight! I don't know when it was made, but it was long enough ago that most of the innards had disintegrated into orange dust.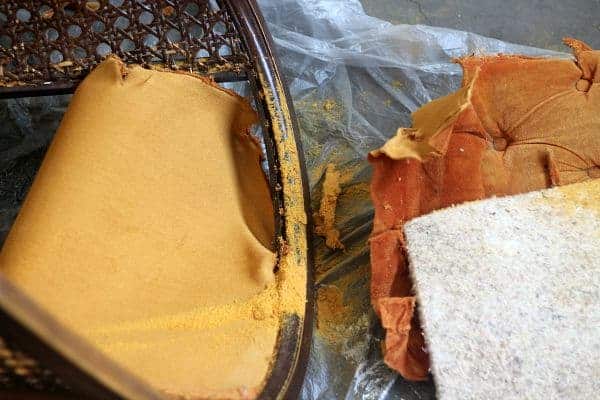 Someone along the way had ungraciously tried to fix a broken leg with an L bracket, so I had to fix that as well.
Next I gave her a couple of coats of different dark gray spray paints. I knew the chalky finish paint needed no surface preparation, but I wanted to add layers of color, so that when I distressed the chair later, it would have some patina to it. 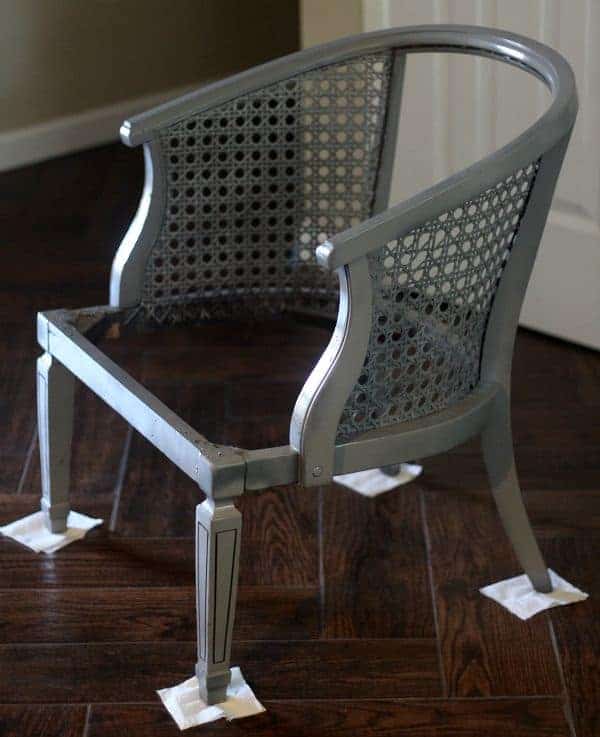
Once the spray paint was dry, I painted on the chalky finish paint. This stuff is amazing. It adheres to just about anything (including my nail polish) and it has a great feel to it. I chose the color "Primitive" to match the natural drop cloth color. While the paint was drying, I put together the seat cushion. You can check out my
 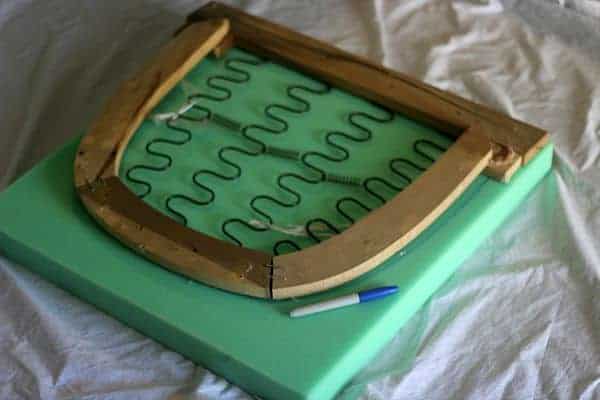 Drop cloths make a perfect substitution for pricey linen in this type of project. They're strong, soft, and thick, just what you want in an upholstery fabric, at a tiny fraction of the cost.
Secret Insider Upholstery Lesson:
Are you wondering how to keep your pattern straight on your upholstered projects? If you've done upholstery before, you know that the whole point is to stretch the fabric tight, and that can lead to wavy lines on your pattern if you don't do it just right. Here's how you fix that: If you are painting fabric, especially with stripes, do the upholstering first, and then paint. Simple, right? But it makes all the difference!
After the paint dried, I lightly sanded all the edges to give it a slightly distressed look.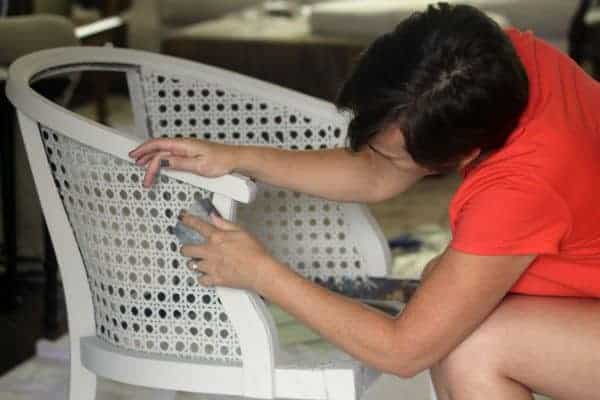
To keep your distressing natural looking, just sand the edges that would normally rub up against something, or come in contact with people's hands and feet.
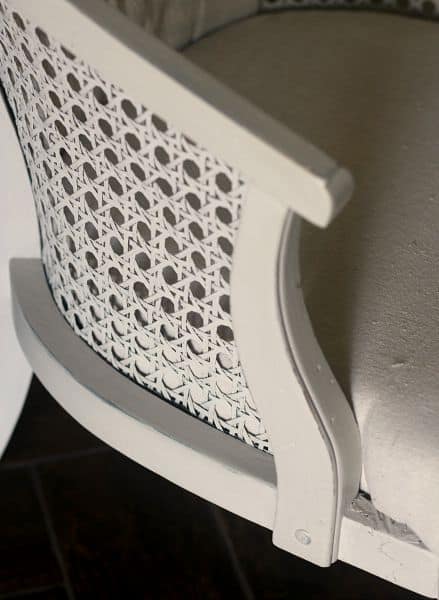
My daughter was dying to "help" me, so I let her brush on the creme wax sealer. Once it was dry, I gave it a good buffing, for a subtle sheen.
Once the wax dried, I upholstered the back with the remaining pieces of drop cloth.
Finally, I was ready to paint the fabric. I used blue painter's tape for my grain sack stripe pattern. Grain sacks come in all different patterns, so you can choose whichever you like. Starting on the chair back, I used a centering ruler to line up the tape. (There's nothing worse than a center stripe that doesn't go down the center!) Then I put the seat cushion in place and continued taping the stripes, matching them to the back.
 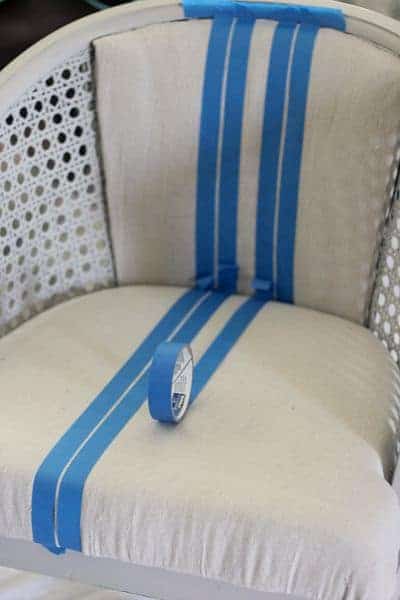 Once everything was lined up the way I wanted, I removed the seat cushion again and simply brushed on the fabric paint, being careful not to force any paint under the tape. Since I wanted a vintage look, I applied the paint imperfectly by mostly dabbing it on.
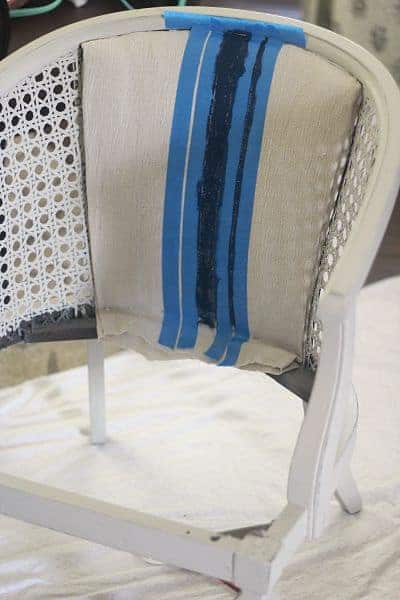
Voila! Perfectly lined up stripes!
With everything done and dry, the only thing left was to screw the seat cushion back onto the bottom of the chair and figure out where to put this newly made-over grand lady. (I haven't figured that out yet, so if you're looking for a French vintage style chair, let me know!
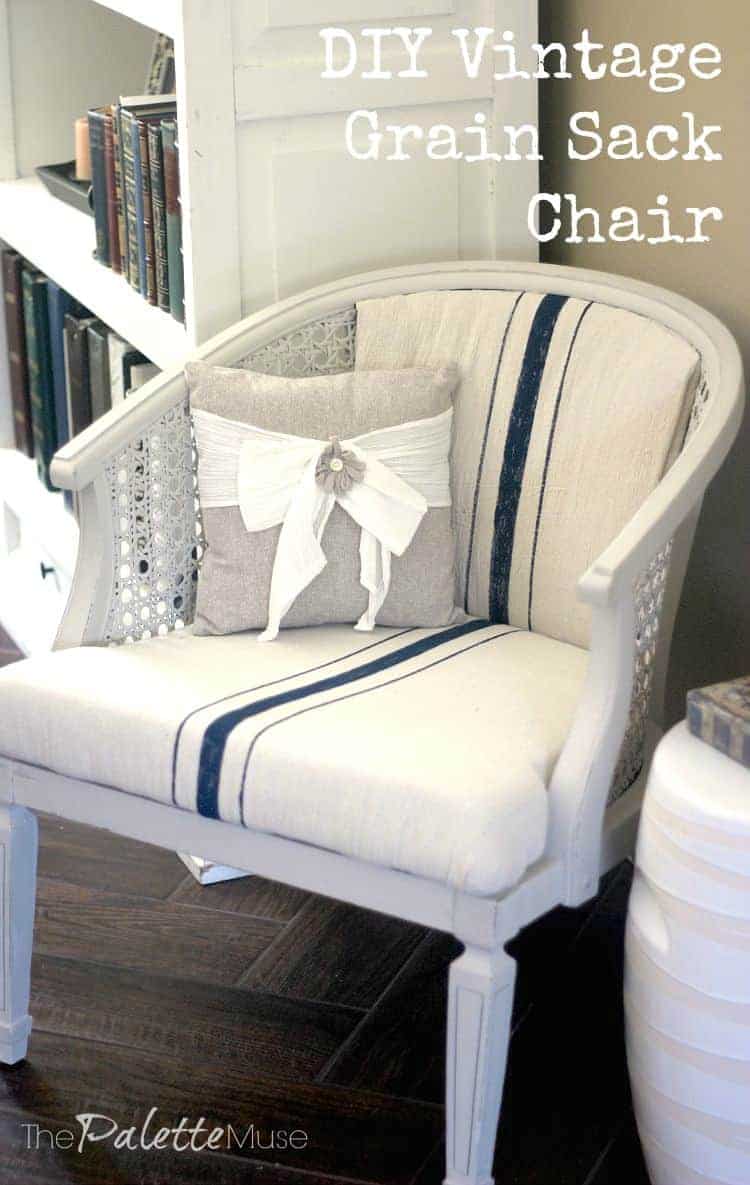 ~Pin me!~
I love to take something old and broken-down, and make it fresh, pretty, and useful again. I think there's a metaphor for life in there somewhere.
And if you're thinking of recovering your own chairs, check out this post on making simple slip covers!


[…] Meredith from The Palette Muse shared her makeover of a sweet barrel back chair using Dropcloth and chalk paint. It is so fresh and sweet and I love the grainsack stripe! Hop over to see how she painted on fabric! […]