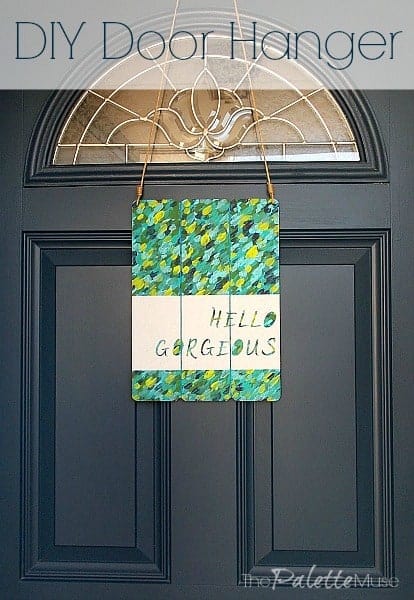
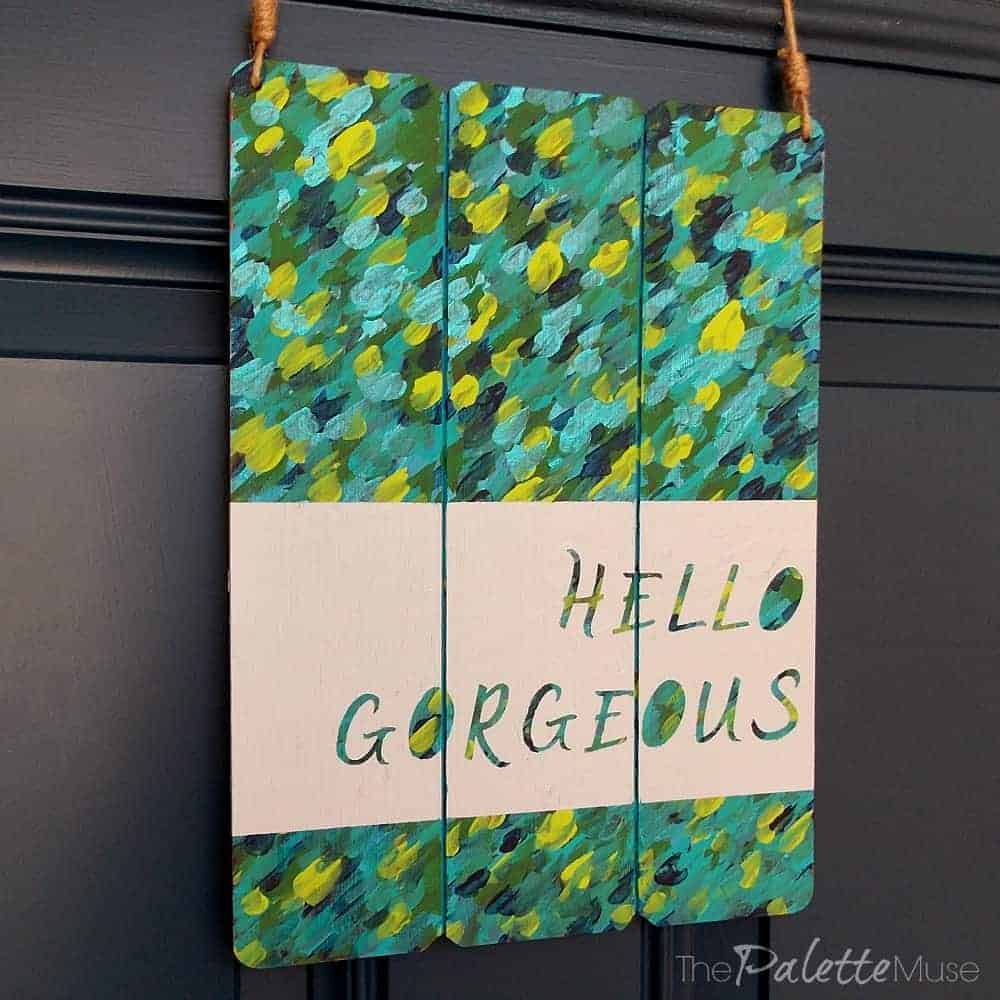
This crafty DIY Door Hanger will make your visitors smile while they're waiting for you to open the door.
I love having visitors. To me, they're like the rare handwritten letter in the middle of a mailbox full of bills and advertisements. Having a visitor at my door (not counting the ones trying to sell me something) is a refreshing break in a day that's often filled with chores and sometimes even loneliness. And any excuse to fire up the coffeemaker and sit down with a friend is a good thing!
So to make my visitors feel welcome I made this colorful sign, instead of a welcome mat which would inevitably be covered with leaves and dusty footprints. This one is right at eye level and stays clean, no matter what folks may track in with them!
Want to make your own Door Hanger? It's easy, and you don't need any artistic ability, I promise. Here's how.
This post contains affiliate links. If you make a purchase, I may receive a small commission at no additional cost to you.
How to Make a Door Hanger
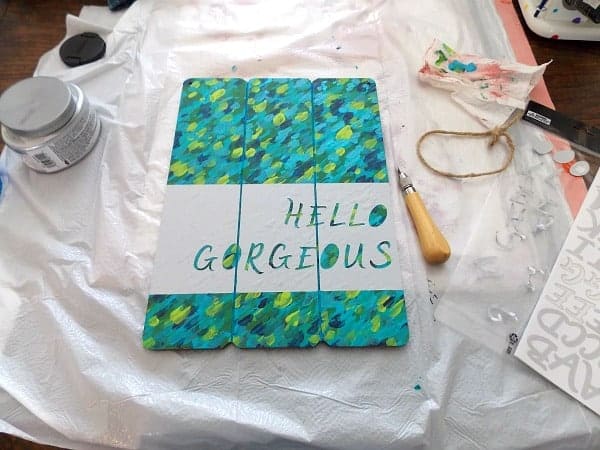
You'll need:
- A wood plank. I bought mine at Hobby Lobby at an after-Valentine's sale for about $1.60.
- Jute string or twine.
- 5 colors of craft paint (4 for the background and 1 for the overlay)
- small paint brush
- 1 inch foam paint brush
- Utility knife
- Blue painter's tape
- Letter stickers, the thicker and bolder, the better they'll stand out. Just make sure they'll fit on your board.
The Process:
First, prepare your wood plank. I simply had to remove the string from mine and sand it lightly.
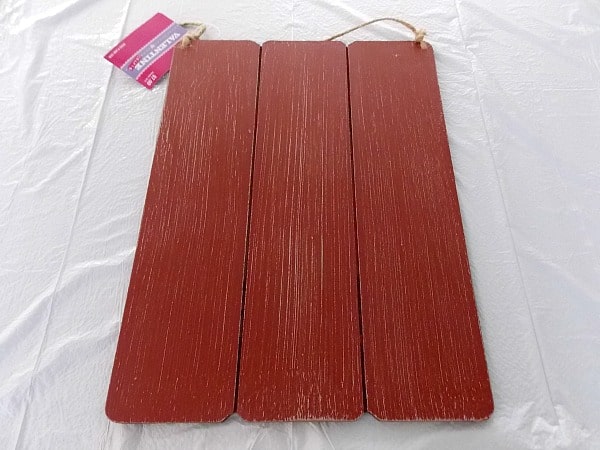
If you're making your own, you'll need to cut the wood to the size you want, drill two holes at the top corners for string, then sand.
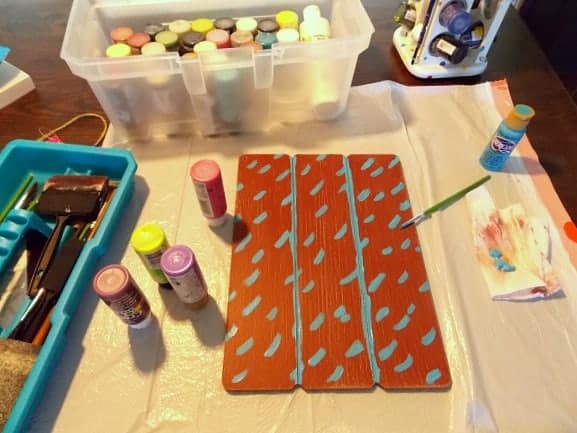
Using the small paintbrush, paint several marks of the first color all over your board. You can do dots or slashes, or any pattern you like, but I painted mine at an angle. I think it looks a little like rain.
Continue to paint several layers of paint, using different colors for each layer, until the wood is completely covered.
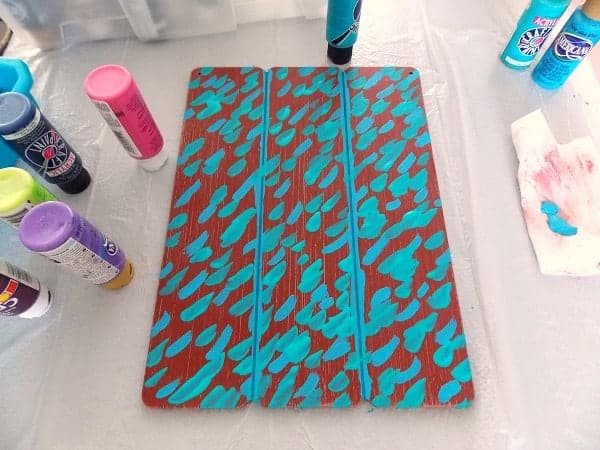
Wash your brush between colors of paint, so they don't get too smudged together.
In case you're wondering, the paint colors I used are Anita's: Topaz, Hawaii, Wasabi, and Navy Blue.
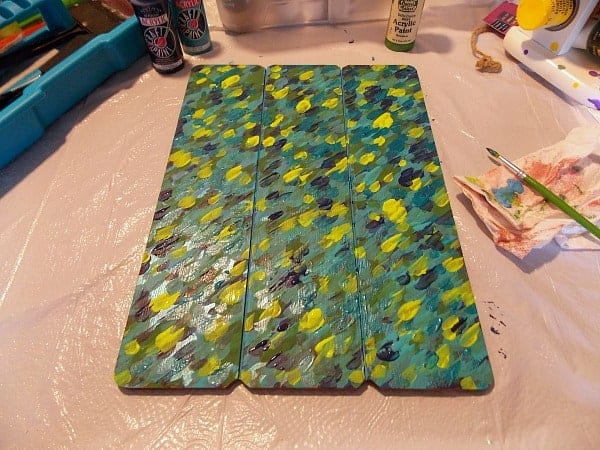
Once your board is completely covered and you like the effect, allow it to dry overnight. If you're not satisfied, keep applying layers of colors. It gets better and better the more you do this.
The next day, carefully apply your letters, using a straight edge to line them up correctly. I wanted mine right justified, so I applied them backwards from right to left to make sure the spacing worked out.
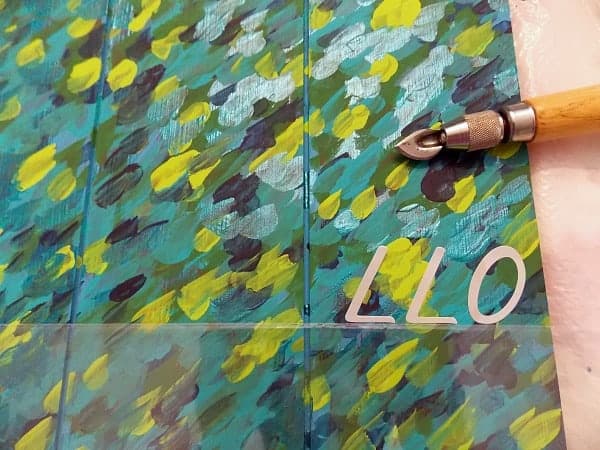
After thinking about it, I decided to leave the holes in the center of the "O"s to allow more pretty background to show through.
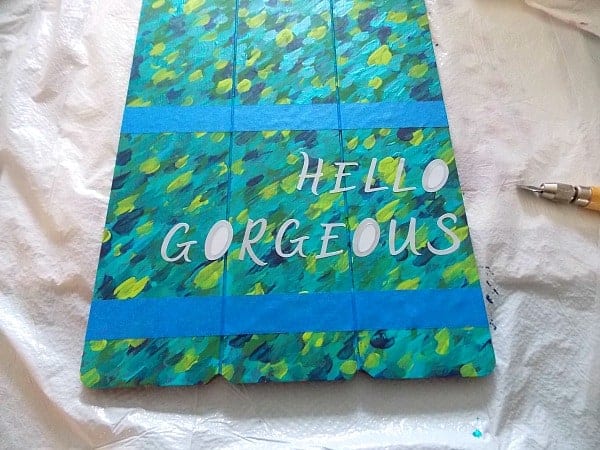
Add blue painter's tape at the top and bottom of your letters.
Carefully use the foam brush to paint the contrasting color over all the letters, and to the edge of the tape. I used a leftover tester sample of Valspar "Gravity" paint for this part.
This was the hardest part for me. I was afraid of covering up all that beautiful painting I had worked so hard on!
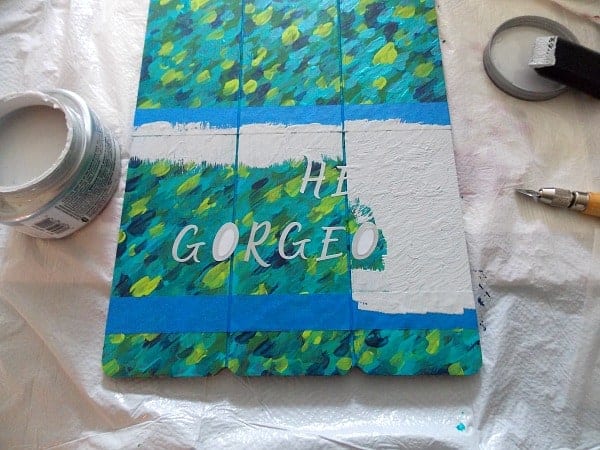
Allow the paint to dry until it's touchable, but for no more than an hour or so. You want it to still be slightly pliable when you peel off the letters and tape.

Using a utility knife, pry up the edge of one of the letters and carefully remove it. You can use the knife to cut around the edge of the letter if it doesn't want to separate from the paint. Continue with all the stickers and tape.
Have you ever looked at a word so many times that the right spelling looks wrong? When I was peeling off these stickers, after all that work, I was sure I had spelled gorgeous wrong. Argh!
But I looked it up and set my mind at ease. I'd hate for my first impression on visitors to be misspelled! Next time, I should probably look it up before doing all that work.
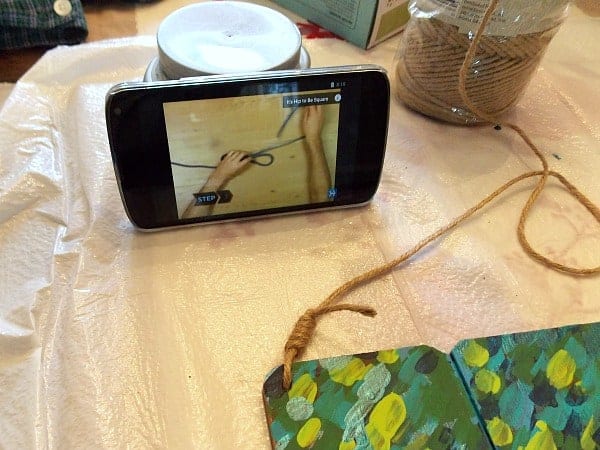
Now you just need to attach the string. I used a hangman's noose knot, but you could use any knot that you like. If you want to use this one, you can find the easy tutorial on Howcast. Finish by trimming the ends.
Hang your sign on the door. In my last wreath project, I showed you how to hang a command hook upside down on the back of the door, if you don't want your hooks to be visible.
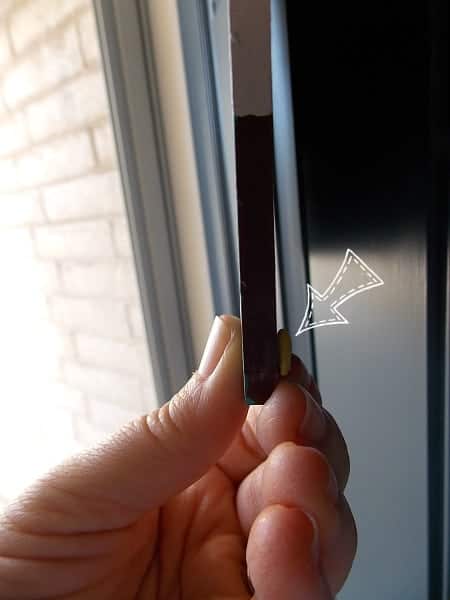
And be sure to use a little poster putty to anchor the edges or the banging will drive you crazy every time you open the door.
Now when your friends come over, they get an instant compliment while waiting for you to open the door. It's a great way to start a conversation!
Come visit me some time - I'll tell you you're gorgeous and make you some coffee!


jacquiegum says
This is now my favorite thing that you have shown us Meredith! It made me smile...and it would make me completely happy to approach anyone's door and find this waiting! It is so unique too! Great one!
Meredith says
Thank you Jacquie! That makes me so happy. 🙂
Anita says
What fun to come to your door and be greeted in such an uplifting way!
Meredith says
It's fun to make people smile!
thelemondaisy says
What a cute idea! I may make this for my door at work. I don't know about Hello Gorgeous but I would like a cute and snappy saying. I'm in pediatric PT, so maybe something about watching out for flying balls.
Or maybe a spin on Shel Silverstein's poem:
Enter this deserted house, but please watch out if you do,
balls fly here and frisbees, too.
Thanks for the idea!
Meredith says
The possibilities are endless! Thanks for stopping by...
Lisa at Concord Cottage says
HI Meredith, this is so adorable! My husband always says that so it hit home for me. Would love for you to come and link up again to our Something to Talk About Link Party. It just went live. Have a great week, Lisa at Concord Cottage
Meredith says
Aww, that's sweet! Glad to make you smile, and I'll head over and share it right now!
Phoenicia says
Wow! Great idea to make guests feel welcome and special. Makes a change from the hanging hearts by the window that everyone seems to own.
This does not look difficult to make at all which is good for those of us who are not very arty!
Meredith says
Thanks Phoenicia! It really is quite easy and your guests will love it!
heraldmarty says
What a charming DIY! I must confess I'm something of a hermit preferring to go out and visit rather than welcome drop ins since I get rather crabby when my writing is interrupted. In fact, I think this would make a terrific gift! Thanks for the inspiration. 🙂
Meredith says
I can certainly understand that Marty! It's hard to be interrupted, just when you get in a groove...
Sabrina Q. says
Your welcome sign is so adorable. It reminds me of Oscar-Claude Monet artwork. One of my favorite artist. I made one this year with precut words like welcome and friend and family, painted it and added silk flowers to it. I plan on creating a new one for different holidays this year. Thanks for sharing how you made it.
Meredith says
Thanks Sabrina! I'd love to see yours too, it sounds beautiful!
Donna Janke says
What a great idea. The Hello Gorgeous sign would certainly make me feel welcome and I'd be smiling when you answered the door. Even if you weren't home and didn't answer the door, I think I'd walk away smiling.
Meredith says
And THAT is exactly the response I was hoping for! 🙂
Ken Dowell says
A sign like that, along with my dog barking viciously, should be enough to scare the PSE&G meter reader away when he comes knocking on my door.
Meredith says
Yep, that should do it! 🙂
Jeri Walker (@JeriWB) says
Oh fun! This would put a smile on any visitor's face. It would also be a great Christmas present to make for people now that I'm on a tight budget again 🙂
Meredith says
I agree, I'm already thinking of who else I could make one for too! Tight budgets are the mother of creativity.
lenie5860 says
Meredith, this is so neat - after reading this your visitors can only enter with a smile on their face. Love it. When I saw the plain board, I thought about cutting boards you can buy at the dollar store. I think they would work for this project. I love the way you apply the paint.
Meredith says
Thanks Lenie, I love the cutting board idea!
Erica says
I love this Meredith! Unfortunately, I'm kind of lazy so I would much rather you make me one, but I'll try to muster the energy to give it a try!
Your fear that you misspelled gorgeous after all the work was done made me laugh That is totally the type of thing I would get nervous about. And yes, I wouldn't feel better until I looked it up and made sure I was right.
Meredith says
Ha! Glad I'm not the only one who does stuff like that!
Jeannette Paladino says
Meredith, love the idea of a welcome sign at eye level. "Hello Gorgeous" is bound to make a visitor smile so when they enter your door they already know they are welcome in your home and know they'll have a good time!
Meredith says
Thanks Jeannette! I love to make people smile.
William Rusho says
What a great DIY idea. I could see making some of these for holidays.
I particularly like the idea of the poster putty to secure the sign, sometimes high winds will move them around, and you run to the door thinking someone is knocking on it.
Meredith says
That's a great idea, you could make them with different holiday sayings on them!
Tim says
Got quite a chuckle out of this one Meredith as I am sure anyone who stops by to visit will almost certainly do as well.
Meredith says
Thanks Tim, that's definitely the idea!
Amanda Kolb says
What a wonderful idea! Love the colors you used too. Thank you for sharing at Merry Monday!
Meredith says
Thanks Amanda!
Vicki and Jennifer 2 Bees in a Pod says
This is so creative and adorable! Thanks so much for sharing at Something To Talk About Link Party!
Meredith says
Thanks for stopping by!
trish @ tagsthoughts.com says
I love this!!! Yours turned out just lovely and I'm sure the visitors who come to your door love the sweet greeting. 🙂 Thank you for sharing your step by step tutorial with the Creative Insporation Link Party. I hope you'll join us again next week. Monday 8p CST - Wednesday 8p CST
Meredith says
Thanks Trish!
Arleen says
What a great idea. Your post was so timely. A friend of mine wants to have a sign outside her training building and we were racking our brains trying to come up ideas. Thank you so much.......
Meredith says
I'm so glad Arleen! You could make it say anything else that relates to her business too.
Beth Niebuhr says
What a lovely idea. How could anyone not feel welcome when seeing a sign like that? Well, maybe not solicitors, but friends, I'm sure would smile and be glad they came.
Meredith says
Thanks Beth! That's definitely my hope. 🙂
Susan - ofeverymoment says
Oh my - so many helpful tips in this post! I love the painting tutorial - and finally, I might learn how to tie a hangman's noose knot! We are getting ready to replace our front door, and I have been worried my wreaths would scratch the new one. Your ideas for how to hang a wreath and prevent it from banging are the perfect solution. Thank you!! Visiting form #SoMe2. Following your blog now!
Meredith says
Thank you Susan, it's so nice to meet you! I hope this helps with your door dilemma! 🙂
C.D. Loken says
LOVE, LOVE, LOVE your door hanger, Meredith!! The colors are just...well, GORGEOUS!!! Thank you so much for sharing at The Wonderful Wednesday Blog Hop!! I'm definitely PINNING so I can make one for our front door!!
Meredith says
Thank you C.D! I really enjoyed the blog hop, so glad to find it!