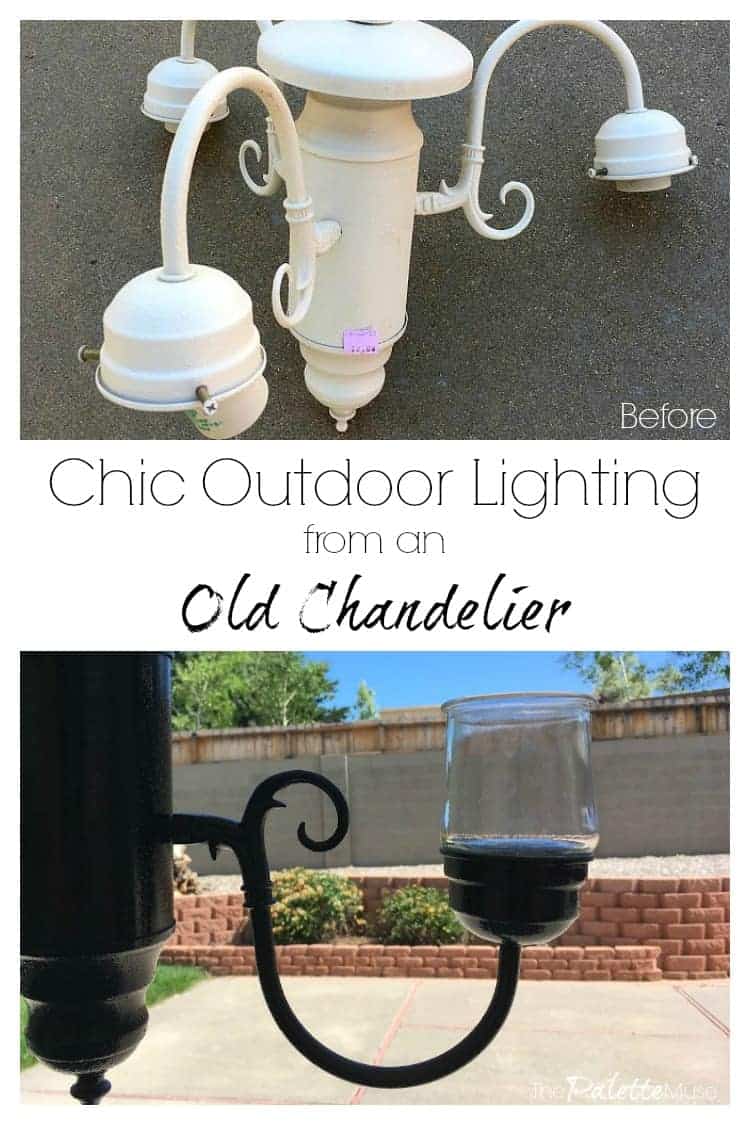
This month we're giving our patio a makeover, and today's mini-makeover is how to unwire a chandelier to make it suitable for outdoor use with no electricity. We'll be taking an old, dated chandelier and reworking it to turn it into a cool candelabra to hang over our outdoor dining table.
I don't know about you but I find electricity to be a little scary. I do a lot of DIY projects, but one thing I don't touch in our house is wiring and electrical fixtures.
So when I decided to turn this old chandelier into a functioning non-electric candelabra for candle-lit dinners in our backyard, I felt a little intimidated by the wiring.
But it turns out it's really not that hard to take apart a light fixture and rework it, as long as you don't need the wiring to work when you're done.
Here's how I unwired an old chandelier to turn it into chic outdoor lighting.
~ This post contains affiliate links. If you make a purchase, I may receive a small commission at no additional cost to you. ~
How to Unwire an Old Chandelier
This is a cool project that appealed to the puzzle-solver in me. Plus, taking something apart is much easier than putting it back together!
First you need a chandelier with good lines. It doesn't matter what color or type of metal it is, just look for a shape that appeals to you.
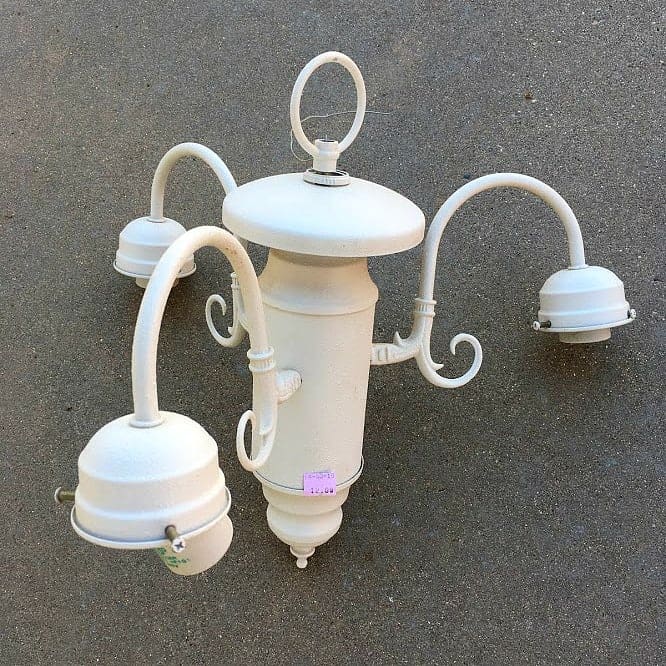
I found this one at our local Habitat for Humanity ReStore, my go-to shopping spot for home parts. They happened to be running a sale that day for 25% off lighting, so I spent a whole $9 on this beauty. I figured if my idea didn't pan out, it wasn't a huge investment. (Experimenting can be expensive!)
Then you need to figure out how to take it apart. (Actually this step may not even be necessary if yours looks just the way you want when you get it. You may be able to simply clip off any wires that stick out.)
My chandelier was hanging upside down and I needed to get rid of the light sockets.
Chandelier Design Tip: Did you know that the arms on some light fixtures can be swiveled to point either up or down, depending on how you like your light shades?
I usually like shades pointing down, so you don't collect bug carcasses, but dining fixtures are the exception for me. I like those shades to point up so you don't feel like there's a glaring interrogation light bearing down on you while you're trying to enjoy a relaxing dinner.

This chandelier was oriented so that the shades would have been pointing down toward the table, but I knew that I wanted to put candles in the light sockets so they would need to be pointing up. I was able to unscrew both the top and bottom of the fixture and switch those, so the loop for the chain would be at the top.
Removing Light Sockets
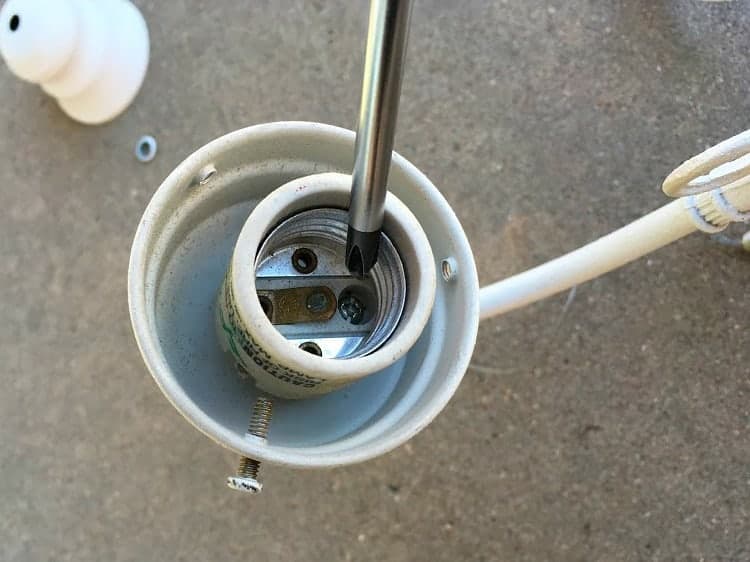
Then I needed to take out the light sockets. This is easiest to do when the whole fixture is taken apart so you can see where the wires are going.
- First, use a screwdriver to remove the small screw near the bottom of the socket.
- Then unwind any wires that are twisted together inside the body of the fixture.
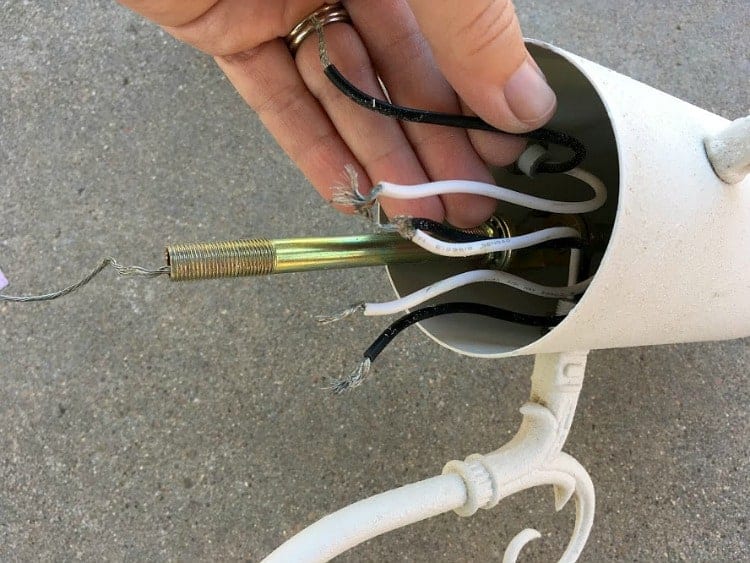
- Now gently pull the socket up and out of the fixture arm. Repeat for the other sockets.
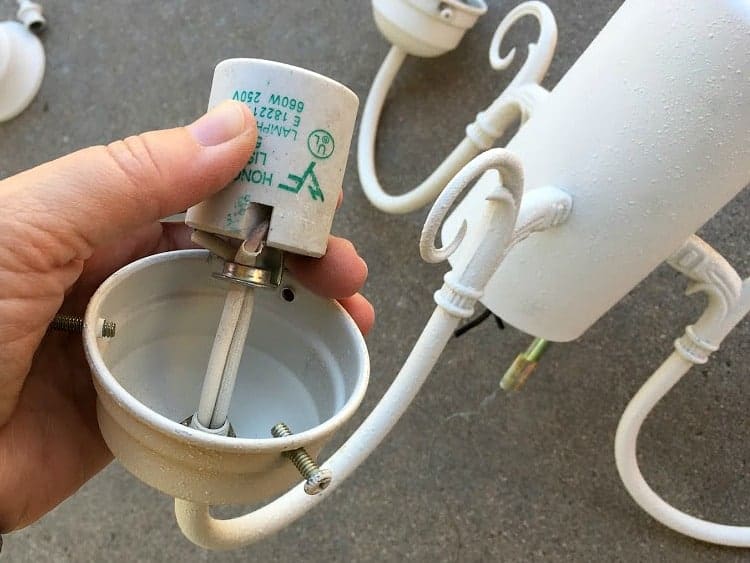
- If you have a ground wire running through the inside of the light fixture, either clip it off or simply push it back inside the body of the fixture.
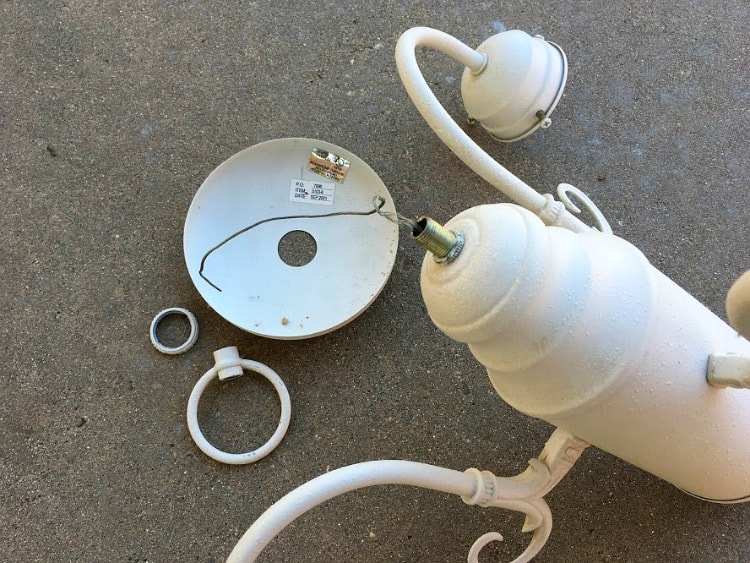
- Finally, put all the pieces back together by screwing the end pieces back on and making sure the loop for the chain is at the top, and the arms are pointing the direction you want.
Now you have an unwired chandelier, ready for decoration!
Redesigning my Chandelier
Once the chandelier had its guts removed, it was ready for a new look. I decided to spray paint it black to match the hardware on our gazebo, and the new frame color of our dining set.

This little guy was so small, it took less than half a can of spray paint to finish the job.
Then I combed through my extensive collection of random glassware. (My family thinks I have a problem, but I like to call it a resource.)
I found that the little Yoplait Oui glass cups were the perfect size and scale for replacing the light sockets. I'm planning on using tea light candles in them, but you could also use LED candles (bonus points if you get the kind with a remote so you don't have to climb on your table to turn them on and off!) or even battery-powered fairy lights.
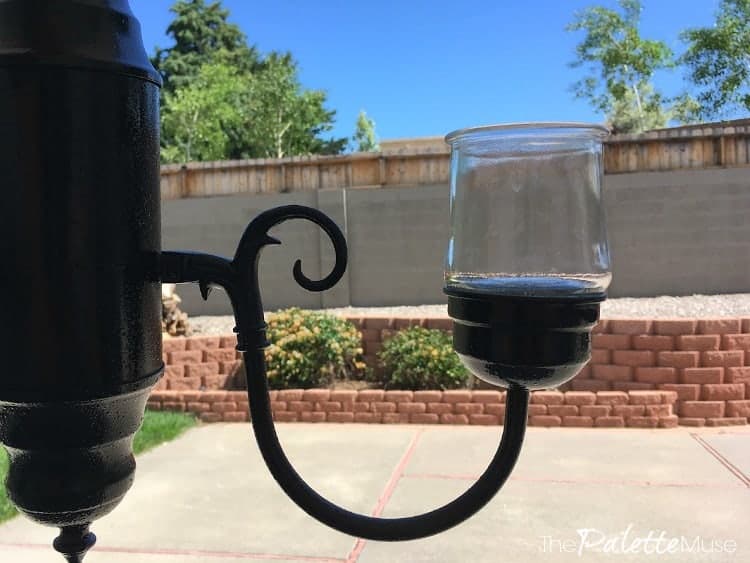
Here's a little preview of how the new chandelier looks with black paint and glass candle holders. I'll save the final reveal for once I get it hung, along with the rest of the lighting. Be sure to check back for that post and the final reveal of our new patio!
By the way, if you're looking for other ideas of how to update an old chandelier, check out this post featuring one of my favorite craft supplies: Mod Podge!


Anita says
Lookin' SO good!
Meredith says
Thanks! At least it's a lot better than it started!
Jeri Walker (@JeriWB) says
I love this idea!
Meredith says
Thanks Jeri, it was a fun project!