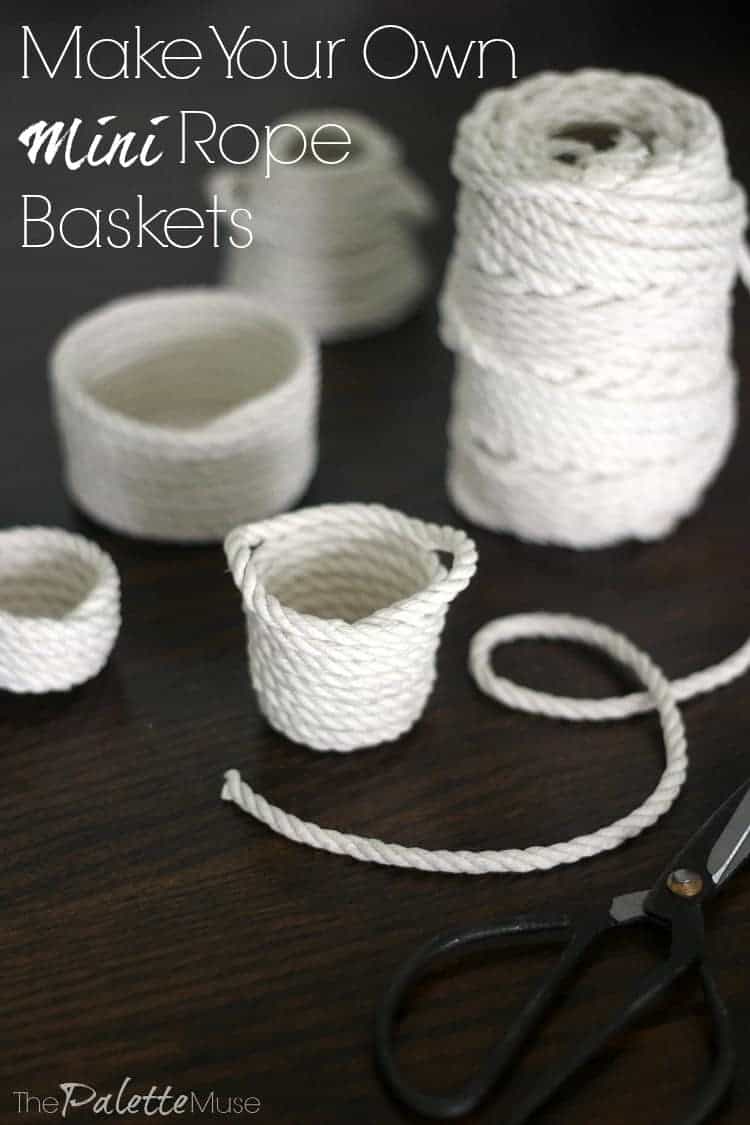
I love baskets. They're great for storage and organizing and with endless design styles, each one is kind of like its own little piece of art.
I especially love these little DIY mini baskets for their cute size and shape. They look a little modern, a little arts & crafts, and a little bohemian, all rolled up into a tiny adorable package. I started making them this week and haven't been able to stop!
How do you make your own baskets like these? It's easy with a few simple supplies and a little dexterity.

Once you see how easy it is to make your own mini rope baskets, you'll be obsessed too. I started with no idea of how to make a small basket like this, and I'm sure this isn't the way you'd make a larger basket that needs to hold more than a few ounces, but this way seemed the easiest for a small craft like this one.
This post contains affiliate links. If you make a purchase, I may receive a small commission at no additional cost to you.
How to Make a Rope Basket
The basic supplies for these DIY baskets could not be more simple: rope and hot glue.
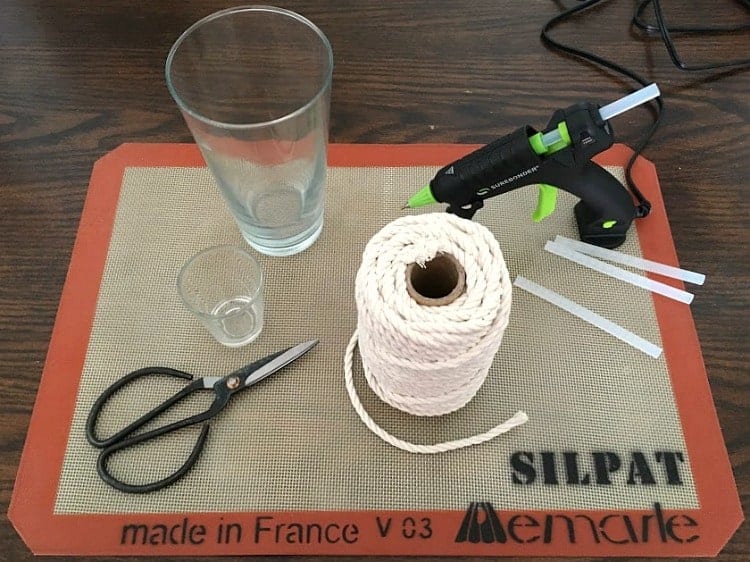
I used 4mm natural cord, but you could also use colored rope, heavy jute, or just about any type of sturdy thick rope you like. (I wouldn't suggest yarn as it might be a little bendy for this project.)
You'll also probably want to use a drinking glass or shot glass to wrap your rope around to help you shape the basket. That's all there is to it! Sort of. Read on for detailed instructions...
First, cover your work area. I like to use my Silpat baking mat so nothing sticks to it, not even hot glue. Plus it's easily washable, so I can use it to make cookies afterwards.
Plug in your glue gun and let it heat up for a couple of minutes. While it's heating up, let's talk glue guns. You can use pretty much any kind of hot glue gun for this project (high or low temp, mini or full size), but I like my precision tip mini glue gun for small spaces like these.
I suggest getting one with a good base and an on/off switch so you don't have to unplug it whenever you want to walk away for a minute.
Getting Started Making Mini Baskets
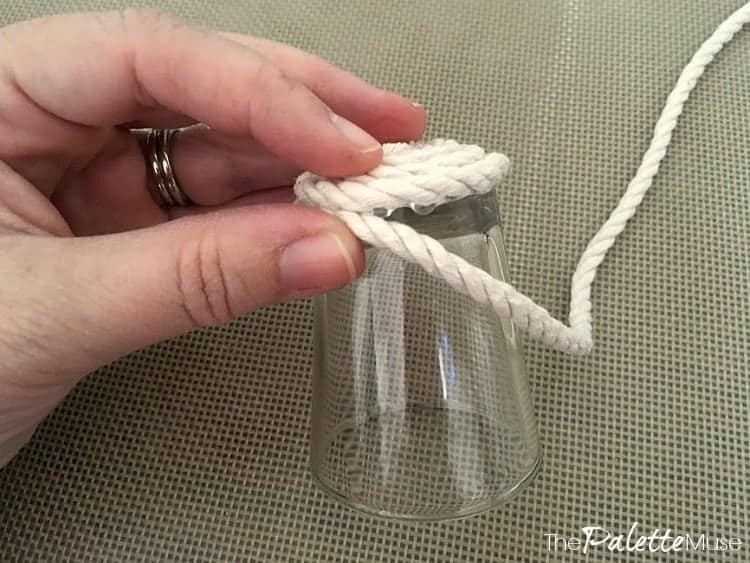
Find a glass the size you want your basket to be, and turn it upside down on your work surface. (Be sure your glass is smaller at the bottom than the top, so you can slide your basket off when it's done.)

I used a shot glass for the smallest size basket, perfect for an egg cup. My daughter liked the pint glass size better for holding a few items in the basket.
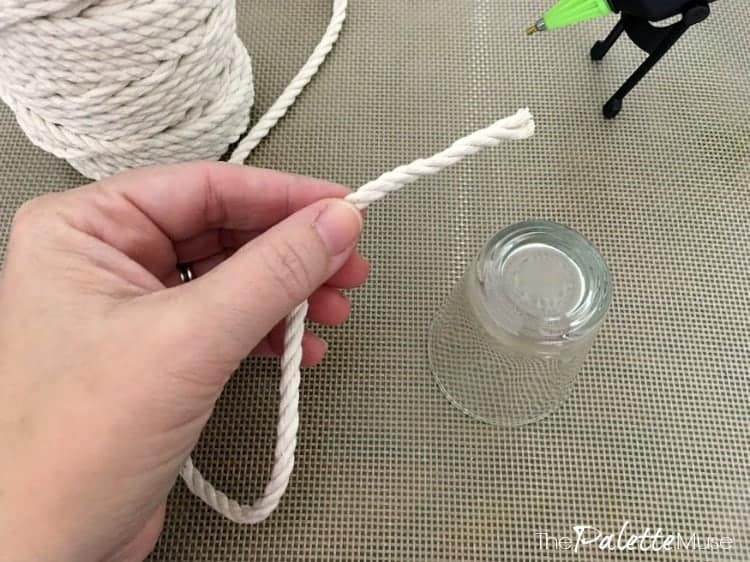
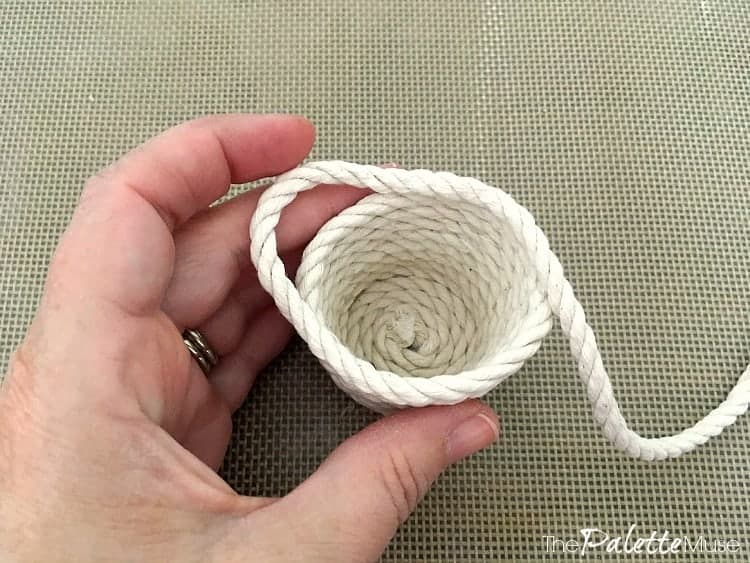
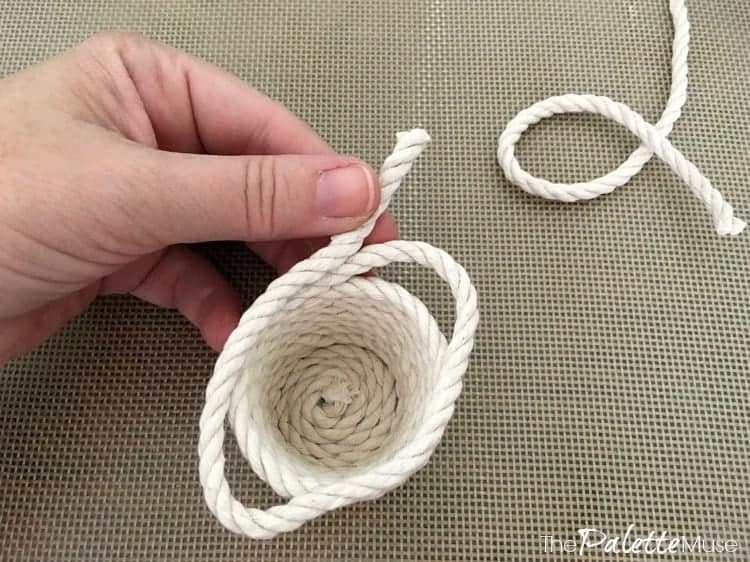
Do not cut any of the rope yet! Hold the end of your rope between your thumb and pointer finger and place a line of glue along the first inch of the rope. Then (carefully cuz it's hot!) fold the end of the rope back on itself, so the frayed end meets the glue line. This is the starting point of your basket.
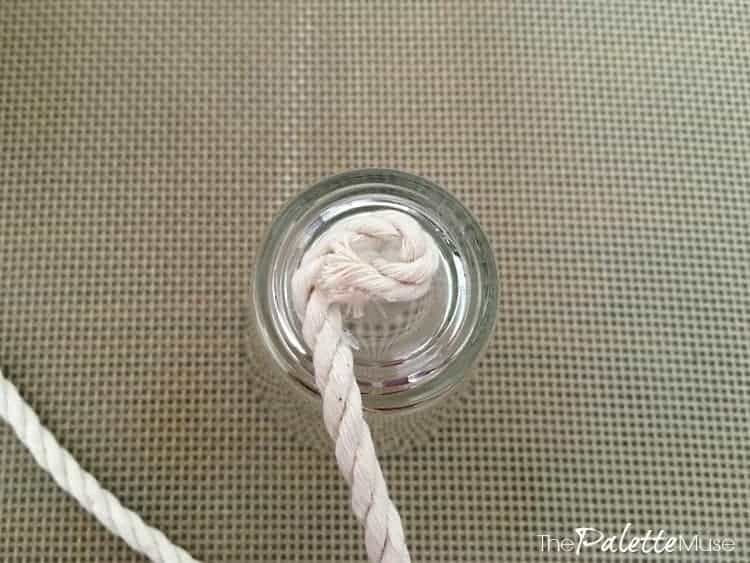
Make sure all the frayed pieces get attached to the glue. You can also glue it directly onto the center of the bottom of the glass if that's easier than holding it in your fingertips. Once the glue dries, you'll be able to peel it off the glass.

Now, with your first loop in the center of the glass bottom, start a line of glue around half of the loop. Spiral the rope around the loop, attaching to the glue line. Keep repeating this process until you reach the edge of the bottom of the glass.
Tip: Don't worry about making your glue lines perfect, and don't pull on any glue strings yet. Otherwise you'll end up with a spider-webby mess of glue strands. Once the glue cools, you can easily pull off any leftover strings without creating more in the process.
Building up your Mini Rope Basket
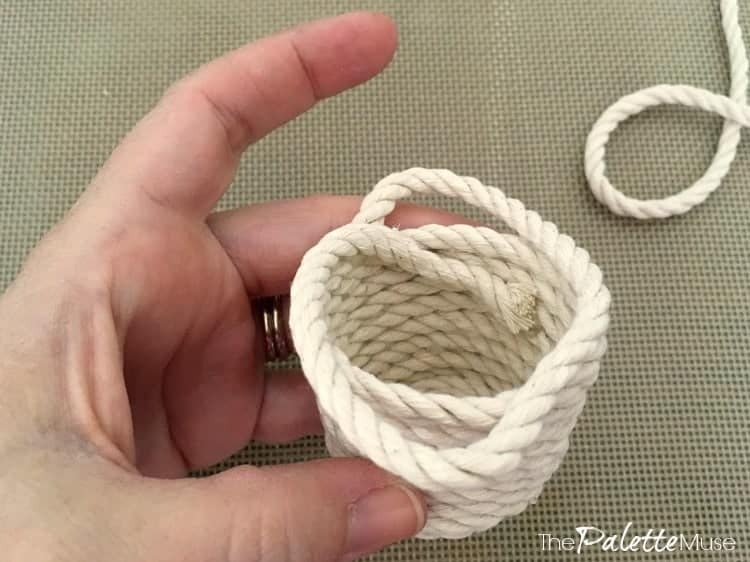
Once you reach the edge of the glass, you'll need to start putting your glue lines along the bottom of the rope base, staying close to the side of the glass. This will help the next layer of rope climb up the glass sides, rather than just keep growing outwards.
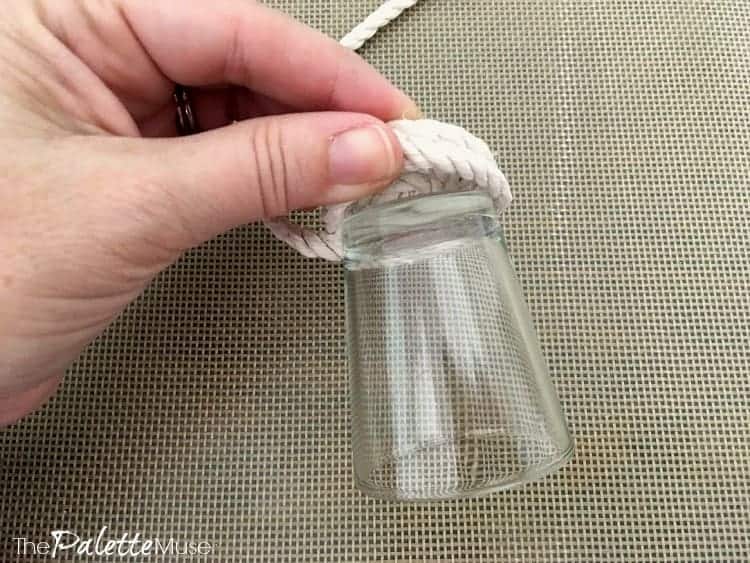
After you have a line or two of rope along the sides of the glass, let all your glue cool, then gently loosen the basket from the glass. If your glue has dried to the glass, it will peel off if you gently work at it. Do this every few lines so it's not so hard to do at the end.
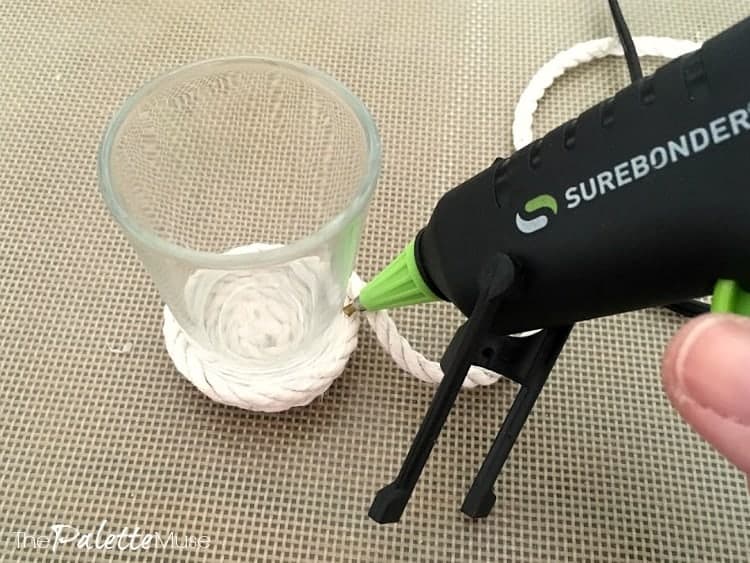
Now turn your glass over. You'll continue adding lines of rope, but it's easier now if the glass is right side up so you can put the glue line at the top of the rope edge instead of underneath. Keep working up the side of your glass until you run out of glass or until the basket is as tall as you want.
Mini Rope Basket Handles
You can add handles to your basket by skipping about an inch of glue and putting a little slack in the rope before you start gluing it back down after an inch. This will make little gaps in the rope for handles.
Finishing your Mini Rope Basket
When your basket is as tall as you like, carefully remove the basket from the glass and set it right side up on your workspace.
Cut the rope so the end is an inch longer than you want. Then run an inch of glue down the inside lip of the existing edge of the basket.
Press the end of your rope into the glue line, making sure all the loose ends contact the glue on the inside of the basket. This will give a nice tucked-in finished look to the edge of your basket.

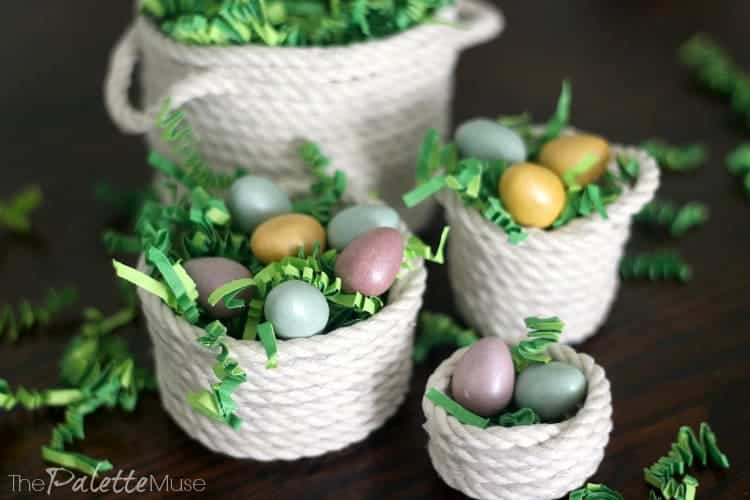
Now your mini basket is all finished! You can decorate it if you like, or simply leave it the way it is and fill it with pretty things. I suggest making a few baskets of different shapes and sizes and grouping them all together for a little arrangement. However you decide to use your mini basket, I hope you enjoy it!
DIY Mini Rope Basket Resources
- Rope or cording, about 4mm thick
- Hot Glue Gun and Glue Sticks
- Glasses - shot glass, pint glass, any size glass container that is smaller at the base than the top
- Baking Mat or Silicon craft sheet
- Sturdy Scissors
- Finger Guards to protect against hot glue - I keep meaning to try these, but I always forget to pick some up. Has anyone used them? I'd love to hear what you think!

What do you put in a Mini Basket?
These little beauties are great for storing small items like makeup brushes, or cotton swabs. My daughter has taken over my hot glue gun and made some to organize her essential oils. They're fun to group together to build a tablescape.
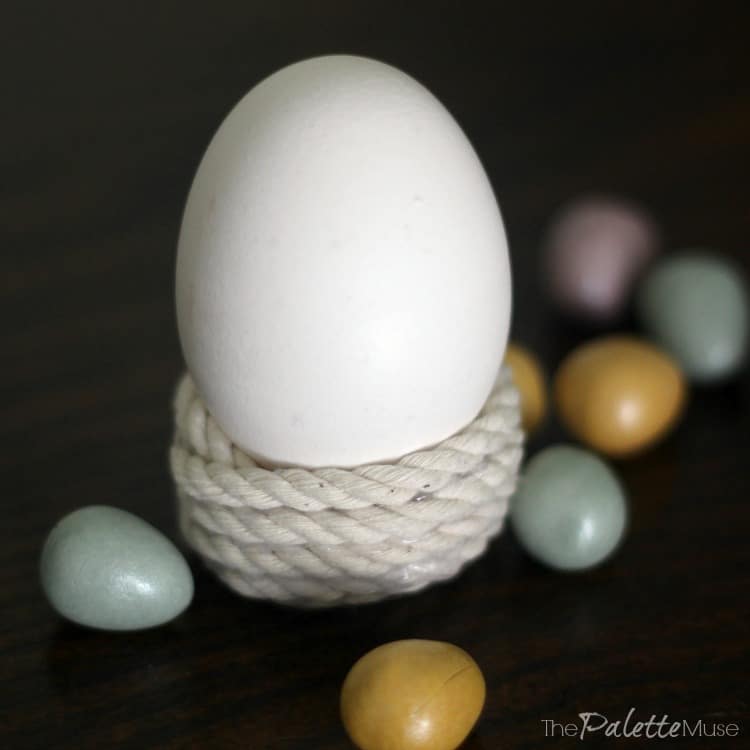
These would be adorable place markers for an Easter brush. I plan on making several of the smallest ones to use as egg cups for Easter eggs with guests' names dyed onto them. Or, they're perfect with some paper filler and a few Cadbury mini eggs!
What will you do with your adorable new baskets?
You know what goes well with mini baskets? Mini pressed flowers! See how to make your own mini flower press here.


cdloken says
Oh my goodness, Meredith! I absolutely ADORE these cute little baskets! What a genius idea and your tutorial is great! I think even I could make these! LOL! Thanks for sharing!!
Meredith says
Thanks so much, CD, you totally could! And should! 😉
Theresa Hineycheck says
I love your blog! Thanks for all the sharing! What a great huge heart you have!!!
Meredith says
Thank you Theresa! Your comment made my day!
Carole West says
What a neat project, absolutely love this idea, thinking these would be great for storage containers as well because you can make them to the size you want. Brilliant.
Meredith says
Thanks Carole! Yes, they've made their way onto our bathroom counter tops for all kinds of storage.
Arlene says
I picked up some finger guards at the Dollar Tree. I love them when I’m using my hot glue gun! I’m anxious to try this project. Thanks for the great idea. I
Meredith says
Ooh finger guards, what a great idea! I will look for those next time I'm at the dollar store!
Jeanette says
These are great little assets to ay room. You can pull the rope apart so you have thinner rope and using smaller tubs to wrap it round, you can make bins and baskets for dolls houses. Use a Thimble for instance for a bin.
Thank you for the inspiration.
Meredith says
Oh what a cute idea for dollhouses! Sounds like more than I have the patience for, but thanks for sharing the idea!