Phase Three: Cabinet Doors and Drawer Fronts
- Now’s the time to set up shop in your garage, if you have one. Otherwise you can do the doors on your kitchen table, but I would definitely suggest sanding outside if possible.
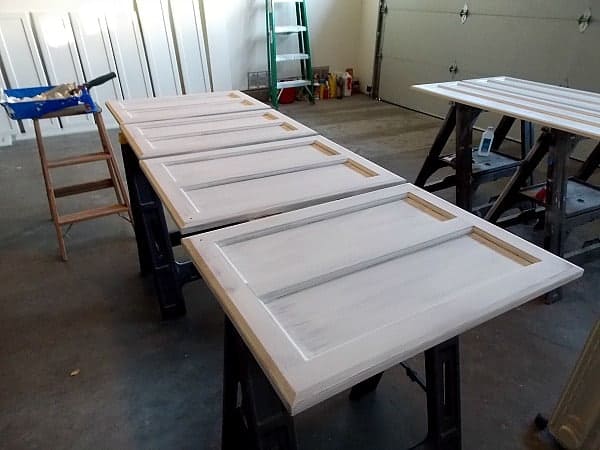

You can make more work space by laying boards across sawhorses and setting several doors on top.
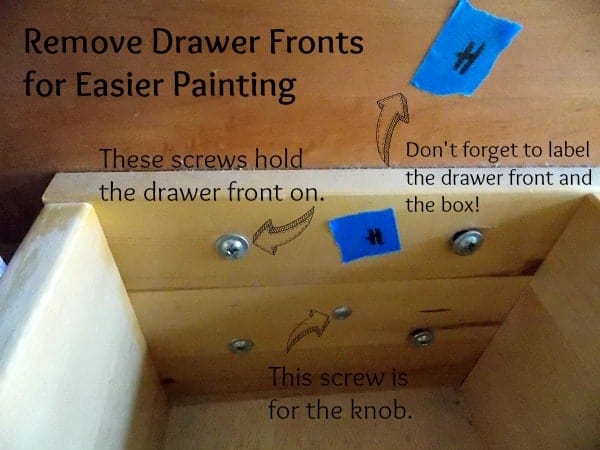
- Remove the knobs and hinges from the cabinet doors. (I collected all my hinges, screws, and knobs in a big bag, since they were all identical. Come to realize later that the hinges were all adjustable and had been fine tuned to hang the doors at the right levels. So when I re-hung them I had to go back and readjust all of them. I’m still not convinced there was a better way, though. To label each hinge would have been just as time consuming as adjusting them all at the end.) Move the number label into the hole where the hinge was so it doesn’t get separated from the door, making the whole labeling step a moot point.
- Remove the knobs from the drawer fronts. I removed the drawer fronts too, and replaced the drawer frames back in the kitchen. You may not be able to remove the drawer fronts, but you can just work around them.

- If you’ve removed your baseboards, include them in all the steps below.
- Clean each surface with Krud Kutter. You do not want to be grinding all that cooking residue into the wood when you sand!
- Sand everything with 100 grit sandpaper. In phase two above, I recommended hand-sanding the frames with a block, but for the doors I recommend an orbital palm sander. There is just so much surface area that it would take forever to do every inch by hand. And if you’re outside or in your garage, you don’t need to worry so much about the mess it will make.


- Repeat steps 7-15 from Phase 2 on the doors. See below for a tutorial on Drip-Free, Mess-Free Cabinet Doors.
- Once the paint is fully cured, for at least a day or more, you can replace your drawer fronts, baseboards, and doors. If you have adjustable hinges like mine, I recommend replacing the doors in sequence so you can adjust them together as you’re hanging them. Be sure to attach felt pads to the inside corners of the doors, so that no painted surface comes in contact with another painted surface. If this happens before the paint is fully cured, they will glue together and strip off the paint when you open the door. More trauma!
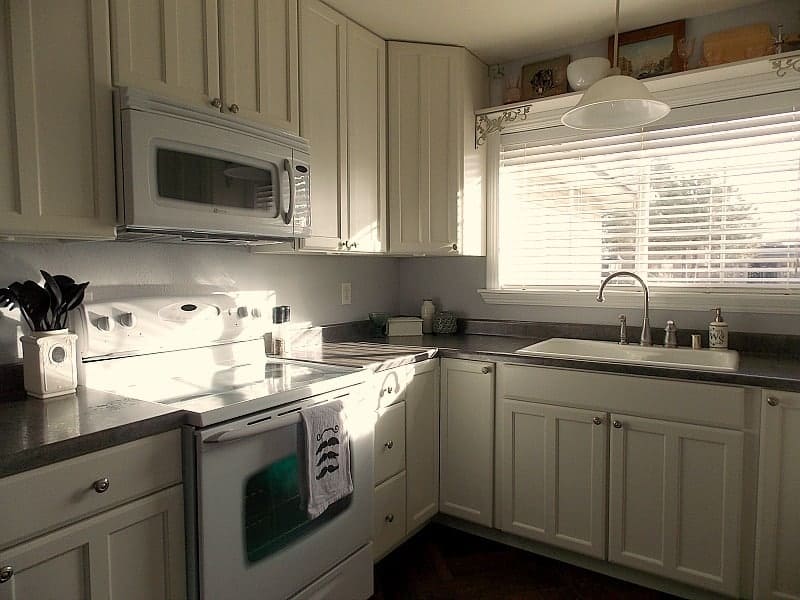
- Finally, replace all the knobs and kitchen staging items, and stand back and be impressed with yourself. You did it!
Drip-Free, Mess-Free Cabinet Doors
The best way to avoid drips on your painted surfaces is to avoid gravity altogether. But since gravity is one of the things that makes life on earth possible, avoiding it is probably beyond the scope of this project. Instead, we’re going to work with it, not against it. Ideally, I would have liked to paint all my cabinet doors on a horizontal surface and leave them there to dry, but since I don’t have that kind of space, the best I could do was paint them horizontally, let them dry for a little bit, then stand them up vertically to finish drying. 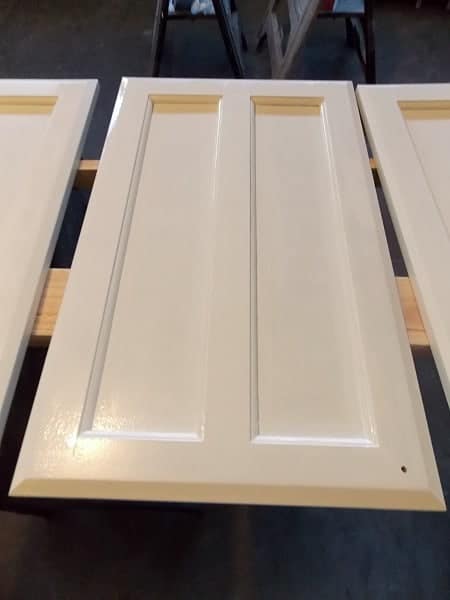 I did the backs and the bottom edge first, which gave them enough time to dry to the touch before flipping them over and doing the front. Doing the bottom edge first also gives it time to dry before you stand the door up. Make sure you have space to lean all the doors against the wall, and not touching each other. No matter how dry the paint feels to you, if you put two uncured paint surfaces together they will leave marks and strip paint.
The other secret to avoiding drips is to not overload your brush or roller with paint. If you use the right amount of paint, it will adhere to the surface, rather than dripping off it. That’s easy enough to do on the flat surfaces, but when you get to the junctions, you can end up with extra paint pooling in the corners. I like to take my used roller (with no extra paint added) to go back over the areas I did with a brush, just to pick up any extra paint. It’s best to start with the lowest surface and work your way up to the highest.

That’s all there is to it! Easy, right? Did I miss anything? If so, leave me a question in the comments and I’ll be sure to answer it. In the meantime, check out a few more “After” pics…

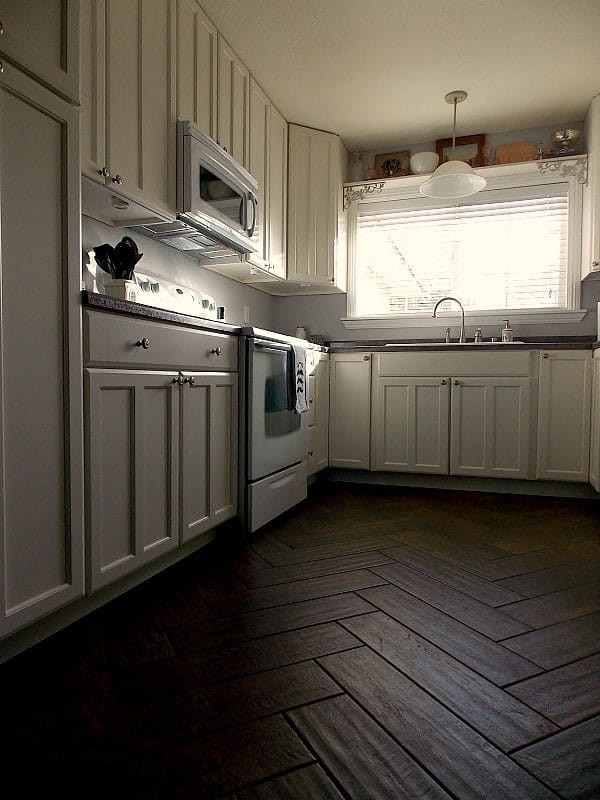
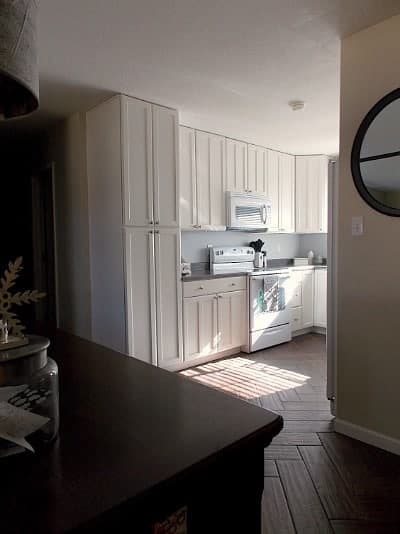
The view from the living room


Some of my favorite thrift store treasures.
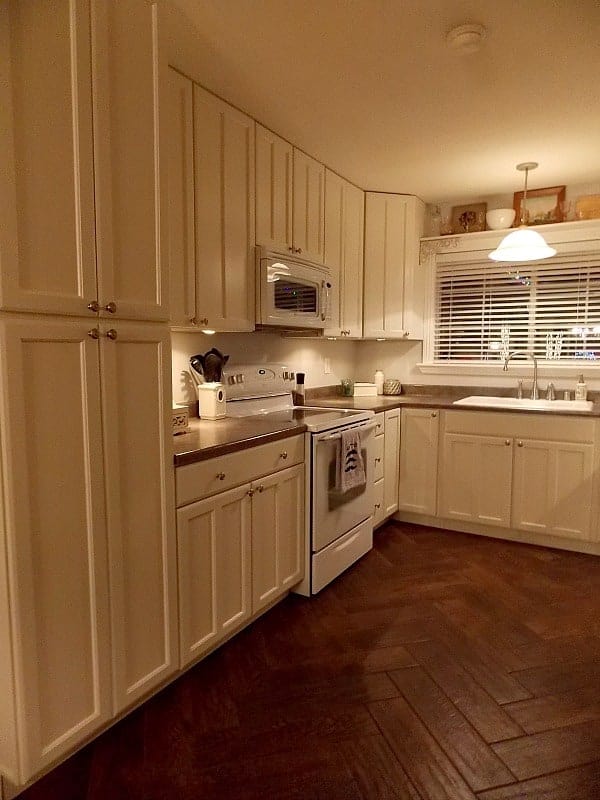
My favorite time is at night.


Thanks for hanging in there with me through this project. I’d love to hear what you think, especially if you have any questions about painting your own cabinets!
And once again, so you don’t have to scroll back to the beginning, here is your…
Kitchen Cabinet Painting Supply List:
- Sandpaper: 100, 200, 320 grit
- Sanding Block
- Orbital Palm Sander and replacement sanding pads
- Paint
- Primer (tinted close to paint color)
- Small Mohair Roller and Handle
- Synthetic Bristle Brush (I actually like the cheap foam brushes)
- Paint Trays (I cover mine with foil, so I don’t have to clean it every day!)
- Microfiber Cloths
- Rubbing Alcohol
- Drop Cloth or Floor Coverings
- Blue Painters Tape
- Krud Kutter
- Screwdriver for removing hinges and knobs
- Caulk or Wood Filler
tami Luttrell
Wednesday 27th of January 2021
I know this was forever ago, but what primer did you use? Advance Primer? Is Zinsser shellac-based compatible? I want to make sure there is no bleed through. Thank you
Meredith
Thursday 28th of January 2021
Hi Tami, when I did these cabinets I used the Ben Moore Advance primer and it worked great. But I've since started using the Zinsser shellac primer, called BIN. It covers everything! It smells a bit worse and cleanup is a bit tougher, but I'm always impressed at how it prevents bleed through. You can read more about that here if you're interested: https://thepalettemuse.com/what-you-need-to-know-before-painting-cabinets/
Laurie Gattis
Tuesday 24th of April 2018
Your tutorial is hands down THE BEST!!! I've been contemplating this project for a few years, yes, years ;-) After researching the do's and don't ad nauseam, I'm now in the thick of it and keep going back to your post as I run into those inevitable snags we run into when doing a project for the 1st time. And your advice and tutorials are spot on! Honestly, if I had just printed this out from the get go and followed to the T, there would have been no snags! So, thank you for taking the time to walk through this so thoroughly, because in a project like this, those little details will make or break your project! So this morning I'm heading to the store for that Mohair roller you recommended ;-) because I've just discovered cutting corners on this project isn't an option if you want a professional finish.
Meredith
Tuesday 24th of April 2018
Thank you Laurie! You're so right, it really is all about the details. I know your project will turn out great since you are obviously taking the time to do things right. It will be worth it in the end!
Mary
Sunday 15th of April 2018
Lovely rehab. How has the paint held up over the years?
Meredith
Wednesday 18th of April 2018
Thank you Mary! We've since moved out of the house, so I can't really answer that. I did redo the cabinets in my new house, and wrote about them here: https://thepalettemuse.com/best-way-paint-kitchen-cabinets/ and I did an updated post about how they've held up here: https://thepalettemuse.com/painted-kitchen-cabinet-faqs-theyre-holding/
Mona
Tuesday 27th of February 2018
Hi you have done a great job! I was just wondering, after sanding them once in the beginning why do you need to sand after primer and then after first coat of paint?
Meredith
Tuesday 27th of February 2018
Hi Mona, sanding between coats is what gives the paint a really smooth finish. If you want to cut down on sanding, try this newer method that I've found: https://thepalettemuse.com/best-way-paint-kitchen-cabinets/
joel
Thursday 15th of February 2018
Very impressive to do this yourself!! I run my home improvement business and i just finished painting a set of kitchen cabinets for a customer. This is not an easy thing to do. It requires skill and a lot of patience. I loved the part about professional results only come from professional labor, putting in the work will always get you the right outcome. I personally sprayed the doors and drawer fronts, but i have a quality spray gun necessary for this type of job. Awesome work. I know plenty of people who wouldn't have the guts to try this them self.
Meredith
Wednesday 21st of February 2018
Thanks Joel! And thanks for answering Sondra's question too. I would love to try a sprayer some time, but I know the learning curve would be a little more than I'd want to take on for a project like this.