The Palette Muse

menu icon
go to homepage
  • DIY
    • Home Improvement
    • Home Maintenance
    • DIY with Paint
    • DIY Decor
    • Cabinets
    • Furniture
    • Camper
    • Makeovers
    • Tips
    • Tools
    • $100 Room Challenge
  • Crafts
    • Painting Crafts
    • Paper Crafts
    • Fabric and Yarn
    • Wreaths and Banners
    • Handmade Gifts
    • Christmas
    • Art
  • Design
    • Color
    • House Flipping
    • Home Staging
    • Bathroom
    • Bedroom
    • Home Office
    • Kitchen Design
    • Home Decorating
    • Outdoor Decor
  • Organizing
    • Airbnb
    • Cleaning
    • Planners and Worksheets
    • Printables
    • Saving Money
  • Family
    • Recipes
    • Camping
    • Creativity
    • Faith
    • Holidays
    • Musings
  • Printables
    • Get the Newsletter
  • About Me
    • Work With Me
      • Affiliate Disclosure
      • Disclosures & Disclaimers
      • Privacy Policy

subscribe
search icon
Homepage link
  • DIY
    • Home Improvement
    • Home Maintenance
    • DIY with Paint
    • DIY Decor
    • Cabinets
    • Furniture
    • Camper
    • Makeovers
    • Tips
    • Tools
    • $100 Room Challenge
  • Crafts
    • Painting Crafts
    • Paper Crafts
    • Fabric and Yarn
    • Wreaths and Banners
    • Handmade Gifts
    • Christmas
    • Art
  • Design
    • Color
    • House Flipping
    • Home Staging
    • Bathroom
    • Bedroom
    • Home Office
    • Kitchen Design
    • Home Decorating
    • Outdoor Decor
  • Organizing
    • Airbnb
    • Cleaning
    • Planners and Worksheets
    • Printables
    • Saving Money
  • Family
    • Recipes
    • Camping
    • Creativity
    • Faith
    • Holidays
    • Musings
  • Printables
    • Get the Newsletter
  • About Me
    • Work With Me
      • Affiliate Disclosure
      • Disclosures & Disclaimers
      • Privacy Policy

×

Small Changes Add up to Big Change at the Flip House

Modified: Aug 17, 2021 · This post may contain affiliate links · 8 Comments

  • Share
  • Email
  • Print

I love a good "before" and "after," don't you? Well, my apologies because today is all about the "during."

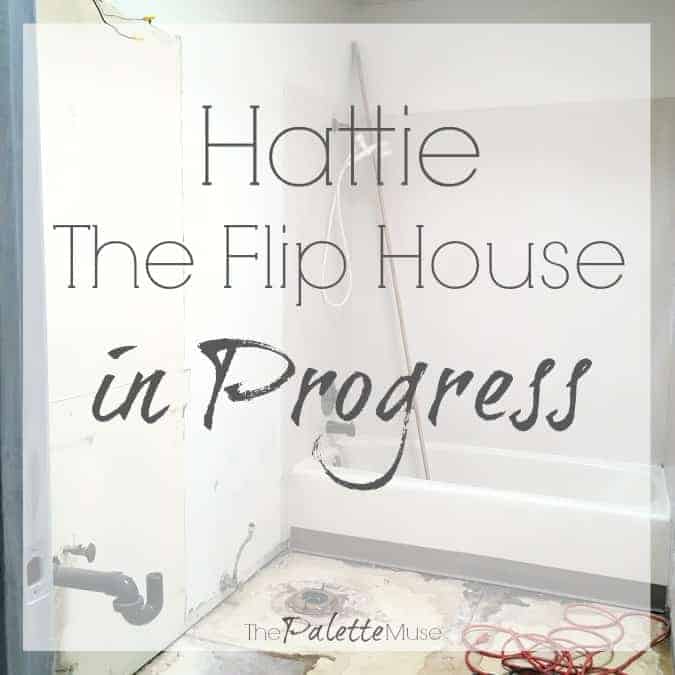
When we started the makeover on our new flip house, "Hattie," I was a little disappointed because she just wasn't very ugly to begin with. I mean, I really love to get into a horrible rundown mess of a house and bring it back from the brink of city condemnation. Let's rip out some walls. Let's carry out the grossness with shovels. Let's back up a dump truck into the driveway and fill it with terrible old cabinets and tiles and (gasp!) sludgy toilets!

(I know, I'm a little bit of a weirdo.)

But Hattie was neat and clean, and just a little dowdy and frumpy. Truly not terrible. Oh well, even in the best of situations, I can find a flaw, so we dug in and started redesigning.

(You can check out all the before pictures in the first post about Hattie.)

As soon as we pulled out the cabinets and flooring, I realized how short sighted I'd been. Even though she wasn't awful to start with, we could make her a lot prettier and more functional. In this house, it comes down to the little details. While I love to open up walls and make big changes, this house just called for some redefining of a few spaces, and updating all the little pieces that make a house a home.

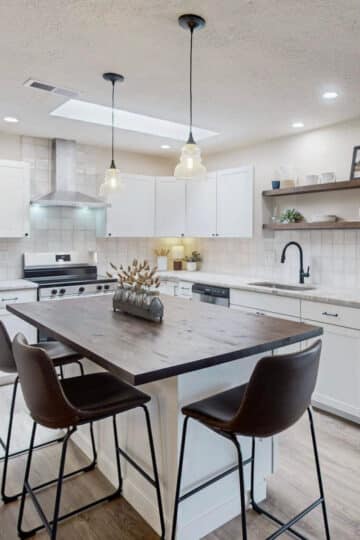
Progress at Flip House Hattie

We started by ripping out almost all the flooring on the first floor. This was particularly painful because most of it had just been updated to sell the house. Tearing up perfectly good carpet hurts my heart, but it had to be done. The floor plan will feel much more open with one type of flooring running throughout the whole area, rather than tile here, carpet here, and wood there. It already looks better with no flooring at all!

Kitchen During

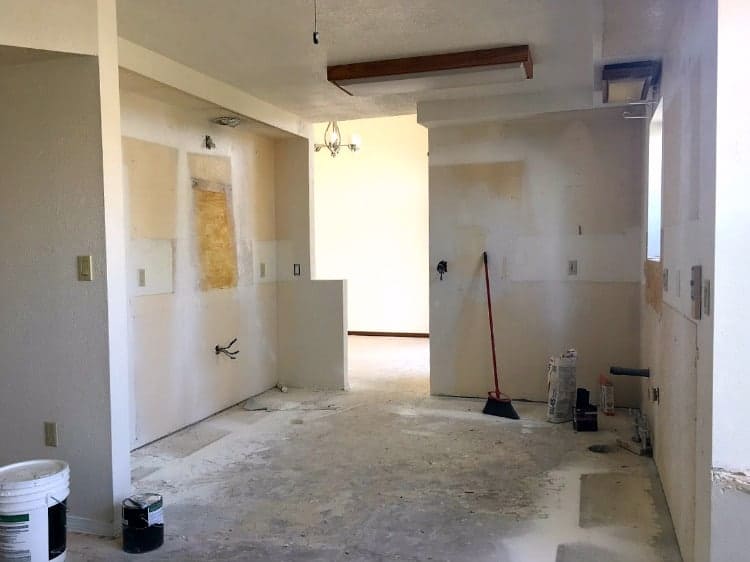
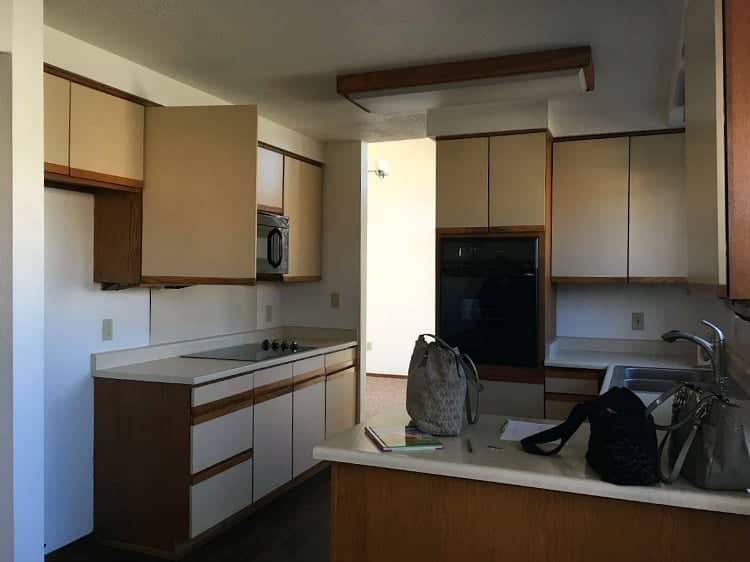
Then we ripped out all the kitchen cabinets and appliances. We're planning on extending the kitchen by getting rid of the peninsula and adding cabinets on the other side of the eat-in area.

The walkway between the kitchen and dining room was restricted by this tiny doorway, so we opened it up as far as we could to let more light through and make it feel less cramped as you walk between the rooms.

Kitchen Before

We decided to paint the staircase white. It wasn't in the budget to replace it with something more modern, and we thought it sort of stuck out like a sore thumb.

Stairs During

This just proves my theory - when in doubt, paint it white!

Stairs Before

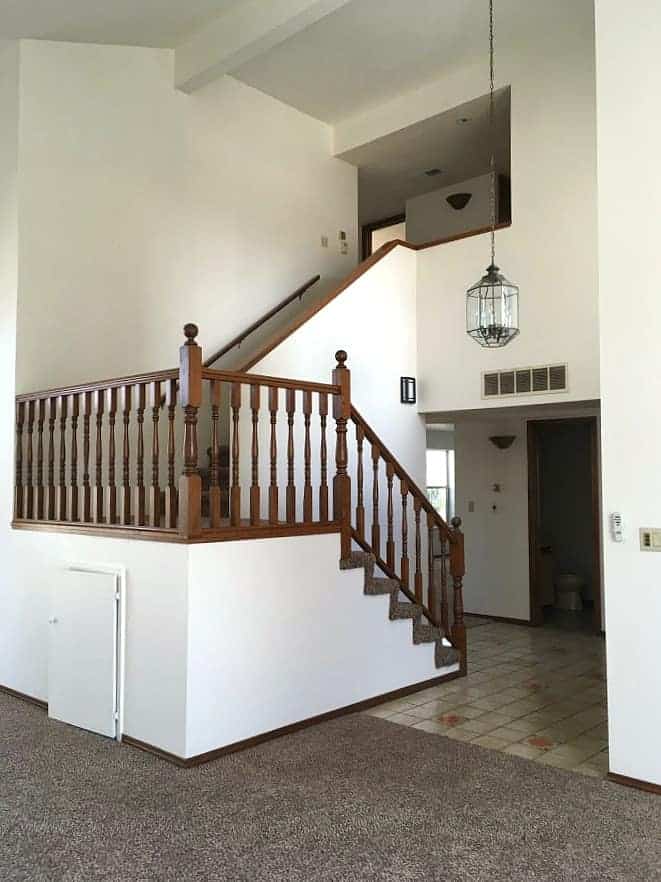
Also, we covered over a weird little storage area under the left side of the stairs. We didn't think it was very useful, and it just looked distracting and made you wonder what we keep under those stairs.

As all this is happening, we are also painting all the trim and doors white. The whole space looks much more open and bright without all that dark wood trim breaking up the view.

Next time, hopefully I'll have more progress to show you with the kitchen and bathrooms. (Hint: shiplap!)But in the meantime, I better get back to work!


More Design

  • Our Latest Flip House Before and After
    Our Latest Flip House Project - Before and After
  • Refresh your home for spring with these unique etsy finds
    Give Your Home a Spring Refresh with These Unique Home Decor Finds
  • How to Fall in Love with your Home Again
    How to Fall in Love with Your Home Again
  • How to pick the best artificial Christmas tree
    How to Pick the Best Artificial Christmas Tree

Comments

  1. Anita C. Lee says

    April 24, 2018 at 5:03 pm

    Wow, that looks so much better already. Can't wait to see the next step.

    Reply
    • Meredith says

      May 07, 2018 at 11:55 am

      Thanks! Just getting rid of the dated pieces made a big difference. Now for the slow work of putting everything back together...

      Reply
  2. Jeri Walker (@JeriWB) says

    April 25, 2018 at 8:20 pm

    Looking good! I'd have covered up the weird storage space under the stairs too.

    Reply
    • Meredith says

      May 07, 2018 at 11:56 am

      Thanks Jeri! My 10 year old is heartbroken that we got rid of her hiding spot!

      Reply
  3. Carole West, says

    April 28, 2018 at 7:37 am

    Love those improvements - you definitely have a eye for fixing up these houses to bring them current and more useful..

    Reply
    • Meredith says

      May 07, 2018 at 11:56 am

      Thank you Carole! It's so much fun!

      Reply
  4. Roxanne says

    February 22, 2021 at 12:53 pm

    Do you have a post on the coffee bar in one of your remodels?

    Reply
    • Meredith says

      February 24, 2021 at 10:01 am

      Hi Roxanne, no I don't have a post on that yet. The short version is it consists of a kitchen base cabinet (off the shelf at Lowe's), a butcher block counter top (also Lowe's), and two shelves hung above a tiled backsplash. Hope that helps in the meantime!

      Reply

Leave a Reply Cancel reply

Your email address will not be published. Required fields are marked *

Welcome!

I'm Meredith, the designer, crafter, and DIY-er behind The Palette Muse. I love all things colorful and creative, and I love sharing them with you. Thanks for visiting today!

More about me

Popular

  • The Best Way to Paint Kitchen Cabinets (No Sanding!)
  • What I Wish I'd Known about Double Barn Doors
  • How to Paint Laminate Cabinets
    How to Paint Laminate Cabinets without Sanding
  • How to Make Your Own Simple Chair Covers

Seasonal

  • Turquoise and terracotta complement each other in this Southwestern inspired turquoise color palette.
    Turquoise Color Palette
  • New Mexican Hot Chocolate Recipe
    New Mexican Hot Chocolate Recipe
  • warm amethyst color palette with shades of purple and very faint orange.
    Warm Amethyst Color Palette
  • Under Cabinet Lighting You Can do Yourself
    How to Choose and Install the Best Under Cabinet Lighting for your Kitchen

Footer

↑ back to top

About

  • Privacy Policy

Newsletter

  • Sign Up! for emails and updates

Contact

  • Work With Me

As an Amazon Associate I earn from qualifying purchases.

Copyright © 2025 The Palette Muse

  • Pinterest
  • Facebook
  • Email