Who pays bills anymore? I know I don't. Well, at least not the kind where you sit down at your desk, pull out all your bills and your checkbook, write a bunch of checks, and then inevitably give your tongue a paper cut licking envelopes and stamps.
I pay all my bills online. I figure if you can't accept online payment, you aren't really serious about getting paid.
(Note to my internet provider: I really DO pay my bills, especially yours!)
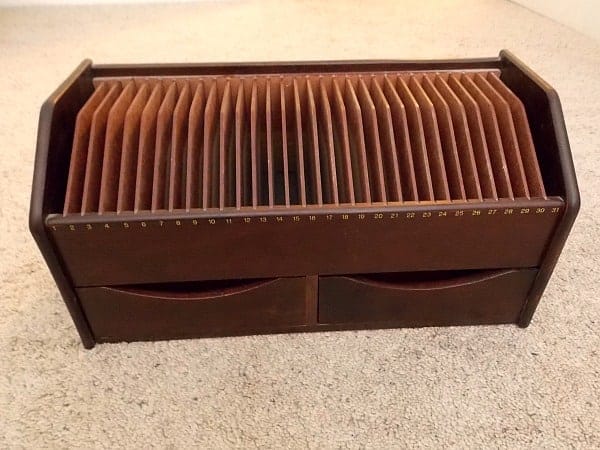
So when we decided to clean out our computer desk so my husband could take over some more space, we found we hadn't really used this old bill organizer in months, for anything other than a catch-all and a few coupons, which were then never used because we forgot we put them there. (OK, "we" really means "I" in this story.)
Anyway, it was taking up a lot of space and not giving back any function, so it had to go.... Or did it? Not one to throw away anything that I may one day see at a thrift store and want to buy back, I decided to hang on to it and find a new use for it. Fortunately, it's just the size and shape that I need to organize all my printmaking supplies.
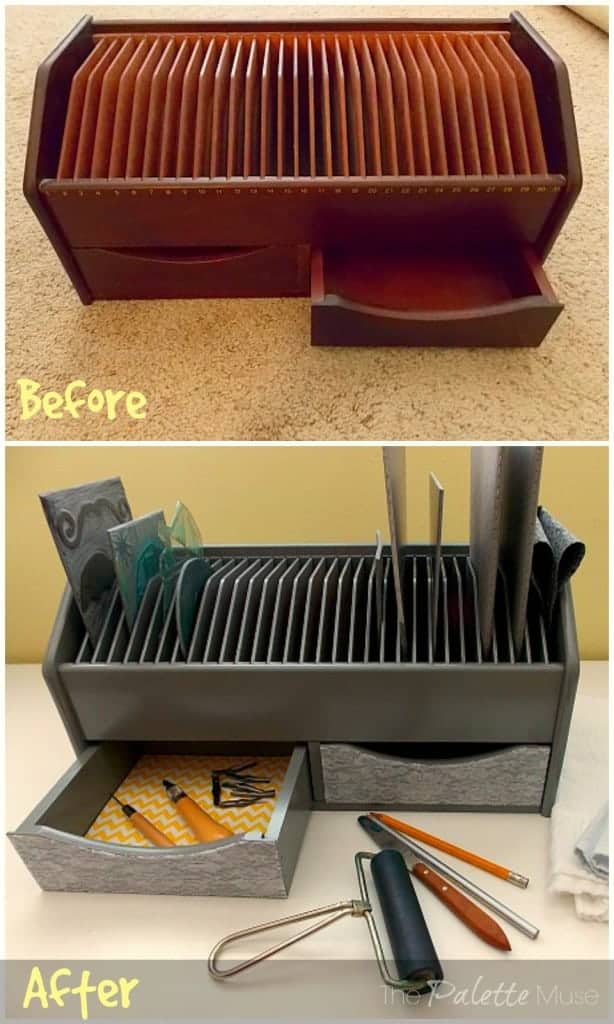
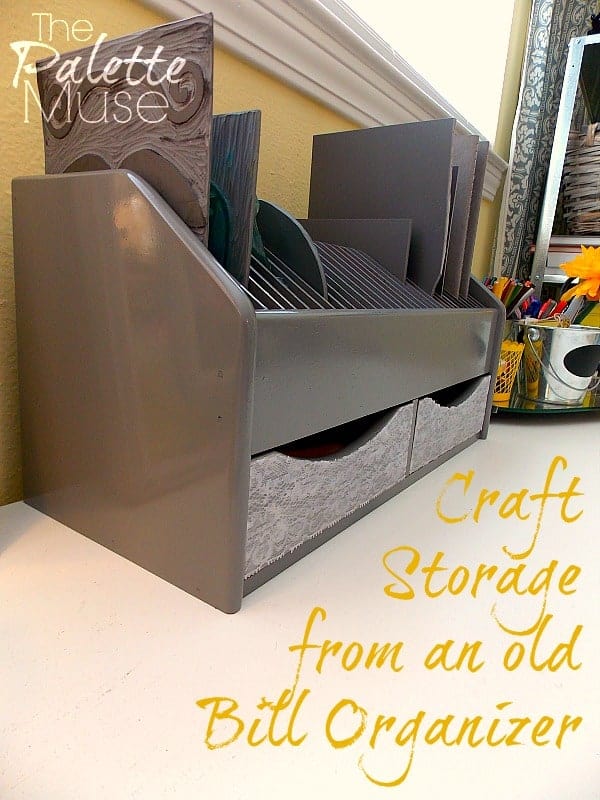
But it wasn't very cute. Sure, it was fine for a bill organizer on a computer desk, but not quite what I wanted for my office. Never fear, though, with a little spray paint and Mod Podge, now it's got a whole new life!
If you ever see these at thrift stores, pick one up and try your own organizer makeover. Here's how.
- Sand the surfaces lightly.
- Clean well. Use a damp rag to remove all the sanding dust from the surfaces. Then use a compressed air blower (the kind they make to clean out computer keyboards and such) to blast the dust out from all the dividers. You could also try your hairdryer set on high. I didn't do this, but once I started spray painting, the forced air from the spray paint kicked up all these little dust bunnies! I had to quit spray painting and clean them all up first.
- Spray all over with a couple of light, even coats of spray paint. I used Krylon's Classic Gray in gloss. Be sure to follow the instructions on the can for drying and re-coating times.

Once the spray paint was dry, I decided to add a little decorative touch to the drawers with scrapbook paper and Mod Podge.
Here's a quick little Mod Podge tutorial that will work on all sorts of decoupage projects.
- Cut the paper to the size of the front of the drawers.
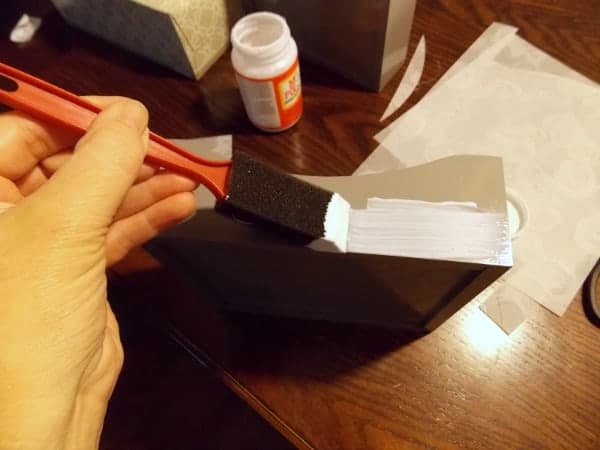
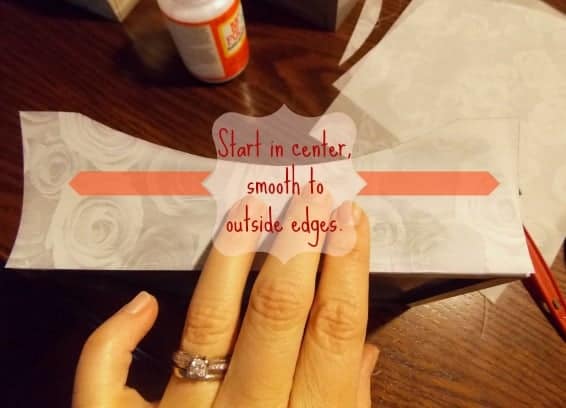
- Using a foam brush, lightly coat the surface with Mod Podge.
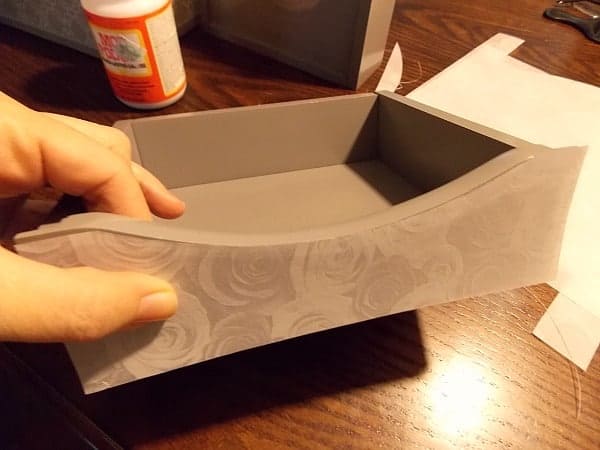
- Carefully lay the paper on the surface, starting in the middle and rolling out to the edges. Using a credit card or your fingers, gently push out any air bubbles toward the edges of the paper, and be sure the paper is lined up correctly. If you work quickly, you can pull up the paper if it ends up in the wrong spot.
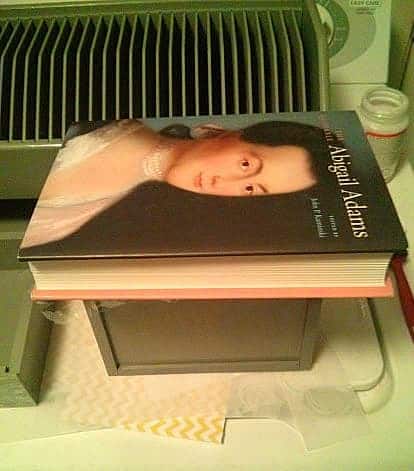
- Allow to dry. You may need to weigh down the paper as it's drying so the edges don't curl up. I use my "Quotable Abigail Adams" for this task. It's a great book, and quite helpfully heavy. (Slide a piece of plastic wrap or wax paper between your project and your weight so they don't glue together!)
- Once the Mod Podge and paper is dry, paint on another light coat of Mod Podge to seal the paper. This gives it that characteristic decoupaged look, and will also help ensure the edges don't lift up after time.
- Dry thoroughly before replacing drawers.
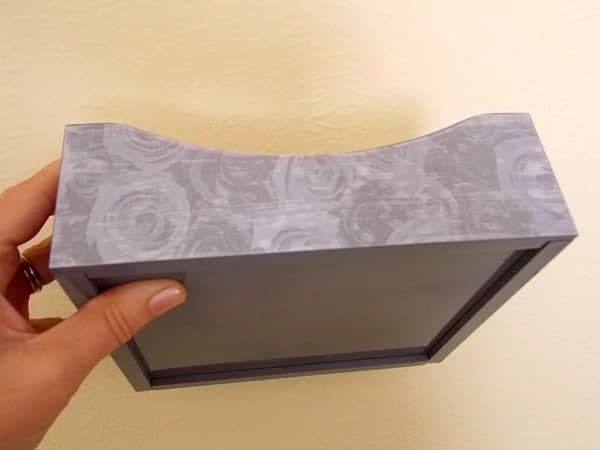
Or, as in my case, decide you don't like the paper on the front, and repeat the whole process with lace instead. (You can decoupage fabric in exactly the same manner as paper.)

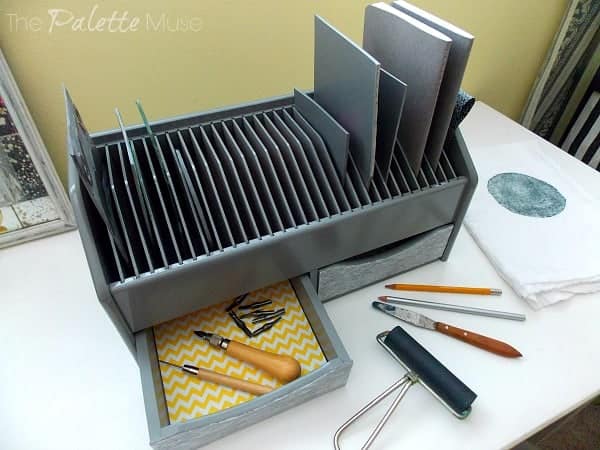
Finally, I added a bit of colorful paper to the inside of the drawers to give it a little extra character. Now my organizer ties in perfectly with my office, and holds all my printmaking supplies.
What's that? You're not big into printmaking? That's OK. You could use one of these for storing scrapbooking supplies, greeting cards, or all sorts of other crafty stuff.


Susan Cooper says
That is a very cool idea for something I sure what to do with. Now I need to the time to make thing cool thing happen.
Meredith says
I hear ya Susan. I won't tell you how long I've been hanging onto this thing, just waiting for the time to work on it!
jacquiegum says
I used to have one of these too! Now I am sorry I gave it to Goodwill! TYours turned out beautifully and now I am thinking that mine would have come in handy to store my greeting cards! I do buy and send them still but I file them in a drawer:)
Meredith says
If I had a nickel for every item I've given away and then wished later I could take back...
Tim says
I still have one of these, or at least something similar. I am pretty sure I am not going to spray paint it and make it cute but I am sure I could use the space. Thanks for getting my brain turning in that direction.
Meredith says
Yeah, the spray painting may not be quite your style, Tim. Now the lace on the other hand... 🙂
heraldmarty says
Yea, finally something I can try! This is awesome Meredith and I even have something similar I can use. This is going to make for a fun weekend project and I can hardly wait to play! 🙂
Meredith says
Thanks Marty, I hope you have fun working on yours!
Pamela@haartfelt says
The bill organizer looks so much better after you spruced it up. I was thinking it would make a great as part of a behavior reward system for kids. Every slot would be a day of the week for a task or chore.They child pulls the card with the task and empties the slot. When they get to the last slot, there's a letter telling them what they've won for emptying all the slots. Young kids might like that.
Meredith says
I love that idea Pamela! I bet my kids would go for that.
Ajay says
Creativity at its best. Looks so good now.
Meredith says
Thanks Ajay!
Jeri Walker (@JeriWB) says
Love what you did with the craft paper and the modge podge. My bedroom furniture is sanded, and now I need to paint it. Last will be the decoupage of O'Keeffe paintings I clipped from an art book. Sometimes I think I should do smaller projects, but where's the fun in that?
Meredith says
I know, the bigger the project, the bigger the feeling of satisfaction at the end! I hope you'll share pics with me when you're done...
lenie5860 says
I wish I had one of those kicking around - I'll have to keep my eyes open during my Thrift Store hunts. That is so neat and could have so many uses - I could store greeting cards, some of my lavender products, even some of my favourite CDs.
Meredith says
It would also be great to use as a packaging/mailing station for your Etsy sales!
Andy says
It's been a while since I myself have paid a bill via snail mail, and I can't recall ever cutting my tongue when licking a stamp. That said, I hope the person who invented self-adhesive stamps got a nice pay raise.
Meredith says
I guess I'm aging myself a bit by admitting that I used to lick stamps!
Donna Janke says
I really like what you did with the old bill organizer. So pretty. Mod Podge is such a great product for all kinds of crafts.
Meredith says
Thanks Donna! I love Mod Podge. 🙂
Jeannette Paladino says
Love what you did. I'm too lazy to do something like that and I'm glad I don't have to feel guilty because I don't have a bill organizer! To me that's why we have the Container Store! Kidding -- I envy creative people like you, Meredith.
Meredith says
Lol Jeannette! I do love the Container Store! I could spend a lot of money in there. 🙂
William Rusho says
This is a great project. If you knew me, you know most of my bills and correspondence is thrown all over my office. This is a nice little project I will do.
Now can you do a project to make me less of a slob.
Meredith says
Ha! I fear that project would be a bit outside the scope of my blog William! 🙂
2beesinapod says
You're so creative! We love repurposed items and this is so clever! Thanks for sharing at Something To Talk About Link Party!
Meredith says
Thanks so much for stopping over from the party!
Jason @ TheButlerJournal.com says
Wow. What a great job! It doesn't look like it was ever a bill organizer.
Meredith says
Thanks Jason!
Beth Niebuhr says
What a great project! I'm going to look for one to play with!
Meredith says
Thanks Beth, hope you can find one!
Erica says
Nice! That really doesn't look like a boring bill organizer anymore! Now I wish I could get doctor's to send their bills online. I always forget to pay because I have the bill lying around in some random place in my house.
Meredith says
Thanks Erica! I'm the same way - once most bills come online, then it's really hard to keep up with the few that don't...
Christine B. says
Organization and upcycling make me a very happy lady, and this project of yours is just superb! I love how you were able to take a forgotten item that was just laying around your house and transform it to bring it back to life. I'm also featuring it as one of my favorite picks at this week's Merry Monday link party! Thanks so much for sharing it with us, and we hope to see you again this week! Great job! 🙂
Meredith says
Thank you Christine! I love Merry Monday, and I'm heading over there now...
Karen says
This is so creative, Meredith. I love the addition of lace and the paper-lined drawers. The idea is a great jump-start for all of those unique, great-piece thrift finds that I never can really decide what to do with.
Meredith says
Thanks Karen, I'm glad to know I'm not the only one who collects random thrift store "project starters"!
Kelly Meier says
It's amazing what a little spray paint and Mod Podge can do! I love how this turned out...makes me hope I find one the next time I'm at goodwill so I can get some of my craft supplies organized. Thanks so much for sharing at the Creative Inspiration party, hope to see you again on Monday night!
Meredith says
Thanks Kelly! I was so glad to find your party. I'll definitely be back this week! 🙂