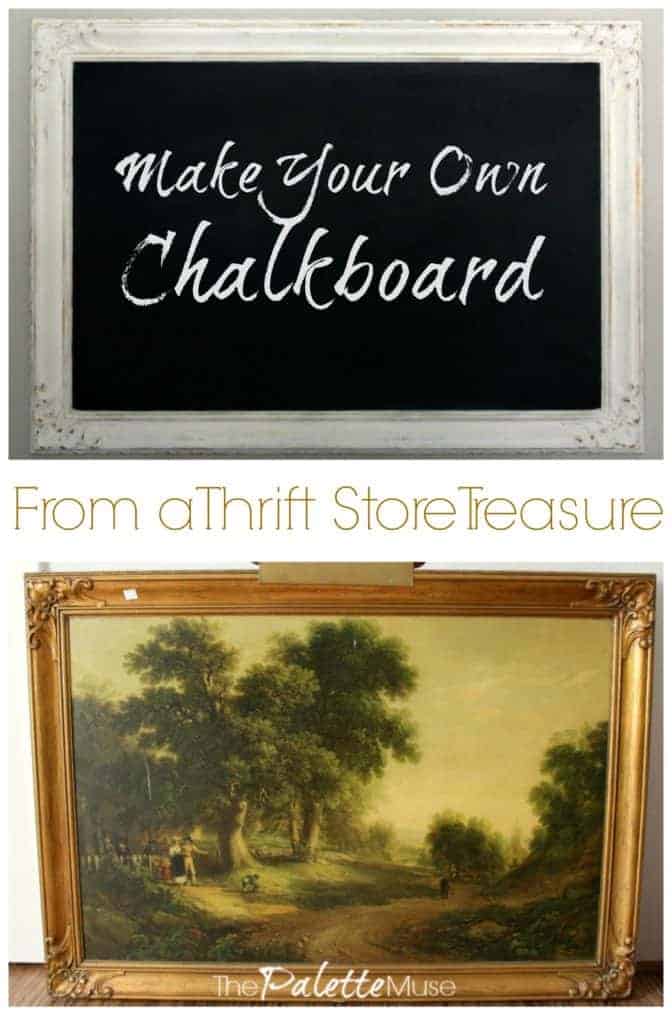
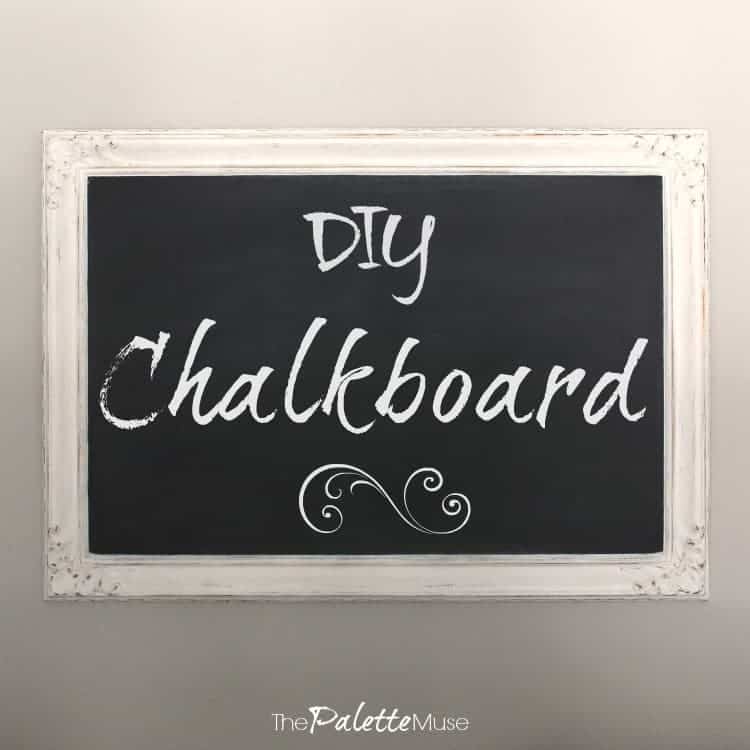
No need to build or buy a huge chalkboard when you can make one from a thrifted print and a few craft supplies!
When I saw this beauty in one of my favorite thrift stores, I knew she needed a makeover. I had been searching for the perfect framed picture to remake into a chalkboard for my kitchen, and this one fit the bill perfectly.
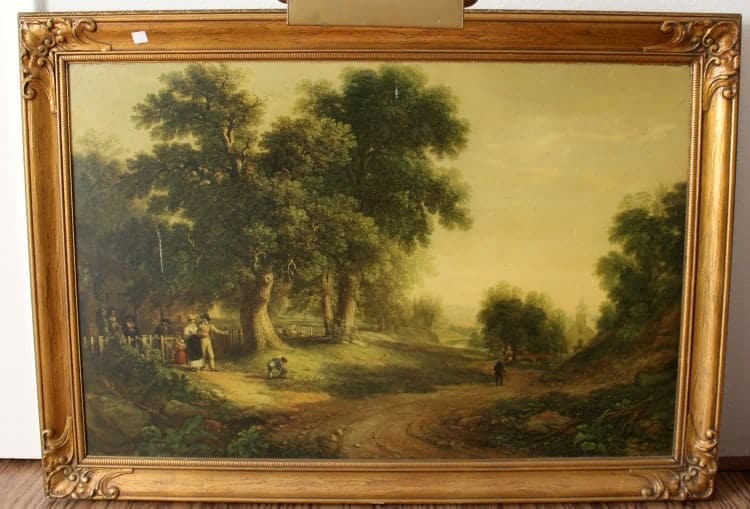
Why? Because it's not actually a painting. If you want to try this project for yourself (and save LOTS of money on a large chalkboard), look for a framed print with no glass. I know that's kind of specific, but the reason is that the chalkboard paint will adhere better to a paper print than to glass, and you don't want any brushstrokes from an actual painting raising lines on your chalkboard.
(Also, the painter in me hates to desecrate anyone else's painting like that. But mass-produced prints are fair game.)
There's a certain amount of satisfaction in taking something old and...ahem...ugly, and turning it into something beautiful and useful. I like to think it's a metaphor for life, but I may be overthinking it just a tad. Maybe it's just because I love a good bargain.
Anyway, here's how to make your own DIY Chalkboard from an Old Framed Print.
This post contains affiliate links. If you make a purchase, I may receive a small commission at no additional cost to you.
You'll need:
- Large framed print or picture (I always keep an eye out for these when I'm browsing thrift shops)
- Chalkboard paint (this time I used Valspar's chalkboard paint, but I also like DecoArt and Rustoleum.)
- 4" Paint roller
- Paint brush
- Chalk
- Chalk paint and finishing wax for the frame, if you're redoing the frame as well.
Getting started:
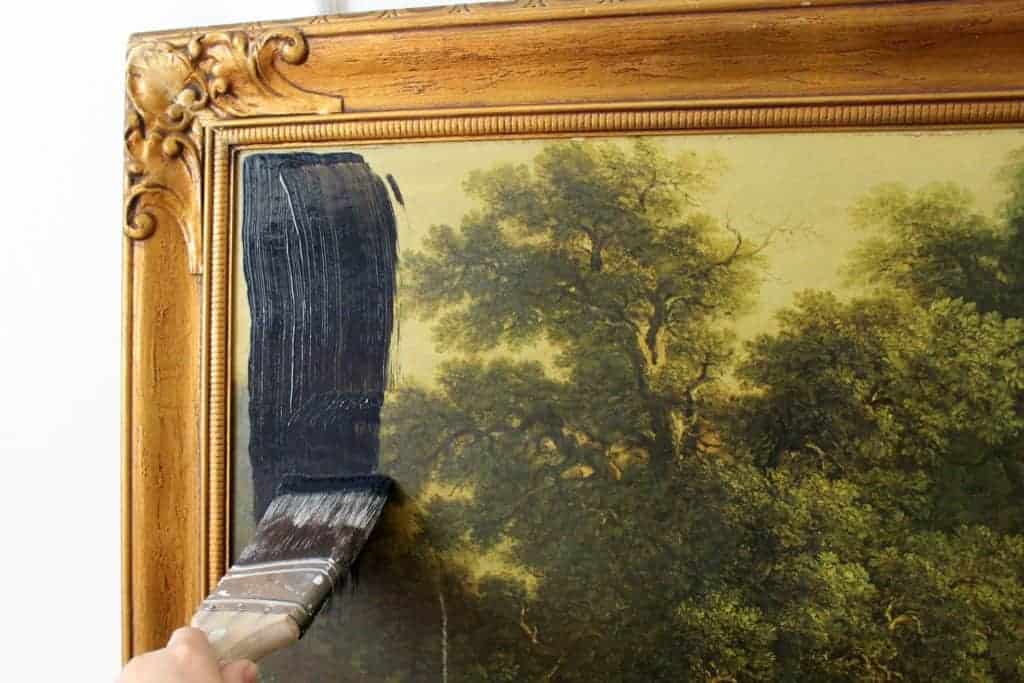
- Remove the print from the frame if possible. (I didn't do this, and it definitely made the process harder when it came to painting the edges between the print and the frame.)
- Use the roller to cover the print with chalkboard paint. (Then use a brush to fill in the edges, if it's still attached to the frame.)
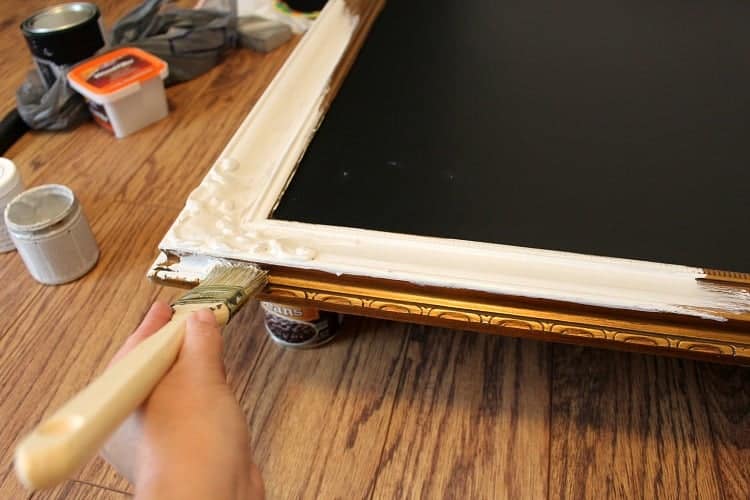
- While that's drying, you can paint the frame with the first layer of chalk paint.
- After plenty of drying time (I waited a day in between), repeat steps 2 and 3. (You may even need a third coat of chalkboard paint. You want to make sure the whole surface is covered really well.)
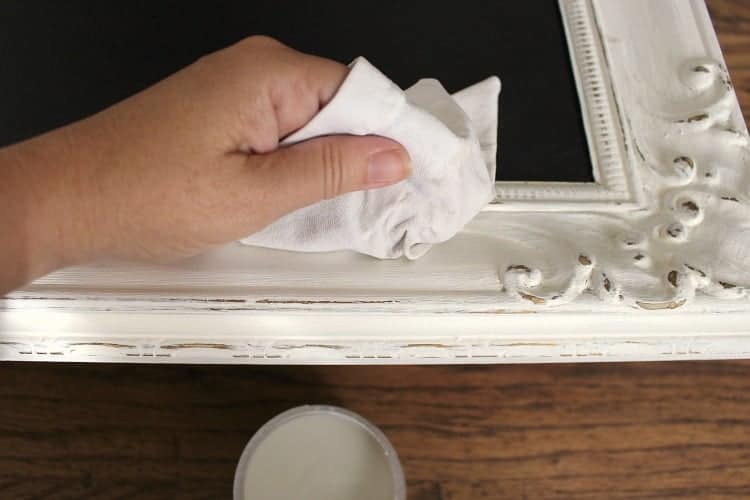
- If you're redoing the frame, lightly sand the edges for a weathered look (I love how the gold shows through on mine!) and follow with a light coat of finishing wax.

- After the wax has dried for about ½ an hour, buff with a clean soft cloth to get a nice sheen.
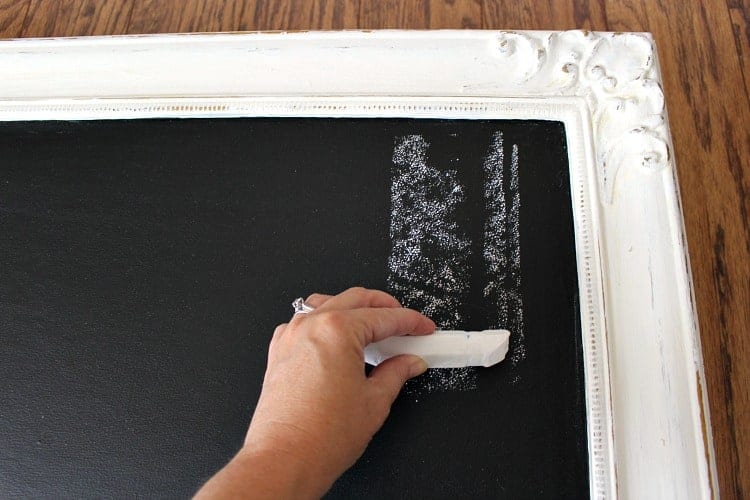
- Finally, season your chalkboard by rubbing a piece of chalk all over it. (I used sidewalk chalk because it covered more area in less time.) Run the side of the chalk all over the board and wipe it off with an eraser or dry paper towel. This step is important, otherwise the first thing you write will never come off!
- Now your chalkboard is ready to use.

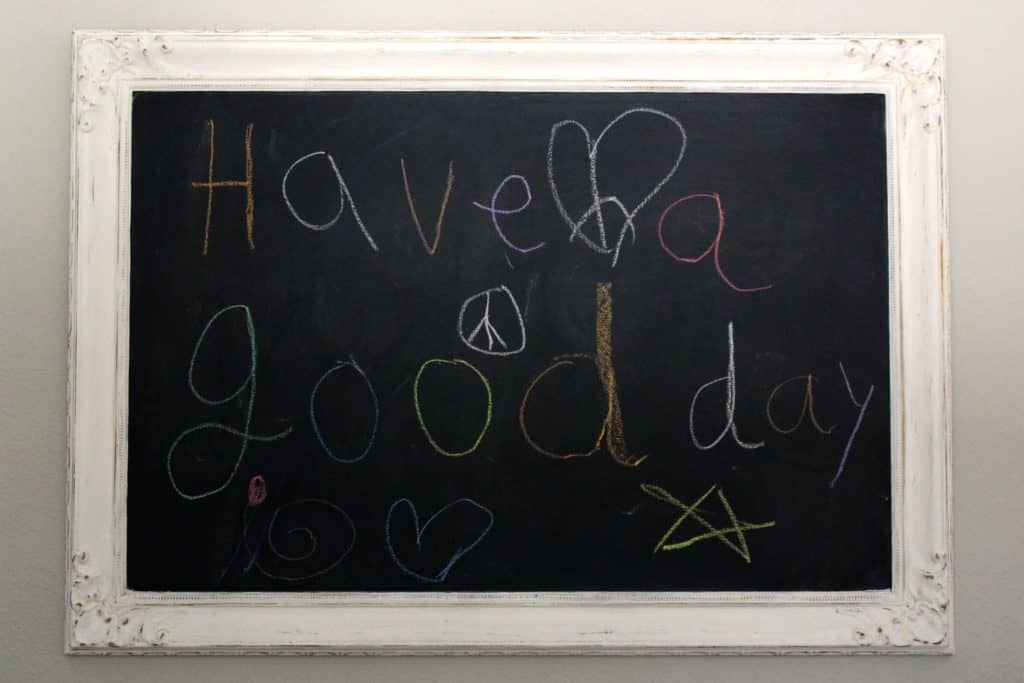
Not until I finished this whole project did I realize that my chalkboard handwriting is terrible! I've never been a teacher, so I failed to pick up that skill. I'll work on my chalkboard lettering game, but in the meantime my 9-year-old daughter has taken over.
Luckily, I've met some really talented bloggers who can help. While you're getting your own chalkboard ready to go, take a look at some of their tips and tricks for getting those beautiful chalkboard designs...
Erin at Lemons, Lavender, & Laundry

Erin at Elizabeth Joan Designs
Now I'm off to practice my lettering skills, so I can start using my new chalkboard, but let me know if you have any questions about how to make your own re-fabbed chalkboard. (Or tips on what to do with it once you've made it!)
Speaking of chalkboards, if you don't have a framed one like this, you can paint closet doors as chalkboards like I did in my office!


jacquiegum says
So much fun and what a beautiful result!
Meredith says
Thank you Jacquie!
Carole West, Garden Up Green says
Fantastic idea! Oh man you just gave me a neat idea for my entry. I'm always forgetting stuff and something like this would be a great reminder board. Love this project you're so talented. Hope you're having a great summer!
Meredith says
Thanks Carole! I love how easy it is to just jot things down and keep up with what's on your mind. This would be the perfect project for an entryway!
Anita says
This is wonderful! Reminds me of all the chalkboard menus we're seeing in France.
Meredith says
If only mine had an actual french menu to go along with it! I think I need a chef now...
Anita C. Lee says
Just wait a few years. I think one is going to be working wonders in your own kitchen when she can reach the countertops better. 😉
Jeri Walker (@JeriWB) says
Like so many of the projects you post, I LOVE this idea. I think back on all the gaudy paintings and somewhat horrible frames I've seen in thrift stores and can't help but think they are all dying to become chalkboards now 🙂
Meredith says
Thank you so much Jeri! I agree, I'm always a little sad to pass up an old painting that wants to have a reincarnation like this!
Susan Cooper/findingourwaynow.com says
I love these framed chalkboards. I actually have one I have bought for this purpose that has been sitting there waiting for me to put it together and turn it in to a beautiful framed chalkboard. I wasn't super clear on what I was doing, but with your post I feel more confident in getting this project complete.
Meredith says
I am so glad to hear that Susan! You will love it once you get it finished!
Rachel Beach says
Lovely and such a better new life! So many great tips and I love that you used actual chalk! I tried using some wet chalk markers from Martha Stewart and hated them. I actually just ended up using white craft paint for my chalkboard and a stencil since my handwriting is nearly unreadable.
Meredith says
Thanks Rachel! A stencil is a great idea. I was wondering about the chalk markers. I haven't gotten around to trying them yet, but I do love using real chalk. Seems more authentic somehow...
Corinna - ADesignerAtHome says
What!? That frame is incredible! Painted or not painted, that thing has beautiful detail. I'm definitely going to look at the thrift art a bit differently now.
Meredith says
Thank you Corinna! That frame really captured my heart, and I almost hated to cover it up with paint, but it ended up being better overall with the kitchen decor. Now I can't pass up a framed print like this without wanting to pick it up!
michellejames42 says
This is such a great update!
Meredith says
Thanks so much Michelle!
jessica says
Such a fun and easy tutorial. I am in love with that frame!!!!
Meredith says
Thanks Jessica, me too!
Kati says
Love your chalkboard! You totally scored at the thrift store. I keep looking for a big beautiful frame but haven't found one yet.
Meredith says
Thank you Kati! I was looking for a LONG time before I found this one. You'll find yours!
Judy Babcock says
I wonder if you could do some graphics and print out the basic design as one or in pieces and coat the back of the printed piece with chalk and then trace it onto the board. You would be able to enhance the transferred graphics and type after you have done the tracing.
Meredith says
Yes, you absolutely could! Some of the tutorials mentioned above go into more detail about how to do that. I'm more of a "wing it" kind of person, so I haven't tried it myself.