How to repair luxury vinyl plank flooring yourself, with only a few tools and products. It’s easier than you might think!
Vinyl Plank flooring is one of the best things since sliced bread. It comes in amazing colors, styles and finishes. You can get commercial grade versions for high-traffic areas. It’s waterproof and virtually indestructible. And it’s affordable. What more could you ask for in a flooring product?!
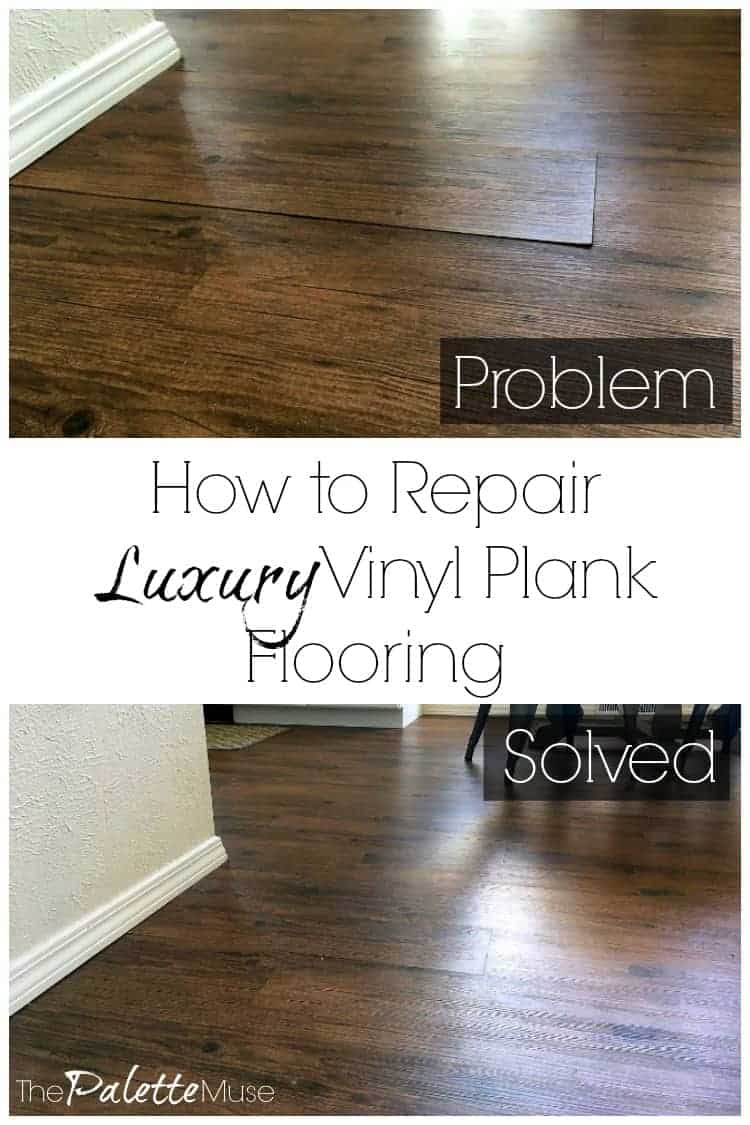
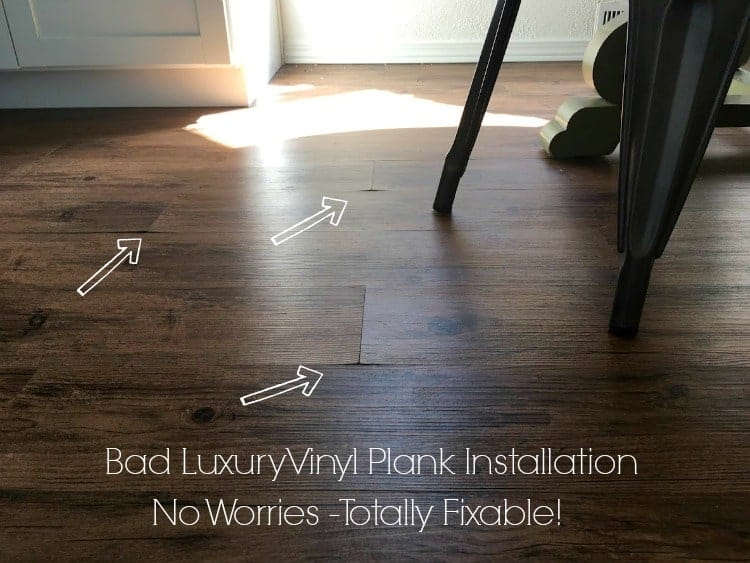
We put luxury vinyl plank (LVP) in our latest flip house, which also functioned as an AirBNB property, and it performed amazingly well. The only problem was a few pieces were not installed correctly, and they started lifting up after several months of wear and tear.
Naturally I wanted to know how to fix it myself rather than calling our handyman. It turned out to be a lot easier than I thought, so I’m passing on what I’ve learned, in case you find yourself in the same boat someday.
~ This post contains affiliate links. If you click and make a purchase, I may receive a small commission, at no additional charge to you. ~
How to Repair Glue-Down Luxury Vinyl Plank Flooring
The great thing about LVP flooring is if something happens to one of your planks, you can simply peel it up and replace it. (It should take a lot to destroy one of these planks, but in my experience, there’s always that one kid who can destroy the indestructible. That kid is my kid.)
When you’re purchasing and installing LVP, make sure you order a little extra, so you’ll have a few planks leftover for emergencies down the road.
This type of repair is for glue-down LVP. There are other types that float on your floor and click together, but that would be a different process.
Here’s how easy it is to repair your own LVP.
For your Luxury Vinyl Plank repair project, you’ll need:
- Henry PlumPro flooring adhesive – I haven’t tried other adhesives, but after researching several this seemed like the easiest one to apply. After using it, I was impressed with just how easy it was, and how well it performed afterwards. I’m a big fan of Henry products, ever since I made a concrete countertop with their feather finish concrete.
- Scraper – You can use a floor scraper for larger areas, but I like my 14-in-1 painter’s tool. The scraper on the end is just the right size for cleaning a 6″ wide plank size.
- Small Paint Roller and/or brush – I like the cheap foam brushes so you can just toss them afterwards instead of trying to clean them.
- Heavy Roller – when you’re installing an entire glue down floor, you need a big roller to make sure the planks all adhere to the subfloor. In this case you can get away with a much smaller version, saving money and your back. I used an ink roller from my block printing supplies, but this carpet roller would probably work even better.
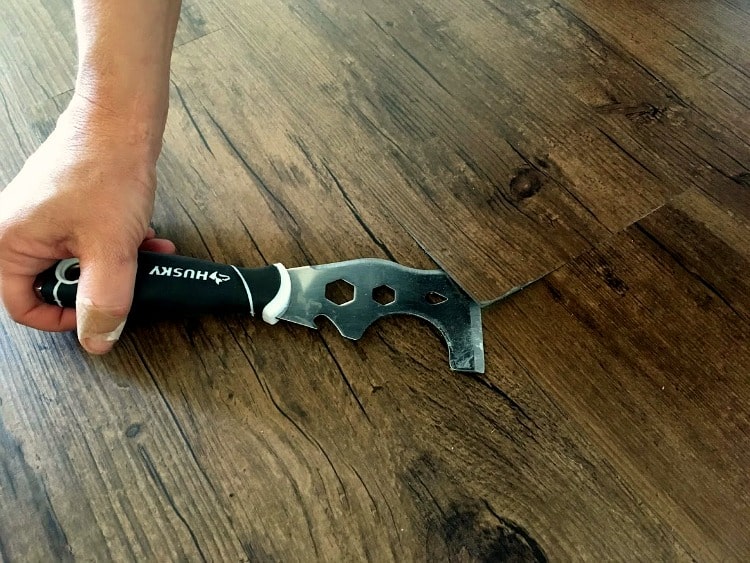
Start by carefully peeling up the affected plank. If it’s in perfect condition, you can save it and simply glue it back down. If any of the corners are chipped or damaged, or if there is heavy glue residue on the bottom, discard it and use a new plank.
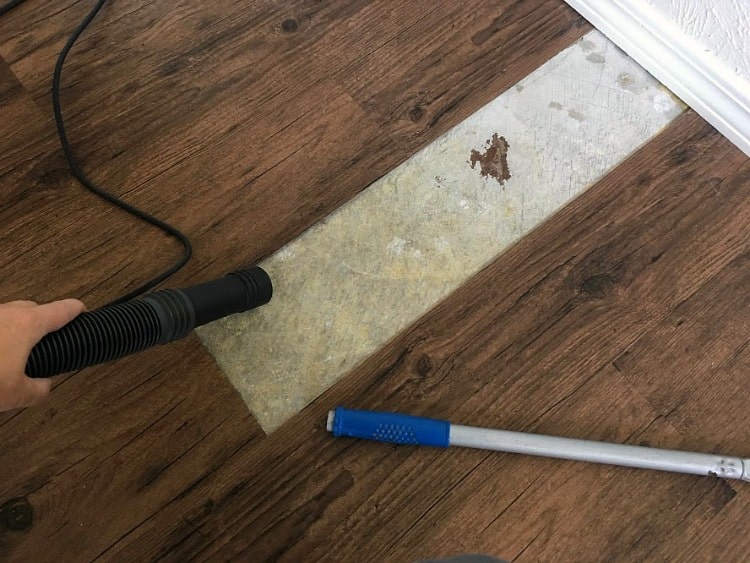
Scrape the old glue off the subfloor with a floor scraper or painter’s tool.
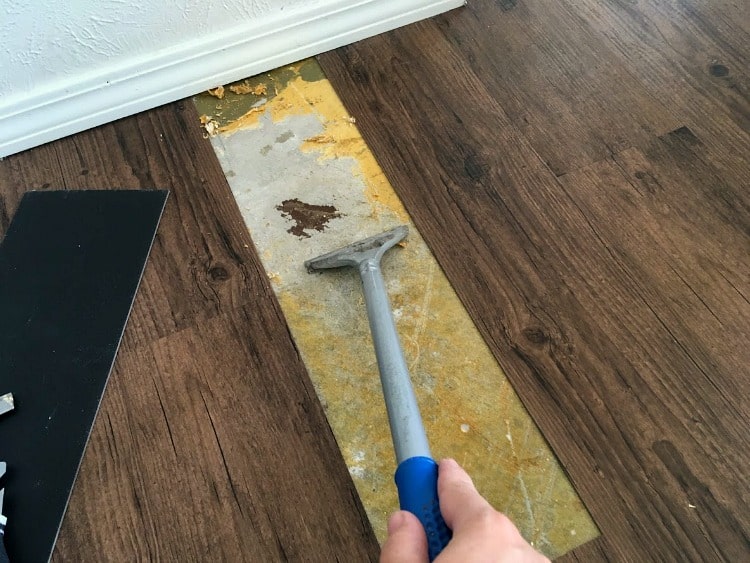
Vacuum well. Be sure the back of the plank you’re replacing is clean also.
Using a small paint roller or foam brush, roll a thin layer of Henry’s PlumPro onto the subfloor. (Other types of flooring adhesives are applied with a trowel, which seems a lot harder to me. I believe this was why our floors were lifting up, because the installers applied too thin of a layer of adhesive.)
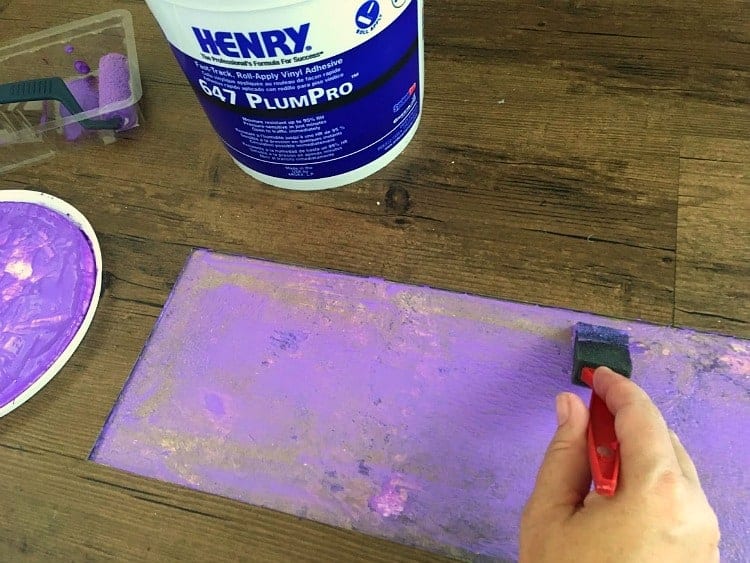
You want to end up with an even coat of adhesive, with neither empty spaces nor puddles.
Don’t lay the glued plank down yet!
Allow the adhesive to dry for a few minutes. (You can move on to other planks during this time if you have several to repair.) After 5-8 minutes, test the adhesive by gently touching it with your finger. It should feel tacky but not wet. If any of the glue comes off on your finger, it’s not dry enough yet.
Once the glue is dry/tacky, lay the plank down in place and smooth out from the middle to the edges with your hands. Then use your heavy roller to press the plank down into the glue.
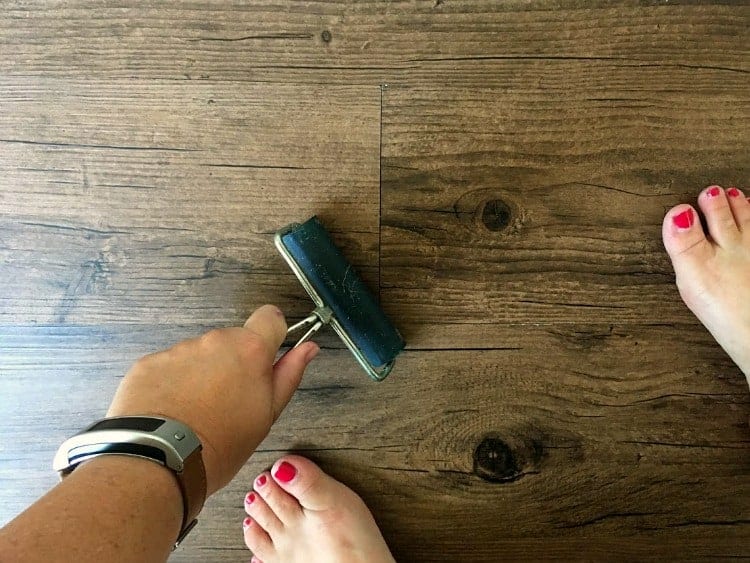
Using as much downward pressure as you can muster, roll all over the plank several times, paying special attention to the edges and corners. (We even went so far as to stack books on our planks for a few minutes afterwards, but I’m not sure that did any good. It made me feel better though!)
Using a clean damp rag, wipe off any adhesive residue that may have seeped out from under the plank. (It’s purple so it should be easy to see.)
If you clean up at this stage, all you need is water and a paper towel or rag. If you wait till after the adhesive has set, it’s a whole different story, and you’ll need mineral spirits.
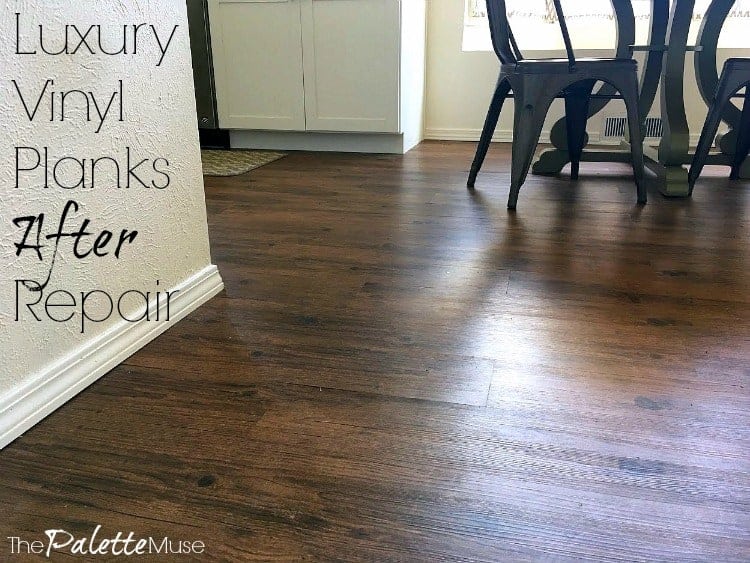
That’s it, your floor is good as new! The adhesive has an 8 hour working time, meaning you have plenty of time to spread it and then work with it.
That also means you wouldn’t want to move anything heavy over it for about 8 hours after gluing down your planks. We walked all over ours immediately, but I wouldn’t suggest pushing a fridge over it!
I hope this helps you with your luxury vinyl repair project, and let me know if you have any questions below in the comments!
Gina
Friday 22nd of September 2023
My apartment complex just put new flooring down for me today. It looks amazing but when I came home from work today, some of the corners have left it on some of the pieces what needs to be done?
Meredith
Monday 25th of September 2023
Hi Gina, first of all, I would say that if your apartment complex installed the flooring, they should be the ones to fix it. (That's why you pay rent!) It's probably happening because they didn't properly clean the subfloor, or they didn't apply enough glue. You could possibly reglue the edges and weight them down for 24 hours as they're drying, but again, I would only try that if you can't get the complex to fix it for you.
Lauren
Wednesday 11th of January 2023
Hey! Would you mind sharing the product name and color of this flooring?
Meredith
Friday 13th of January 2023
Hi Lauren, definitely! It's listed near the end of the post. There's a section that summarizes the post, and it's the first link under "Materials". Let me know if you have trouble finding it!
mary
Thursday 27th of January 2022
HOW DO YOU WASH THIS PLANKING FLOORING--SOAP? LICQUID LIKE DISH WASH? PLEASE HELP THANKS
Meredith
Tuesday 22nd of March 2022
Yes, I would recommend dish soap like Dawn. It's a great degreaser for everything. Just use a very small amount dissolved in warm water. If you use too much soap, you may need to rinse with clean water after.
Tile Setters Vancouver
Friday 24th of September 2021
Great tutorial!!!! Your pictures were very helpful and I enjoyed reading about your process.
Meredith
Thursday 30th of September 2021
Thanks!
Teri P
Tuesday 20th of October 2020
What if there is a thin foam liner underneath versus concrete below?
Karen M
Wednesday 25th of August 2021
@Meredith, sounds like Teri has interlocked LVT.
Meredith
Monday 26th of October 2020
Hi Teri, do you mean it's not glued down to the subfloor? That's a product I don't have experience with, so I'm not sure the answer to that one.