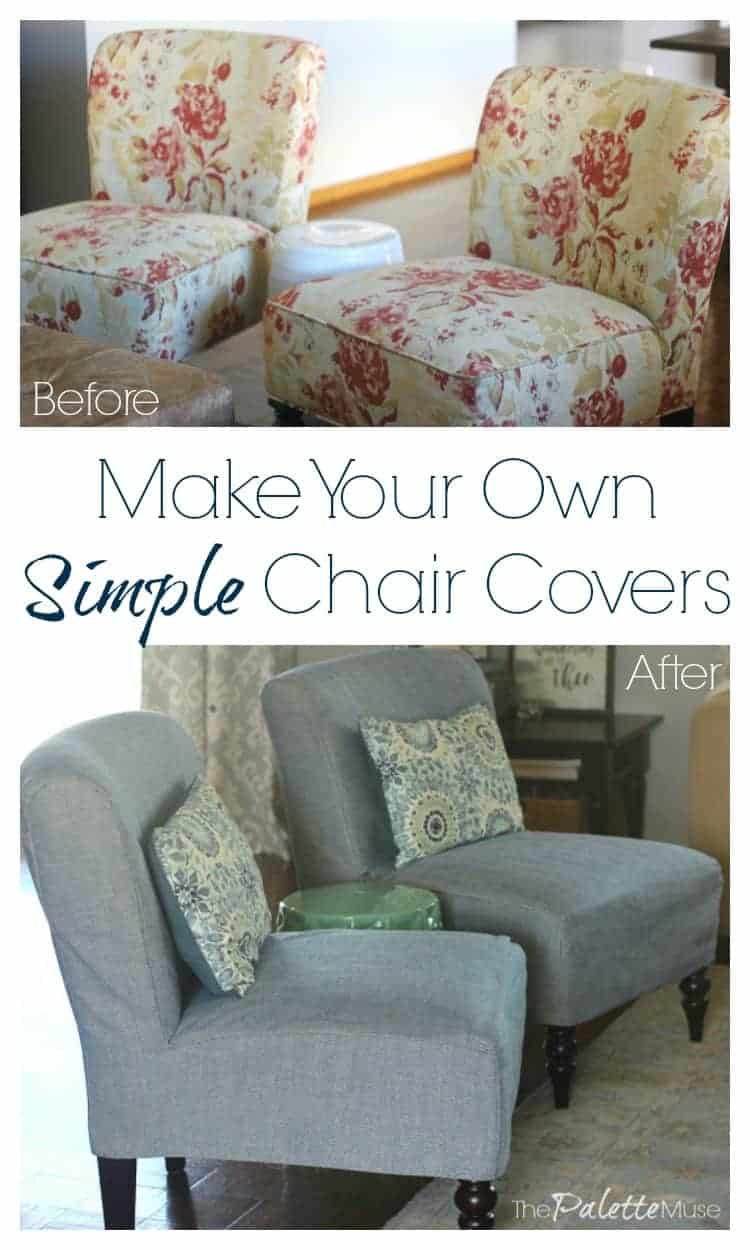
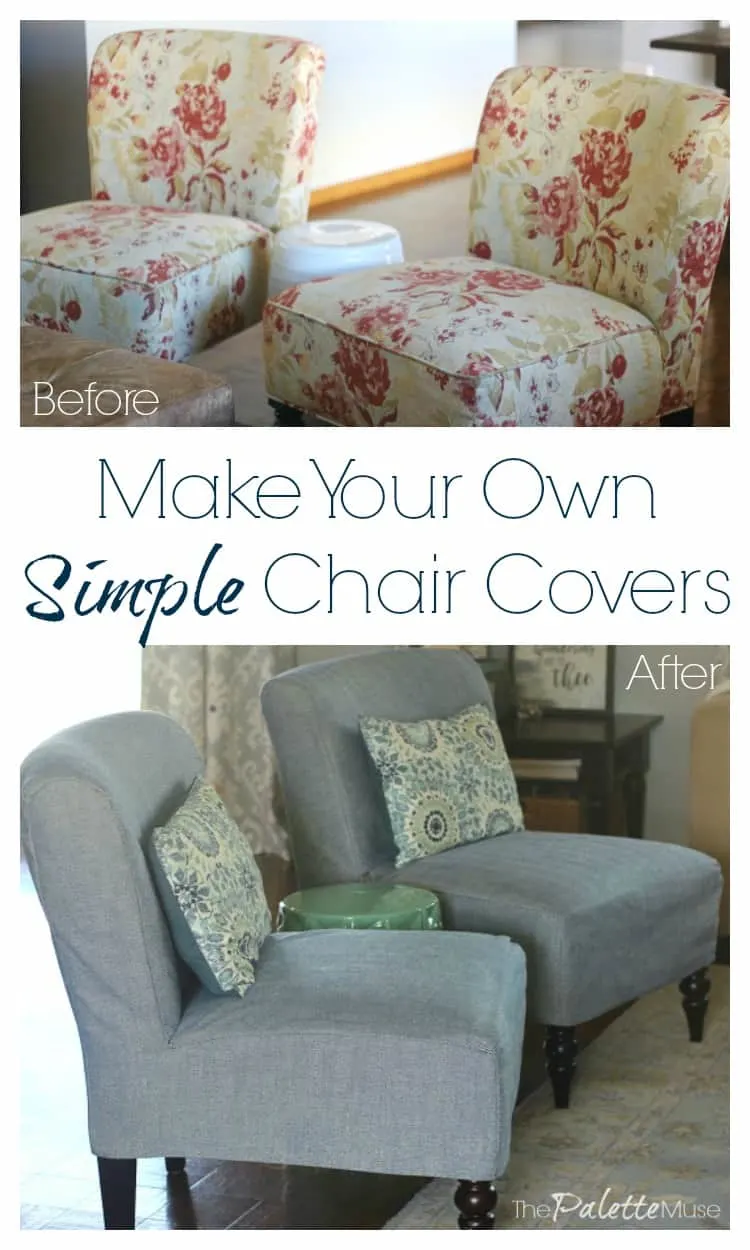
No need to call an upholsterer when you want to change the color or pattern on your occasional chairs or dining chairs. Here’s how to make your own pattern to create simple chair covers.
Do you have any furniture in your house that you mostly love, but it just needs a little updating? I do because I’m a sucker for garage sales, estate sales, and generally anything with a little history (and a low price tag) to it.
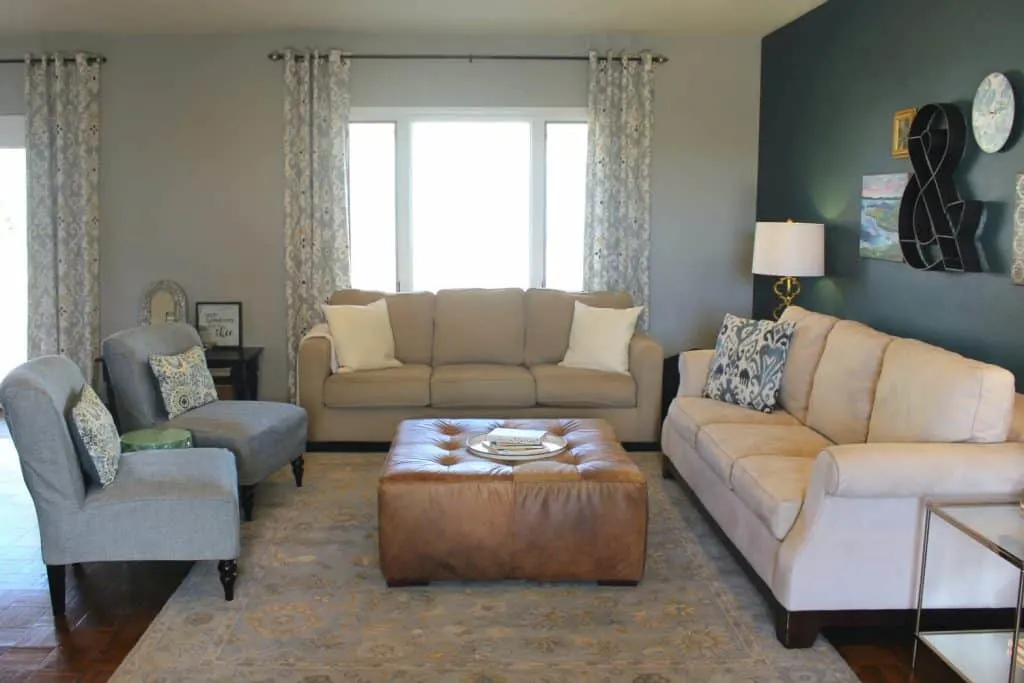
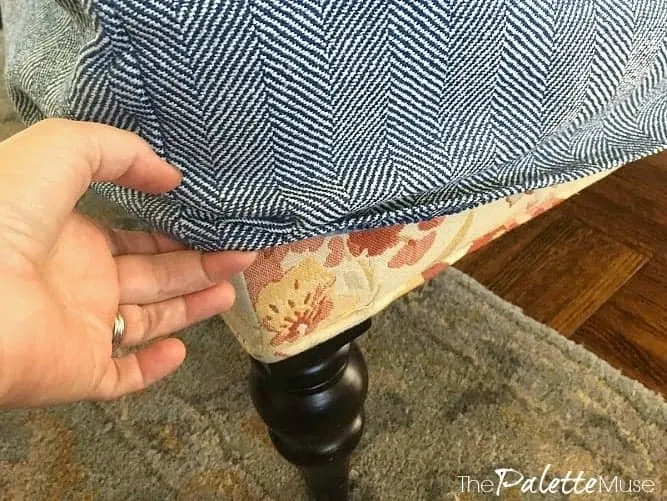
I got these sweet little chairs from Craigslist a couple of years ago, and immediately fell in love as soon as I sat in one. These might be the most comfortable chairs I own. I even loved their quaint rose pattern, although it doesn’t fit any of my decor.
I knew I could fashion chair covers for them someday, if I ever felt the need.
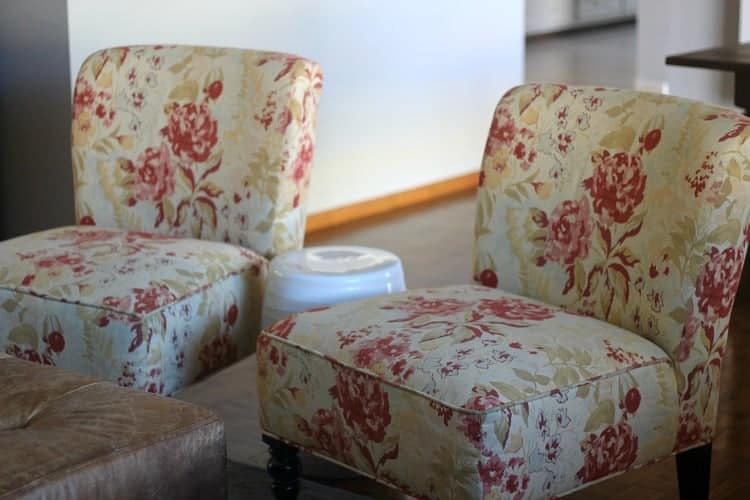

Fast forward a couple of years, and although I still love the chairs’ original upholstery, I can’t deny anymore that they need a little update to fit in with the rest of my living room.
(This is mostly because my best friend and design eagle-eye, Jana, tells me so whenever she comes over.)
When I decided to do a Spring Refresh on these dated accent chairs, my first thought was, “but I hate sewing, and I don’t have a pattern.” Jana assured me that she would help, if I would finally do something about them.
I grudgingly agreed and we put our unskilled heads together and came up with a plan. I didn’t want to just start stapling new fabric to the chairs (my usual M.O. includes either staples or hot glue) because someday I might want to use them in their original state again.
So I decided to make simple slipcovers for them, which turned out to be easier than I expected.
~ This post contains affiliate links. If you make a purchase, I may receive a small commission at no additional cost to you. ~
How to Make Your Own Simple Chair Covers
This project worked out to be relatively easy because my chairs are a classic L-shape. The L-shape also works great for parson style dining chairs. If you have a different style you’re trying to update, you can still use these steps, but the measurements might not be as simple.
Also, if you’re looking for custom slipcovers that you don’t have to make yourself, give this shop a try: August Blues (That’s not an affiliate link, I just really love her stuff.)
1. Measure the Chairs
First you’ll need to measure your chairs to get an idea of how much fabric you’ll need.
Keep in mind that if your fabric has a big pattern to it (called a “repeat” in design lingo), you’ll want to match up the lines as much as possible, so you may need to buy extra fabric to move your pattern around.
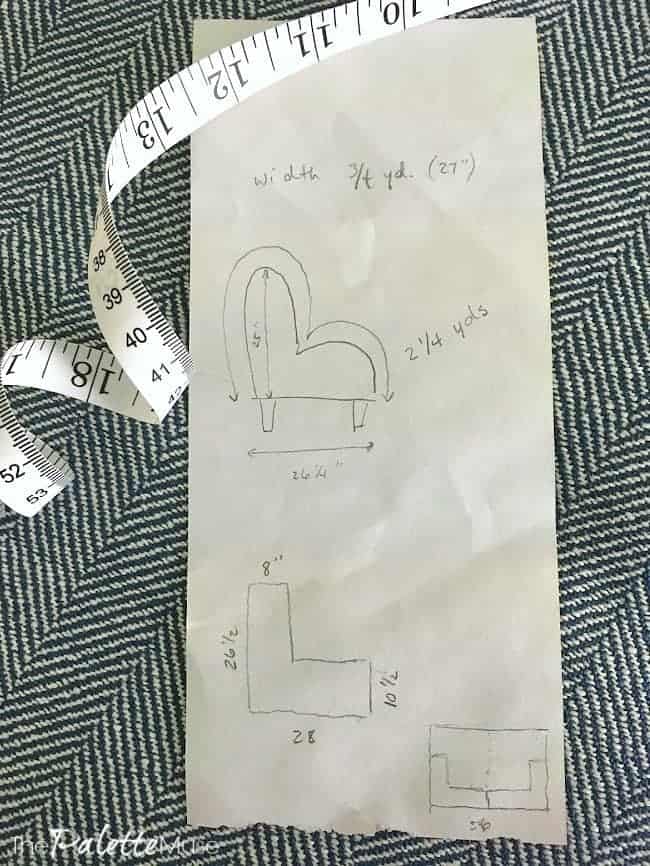
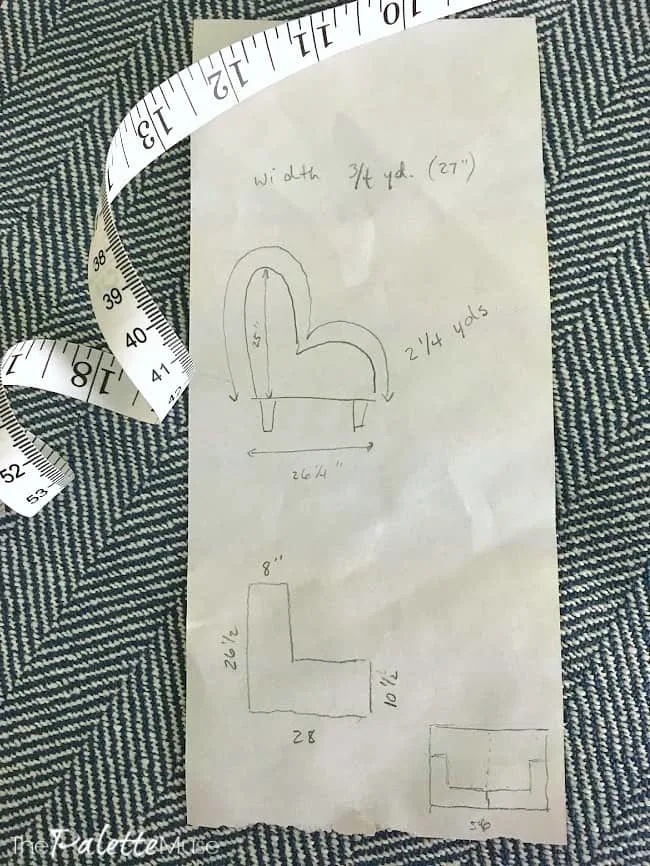
I measured from the bottom of the back of the chair, all the way up and around and down to the front. Then I measured each side “L” pieces. Then I had to figure out how to fit all those pieces onto one cut of fabric.
2. Pick Fabric
Then you need to pick out the fabric. You can use almost anything, but I chose heavy duty upholstery fabric because I wanted them to retain their shape and stand up to wear and tear from the kids and dog. Not to mention my rowdy guests.
When you’ve picked your fabric, pick up a spool of thread to match. (Use heavy duty if you’re using upholstery fabric.)
3. Make a Pattern
Next, create your pattern. This doesn’t need to be technical or intimidating. It’s just a way to get your measurements onto your fabric. Mark your measurements on the back side of the fabric with pencil or chalk.
Be sure to line up any lines and designs in your fabric that you want to meet up at the seams. My fabric has only a subtle pattern, which isn’t why I picked it, but it ended up being a lot easier to work with. Score!
Remember to leave a couple of inches along the bottom of the chair so you can hem the whole piece.
4. Cut the Fabric
Now cut out your pieces. When cutting out your pattern, make sure to leave about an inch around every edge for seam allowance. (That’s the edge that ends up on the inside and keeps the seams from unraveling.)
Ok, sadly that was the easy part. This is where it gets interesting…
5. Fit and Pin the Pattern

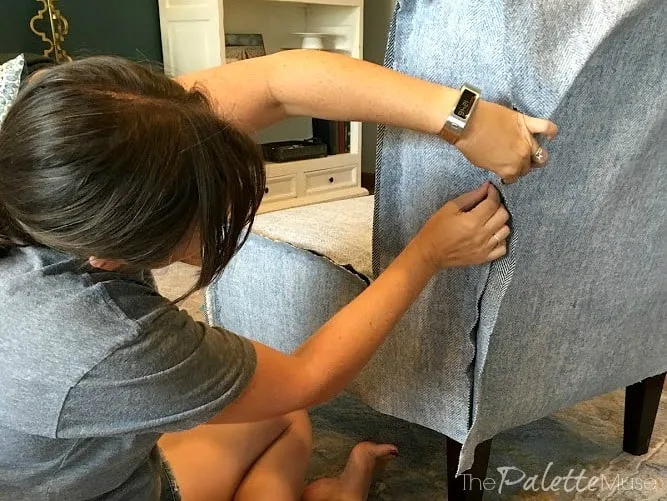
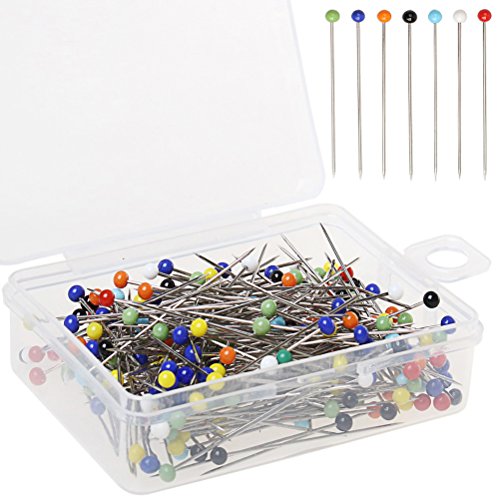
Now lay your fabric upside down on your chair. Use straight pins to pin the fabric pieces together around the edges of the chair. Keep your pins as close to the chair as possible so you can get a nice tight fit, and use lots of pins (about every couple of inches).
You may need to tuck the fabric a bit as you follow the contours of your chair.

6. Sew it Together
Use your sewing machine to stitch the whole line you’ve made with your pins, pulling each pin out as you go. Don’t worry about the bottom edge just yet.
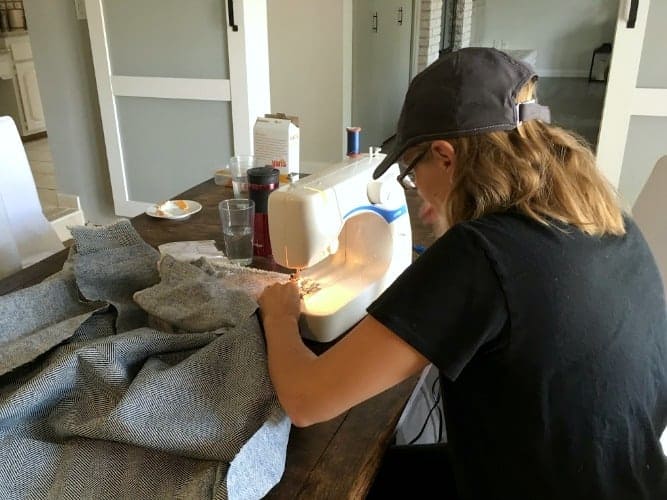
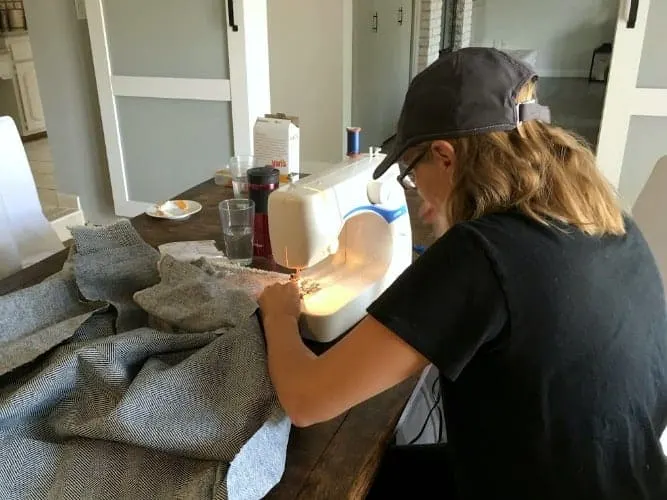
Even better, talk a good friend into coming over to help you do the sewing!
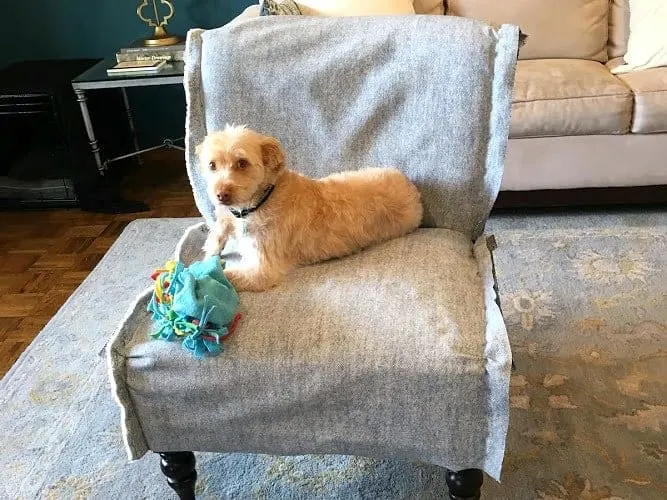
7. Fit and Adjust
Now try fitting the cover right-side up onto your chair. If there are any areas that seem too tight or loose, you will need to restitch those. That sounds annoying, but it’s really not so bad.
Hopefully you’ll just be making minor adjustments at this point.
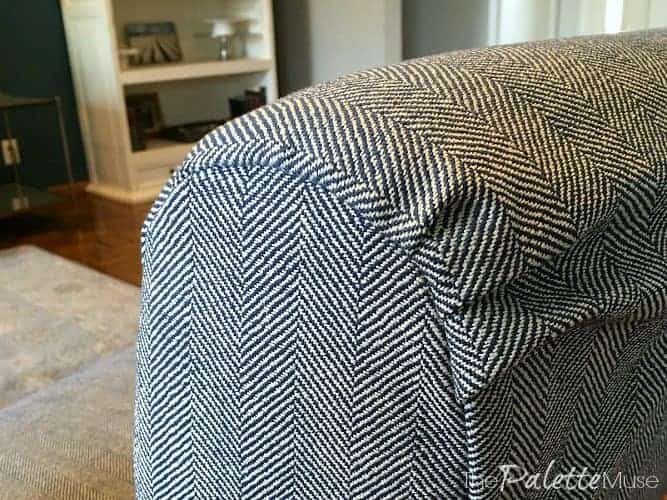
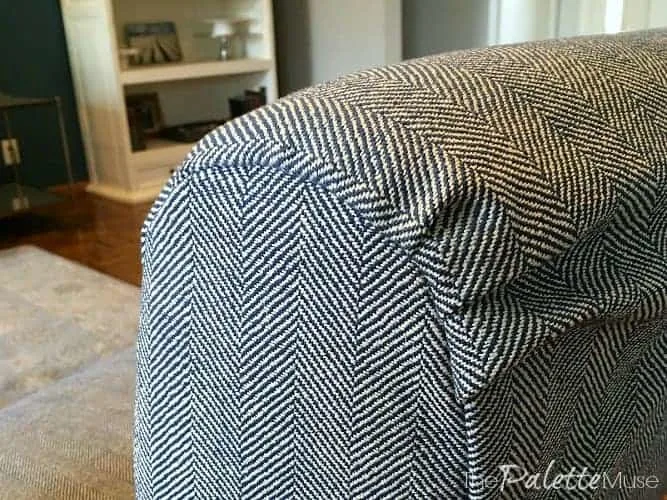
8. Hem and Trim
Once your cover fits well, you’ll want to hem the bottom of the whole “skirt.” Simply fold the fabric over twice toward the inside and stitch along the bottom.
That will give you a nice clean edge, without a lot of fuss. (If you like more fuss, you can add a pretty piece of trim to the bottom to finish it off.)
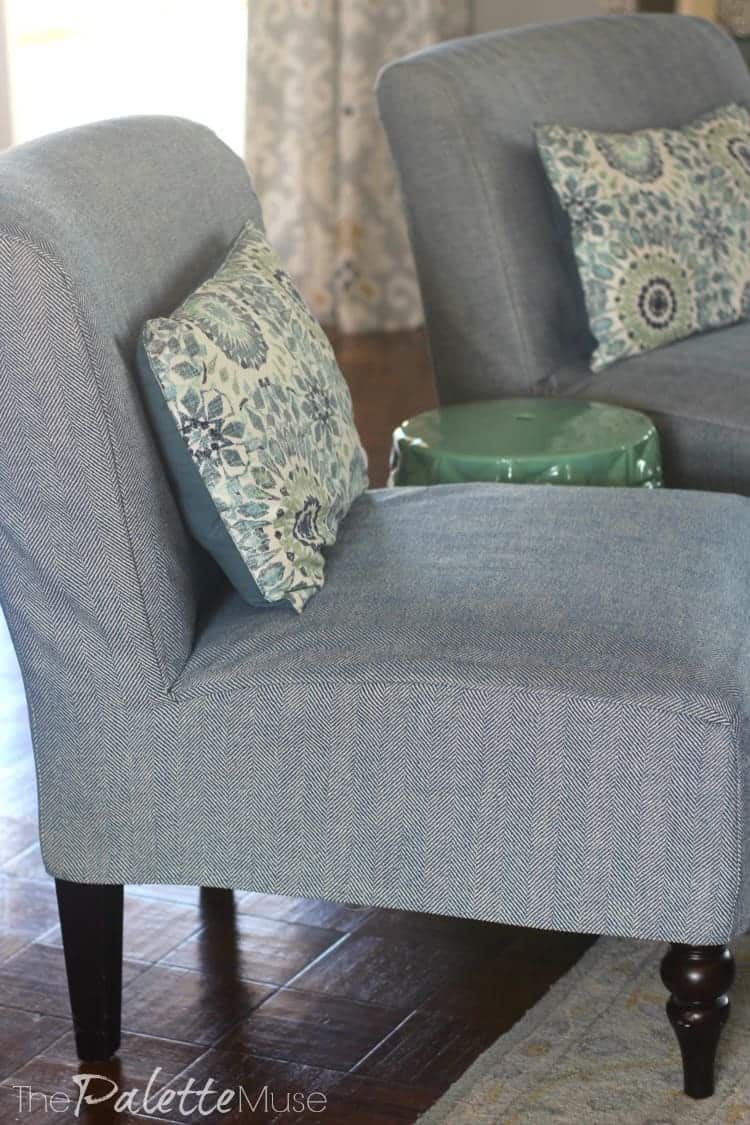

Finally, put your cover on, tuck in the extra fabric along the bottom of the seat back, and straighten everything out.
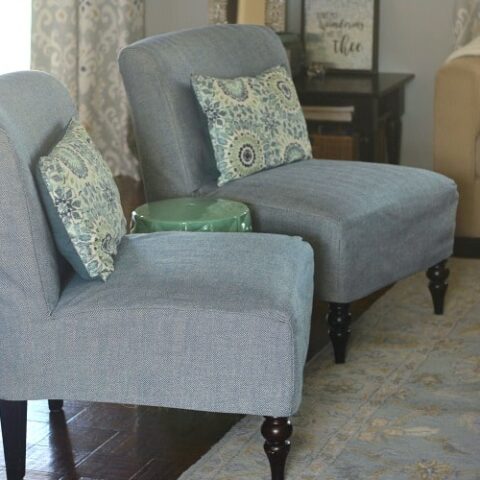
And you’re done! It looks like you have brand new chairs, for only the price of a few yards of fabric, and without having to search for a pattern.
Simple Chair Cover Resources
- Sewing Machine
- Good Sewing Scissors
- Straight Pins
- Fabric
- Thread
Finishing Off the Spring Refresh
I love my new chairs, but I felt like they needed a little spot of color, so I threw my Easy DIY Placemat Pillows on them, which just happened to be the perfect size and shape.

Then I added a lovely garden stool from HomeGoods, which tied the whole vignette together and brought just the right amount of color to that side of the room.
Then, because I stole the pillows from the couch, I just had to pick up a new Ikat pillow from World Market to pull everything back together.
Now the whole room has a soothing blue vibe, without the red and yellow rose chairs to break up the theme. Plus, if I ever change color schemes, I can go back to the roses, or just make new slipcovers.

In the meantime, I’m enjoying my new Spring theme, and hoping the weather cooperates soon. How about you? Are you ready to try this kind of refresh on a piece of your furniture?
Let me know if I missed anything in my instructions, or if you have any questions along the way.

How to Make Your Own Simple Chair Covers
Make your own beautiful DIY chair covers in whatever fabric that you like. This is a great way to update old chairs for a fraction of the cost with this step-by-step tutorial.
Materials
- Fabric
- Sewing Needles
Tools
- Sewing Machine
- Fabric Scissors
Instructions
- Measure your chairs from the bottom of the back of the chair, all the way up and around and down to the front.
- Measure each side “L” pieces.
- Choose your fabric. Keep in mind any repeat in the fabric pattern.
- Pick up a spool of thread to match.
- Mark your measurements on the back side of the fabric with pencil or chalk.
- Leave a couple of inches along the bottom of the chair so you can hem the whole piece.
- Cut out your pieces, leaving about an inch around every edge for seam allowance.
- Lay your fabric upside down on your chair.
- Use straight pins to pin the fabric pieces together around the edges of the chair.
- Use your sewing machine to stitch the whole line you’ve made with your pins, pulling each pin out as you go.
- Put your cover on, tuck in the extra fabric along the bottom of the seat back, and straighten everything out.
- Enjoy your new chair covers!
Recommended Products
As an Amazon Associate and member of other affiliate programs, I earn from qualifying purchases.
-
 Color Scissor 250 Pieces Sewing Pins 38mm Ball Glass Head Pins Straight Quilting Pins for Fabric,Dressmaker Jewelry Decoration
 -
 LIVINGO Premium Tailor Scissors Heavy Duty Multi-Purpose Titanium Coating Forged Stainless Steel Sewing Fabric Leather Dressmaking Softgrip Shears Professional Crafting (9.5 INCH)
 -
 Brother Sewing Machine, XM1010, 10 Built-in Stitches, 4 Included Sewing Feet
Ruth
Sunday 5th of June 2022
Where did you get your fabric? I love the print.
Meredith
Thursday 9th of June 2022
Thanks Ruth! I got it from Joann Fabric and Crafts, but it was a couple of years ago, so I'm not sure if they still have it.
Sarah
Tuesday 3rd of May 2022
My home ec teacher would say to BASTE the seams before you sew them and see how the slip overs fit, then make adjustments and sew. Which is what I’ll do with the chair I have in mind!
Nadia
Saturday 6th of April 2024
@Sarah, ….. Yes…! My mother taught me to ALWAYS “baste” and try the fit before sewing it on the machine….. 😊. I’m glad you brought it up….🌸
Meredith
Monday 16th of May 2022
Yes, basting first makes so much sense! (You can tell I never took home ec.) That's a great point, thanks for sharing!
Mary McNeill
Thursday 23rd of September 2021
This isn't the shape of my chair but it will give me some helpful ideas. I want to do mine in denim and I'm finding it hard to get a nice denim.
Meredith
Thursday 30th of September 2021
I'm glad this was helpful to you! Finding good fabric can be a challenge. I know there are online shops. Perhaps you could find one that will send you samples?
Naomi Sethie
Thursday 10th of June 2021
those look great, thank you for sharing
Lourdes Quinones
Monday 15th of February 2021
Great job I am inspired thank you
Meredith
Tuesday 16th of February 2021
Thanks Lourdes!